Nude Studio Setup – 1 light

Personal Pictures, personal tips & tricks, Tips and Tricks, Uncategorized

Continuation of my series of ‘portfolio shoot images’ Behind the scene’s.

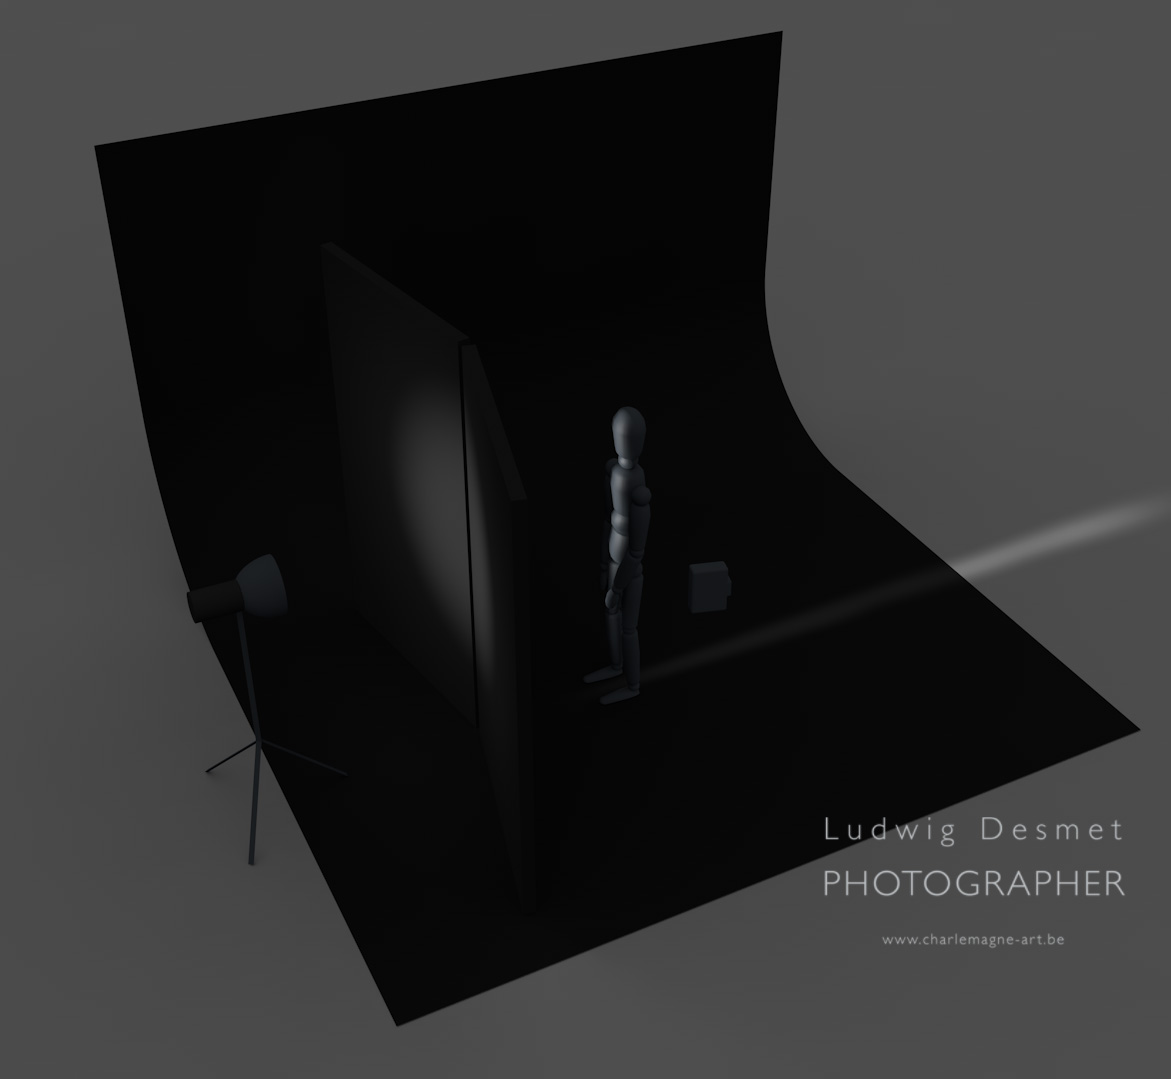
For this setup I used only one studio flash, with reflector.

In order to create a really small light bundle, you need to work with solid elements blocking the light.

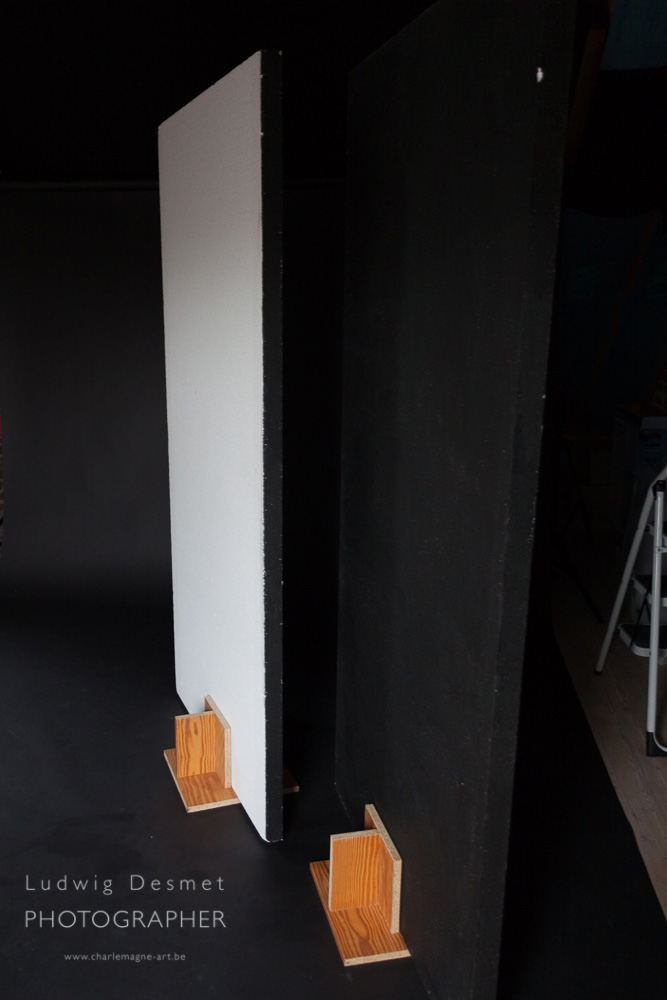
For this I use some of those huge styrofoam boards (they can be bought in the build supply shops, they are used for insulation, crappy for this purpose, but very handy in studio) of 120x220x6 cm. I paint them black on one side, and around the edges. I made some simple stands from fibre wood panels to hold them upright.

They weigh virtually nothing and are easily stowed away.

here you can see one white side front, one back side front (I pushed exposure a bit here, because they are really nicely black):

LudwigDesmet-studio-6597

So a very simple setup here:

one flashlight on the left, with standard reflector, two styrofoam panels, black side towards the flash (you don’t want light bouncing of the white side, don’t you?)

model standing right in the middle, a little further back. Because the reflector is a quite big light source, you’ll need to put your panels really close to eachother (2 cm apart for instance) and you’ll still have the light spreading out further away from the panels.

Portfolio studio setup2

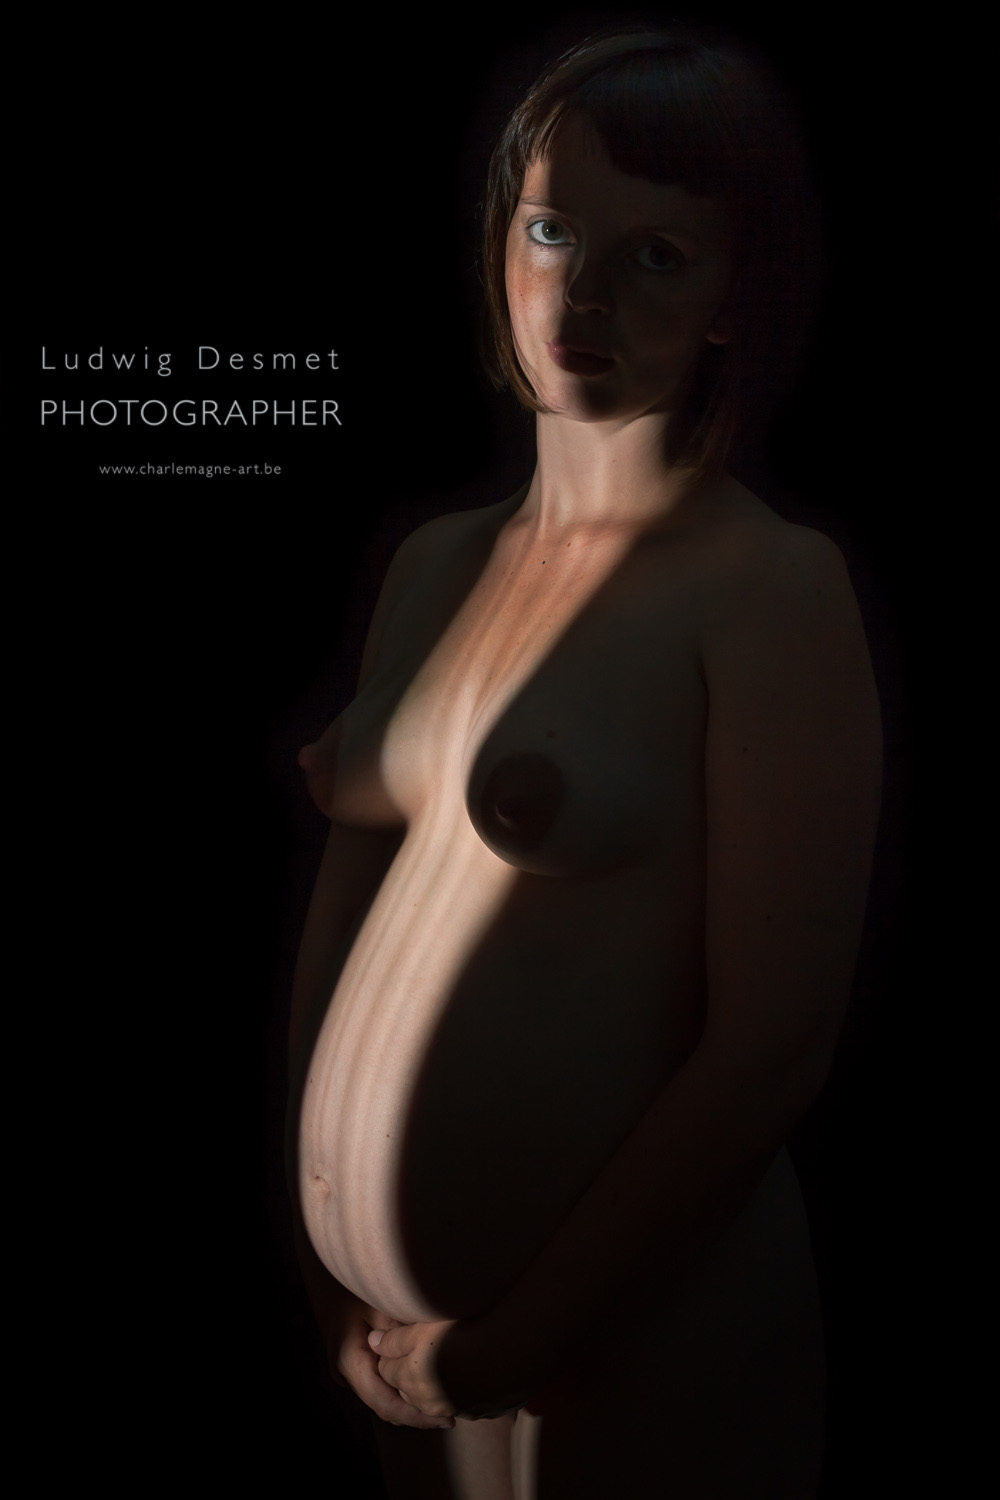
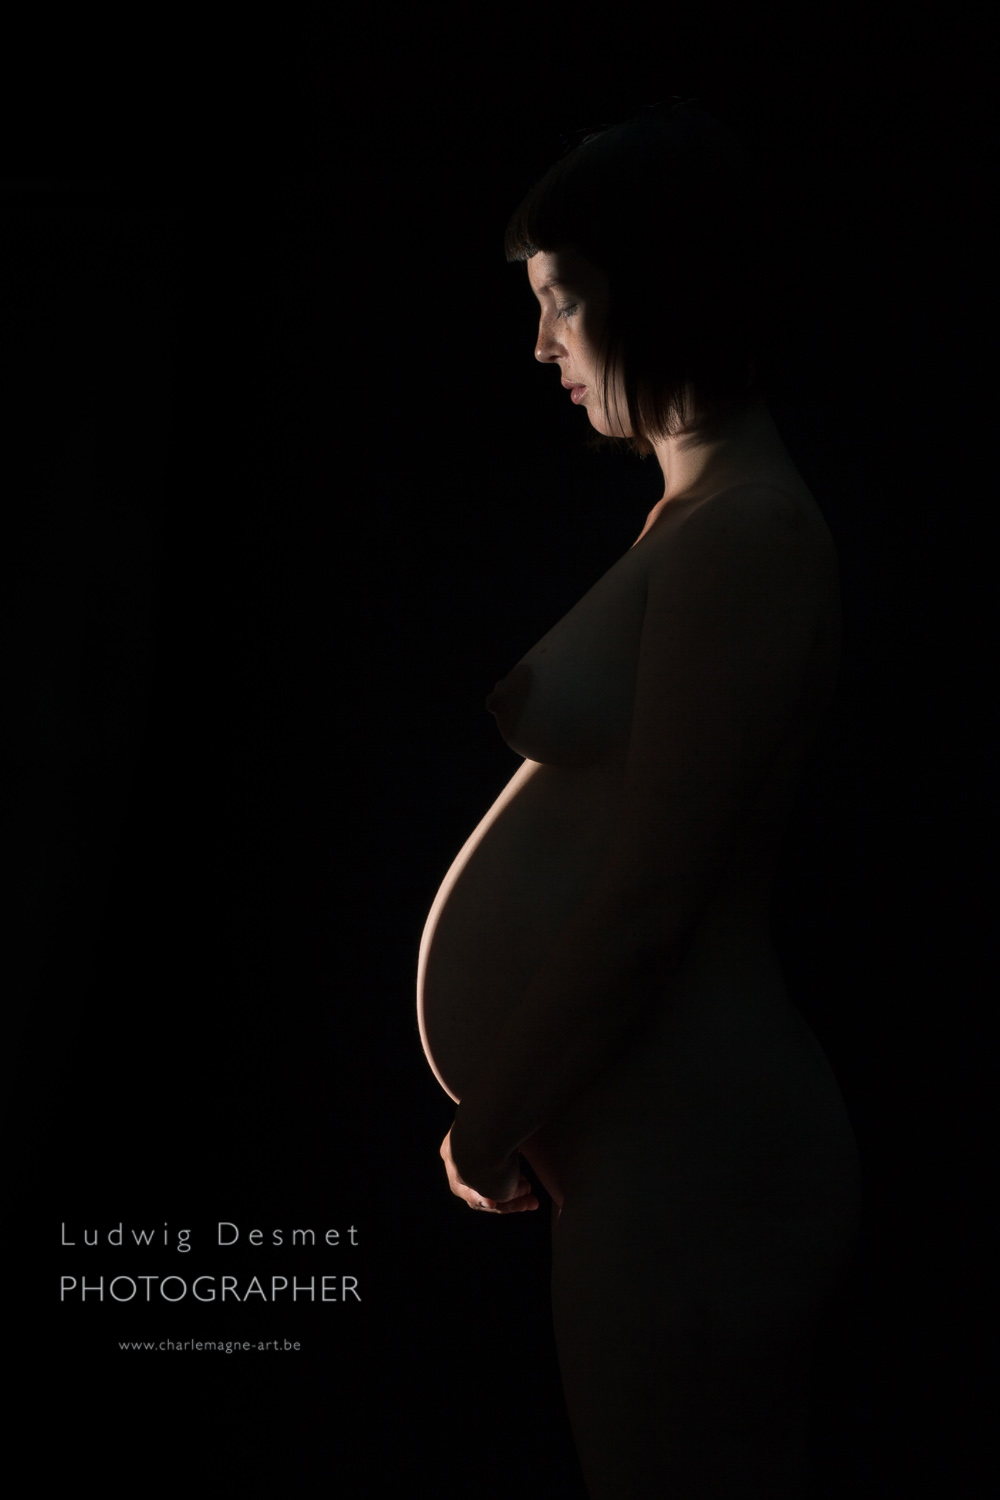
two images with this setup:

LudwigDesmet-studio-080

LudwigDesmet-studio-081

thank you for reading, see you soon for a new post.

Ludwig

Nude Studio Setup – 3 lights

beauty, Personal Pictures, personal tips & tricks, Tips and Tricks

Hi there,

I’m planning on a series of posts with some explanation of the studio setups I’ve used for my portfolio shoots.

Here’s te first one. The model has some massage oil on her body, just very slightly. A slightly colored setup.

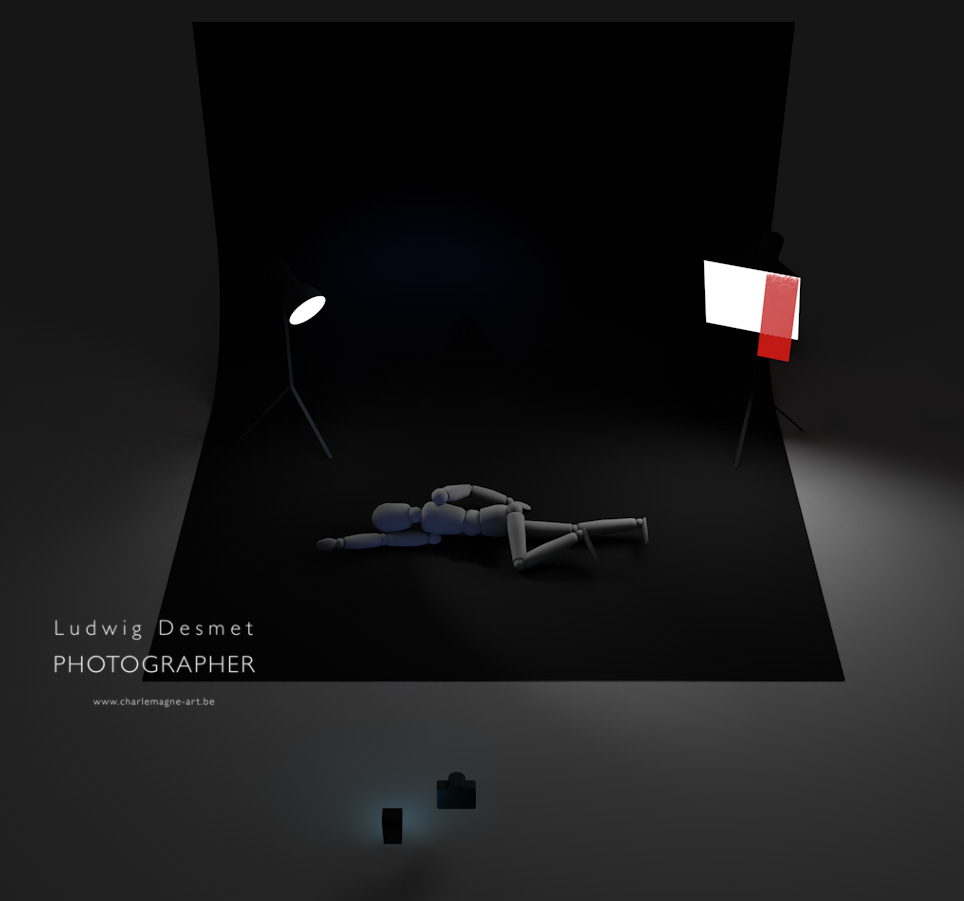
Portfolio studio setup

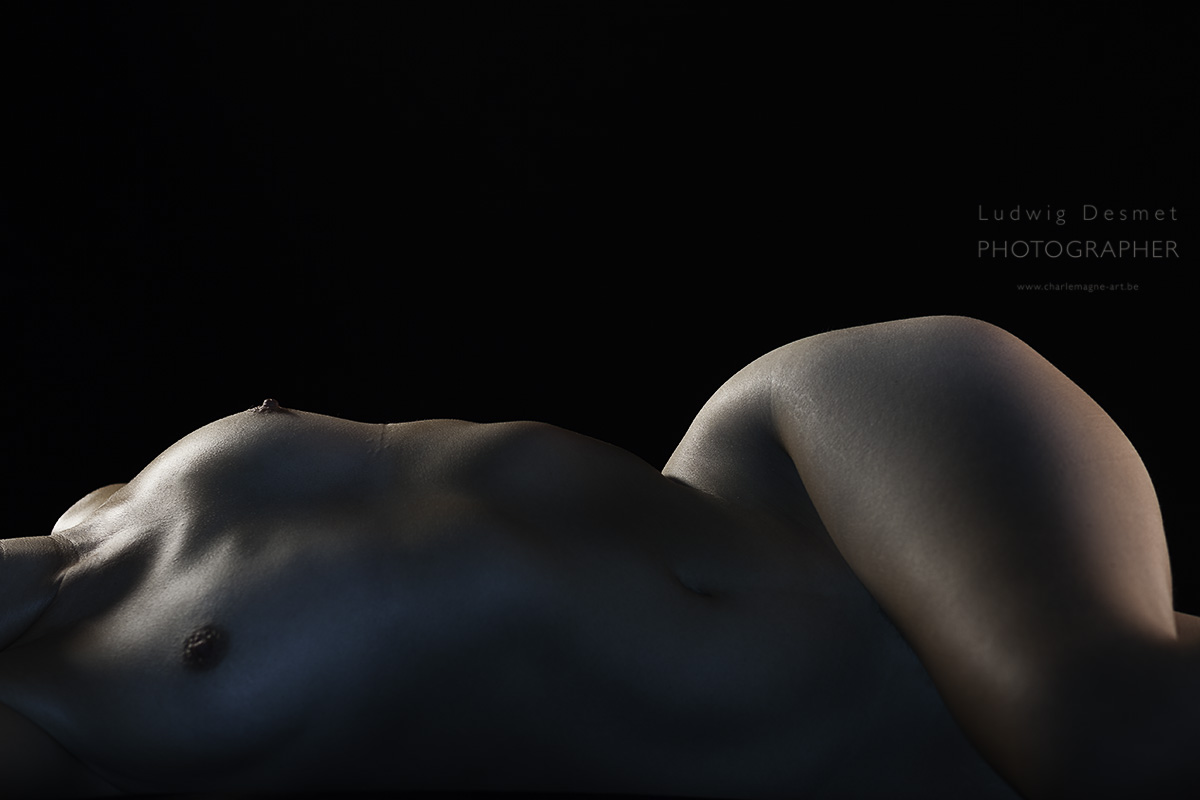
A triple light setup for a body shape portrait.

Model is laying down on a black velvet cloth, which literally absorbs all light. It is positioned in a infinite floor to wall shape.

1. On the left, studio flash with reflector, gridded. Gridded to keep the light from spilling all over in the studio. Reflector for those nice highlights on the body.

2. On the right, studio flash with small softbox (60x60cm) partially covered with a red cloth, for a slight color shift. I discovered that the use thin colored cloth works in a similar way as gels, and it is easy to just move the cloth a little bit (a wooden clothespin works just fine) to have a stronger or weaker effect. I currently work with some kind of very thin colored cloth pieces, like a magician would use. This second flash not as strong as the first one and aimed a little more off the model

3. just next to the camera, I’ve put an additional flash (Speedlite 580), again with a colored cloth in front (blue-ish) to slightly fill in the shaded areas.

Camera is just above the floor (me lying down).

Setup:

Studio setup 1 - Ludwig Desmet

85mm – 1/125th – f3.2

I probably would have been better of aiming for a smaller aperture for larger depth of field, but this is the way it is ๐Ÿ˜‰

hope you’ve found some inspiration here.

see you soon,

Ludwig

Sensor cleaning

photo gear, Tips and Tricks

I’ve had my camera’s about 2 years/3 years now, and I never had the nerve to clean the sensor. I have always been afraid something might happen to the sensor surface while cleaning it. Till now.

Some weeks ago I went to a local shop buying the necessary equipment.

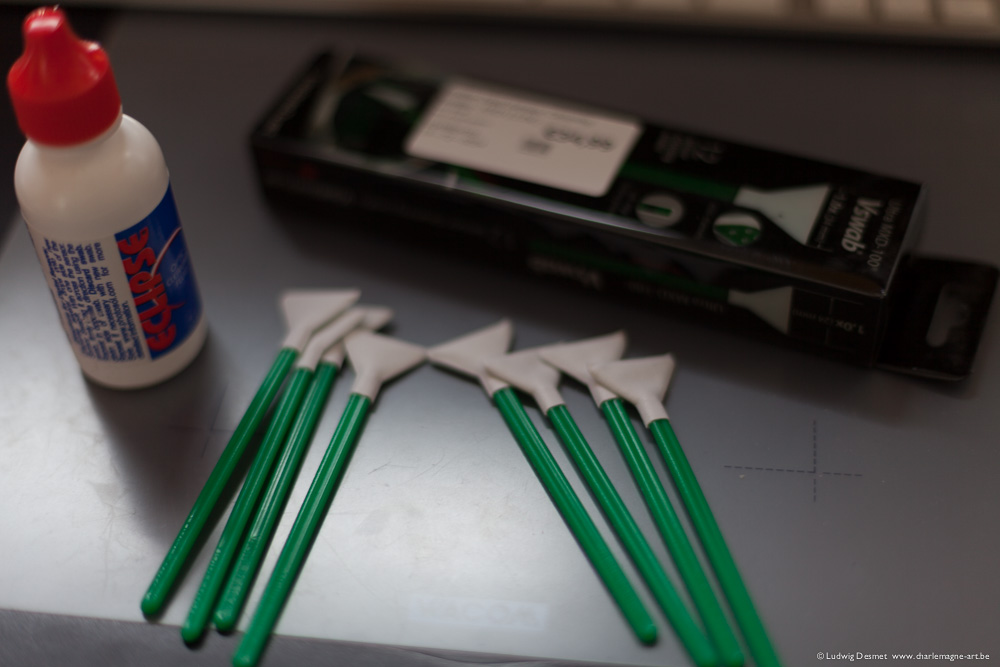
I received a bottle of Eclipse, optical cleaning fluid (www.photosol.com) and a box of Vswab Ultra MXD-100 from VisibleDust (12 pcs). Attention, you should always get the right swabs for your size of sensor. Full frame, aps-c x1.6 or aps-c x1.5 or aps-c x1.3, depending on your type of reflex camera. The bottle is good for at least a hundred sensor wipes, the box of swabs will be quickly gone, as I discovered quite soon. The swabs are individually packed in plastic foil, and should only be unpacked just before use. (the image below is after cleaning 2 sensors)

I’m not sure it’s the best tools around, but it’s the stuff they recommend. Since I have no experience with other makes, I can’t judge. One remark, it might be a good idea to use one of those static brushes, to wipe of loose dirt first, but I don’t have one, so I couldn’t use it.

Ludwig_desmet-sensorclean-4583

What I could judge, is how dirty my sensors were before cleaning.

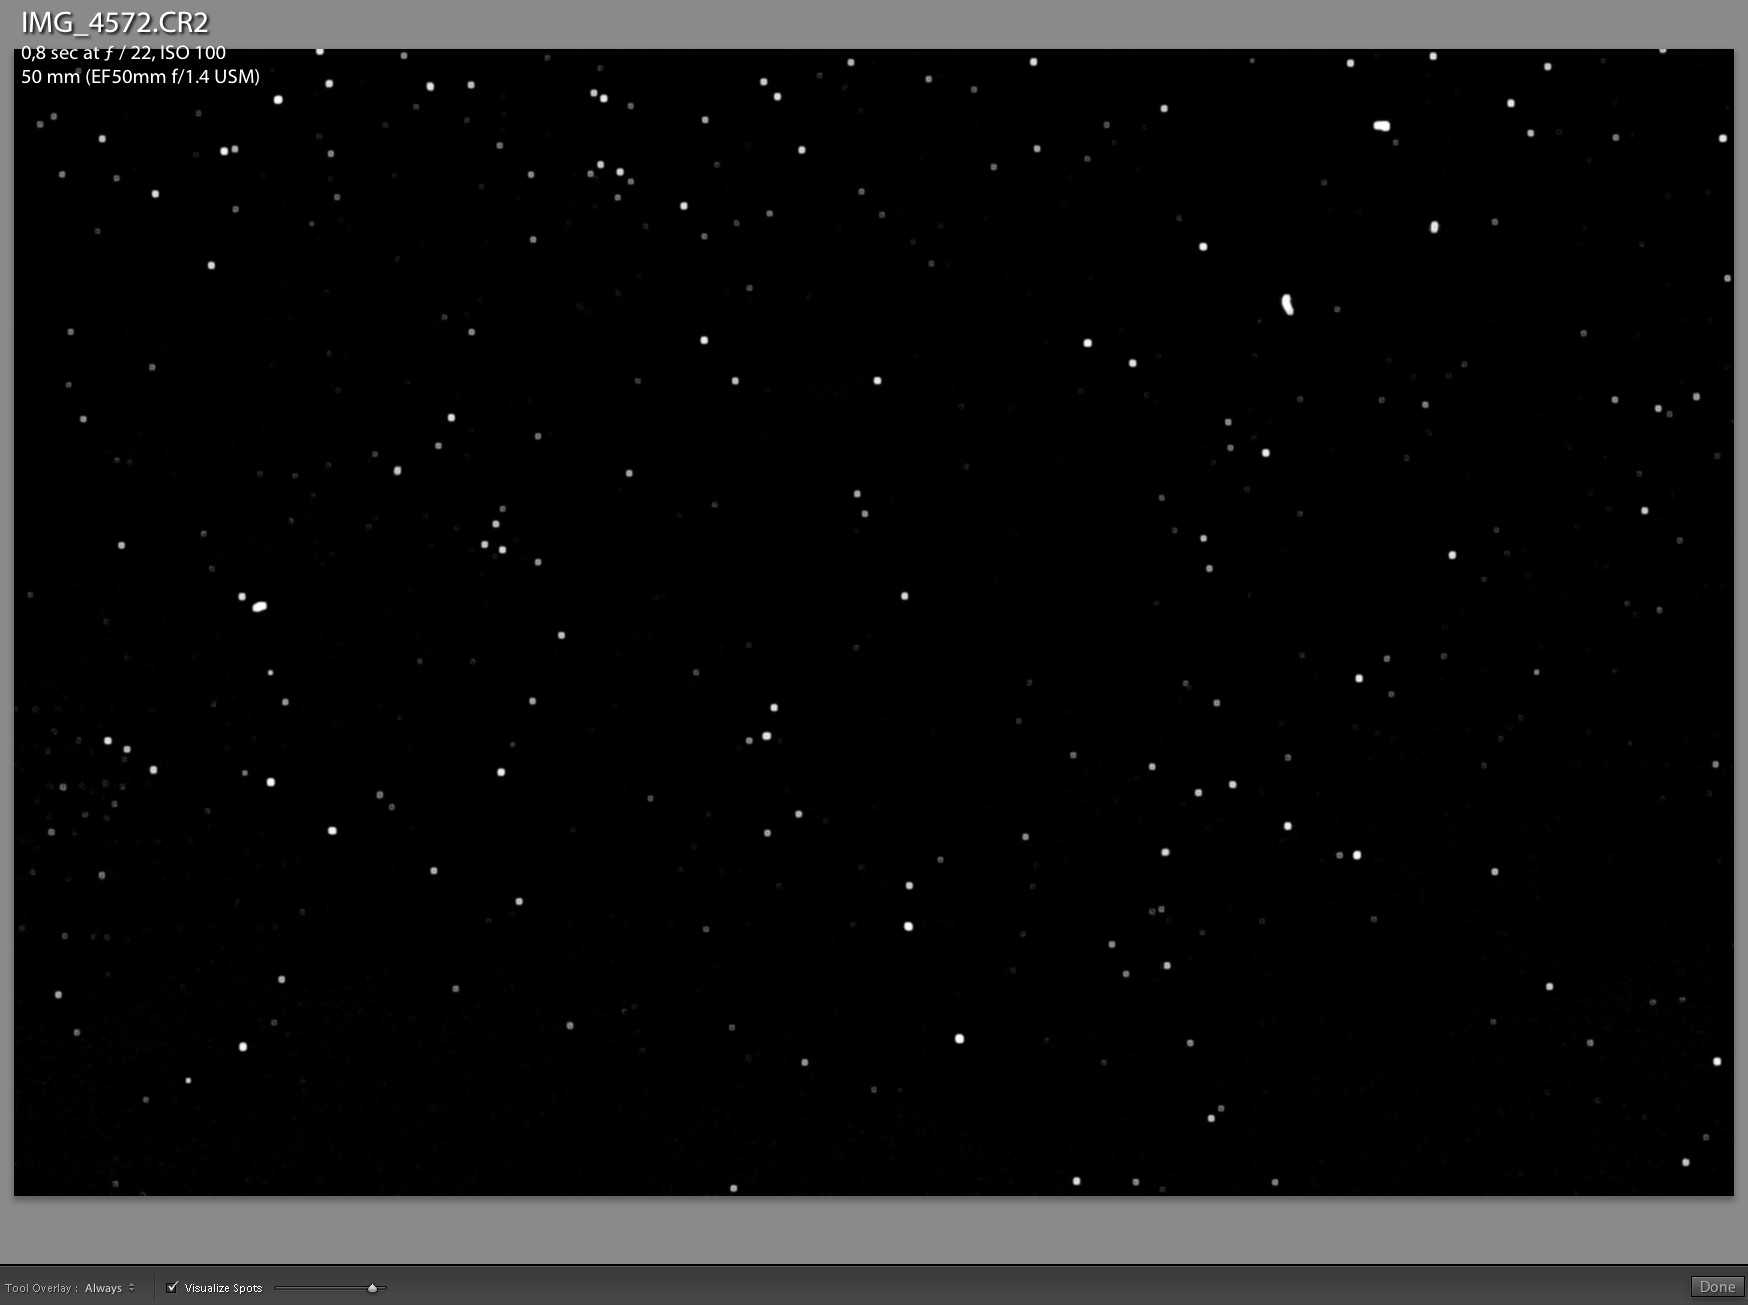
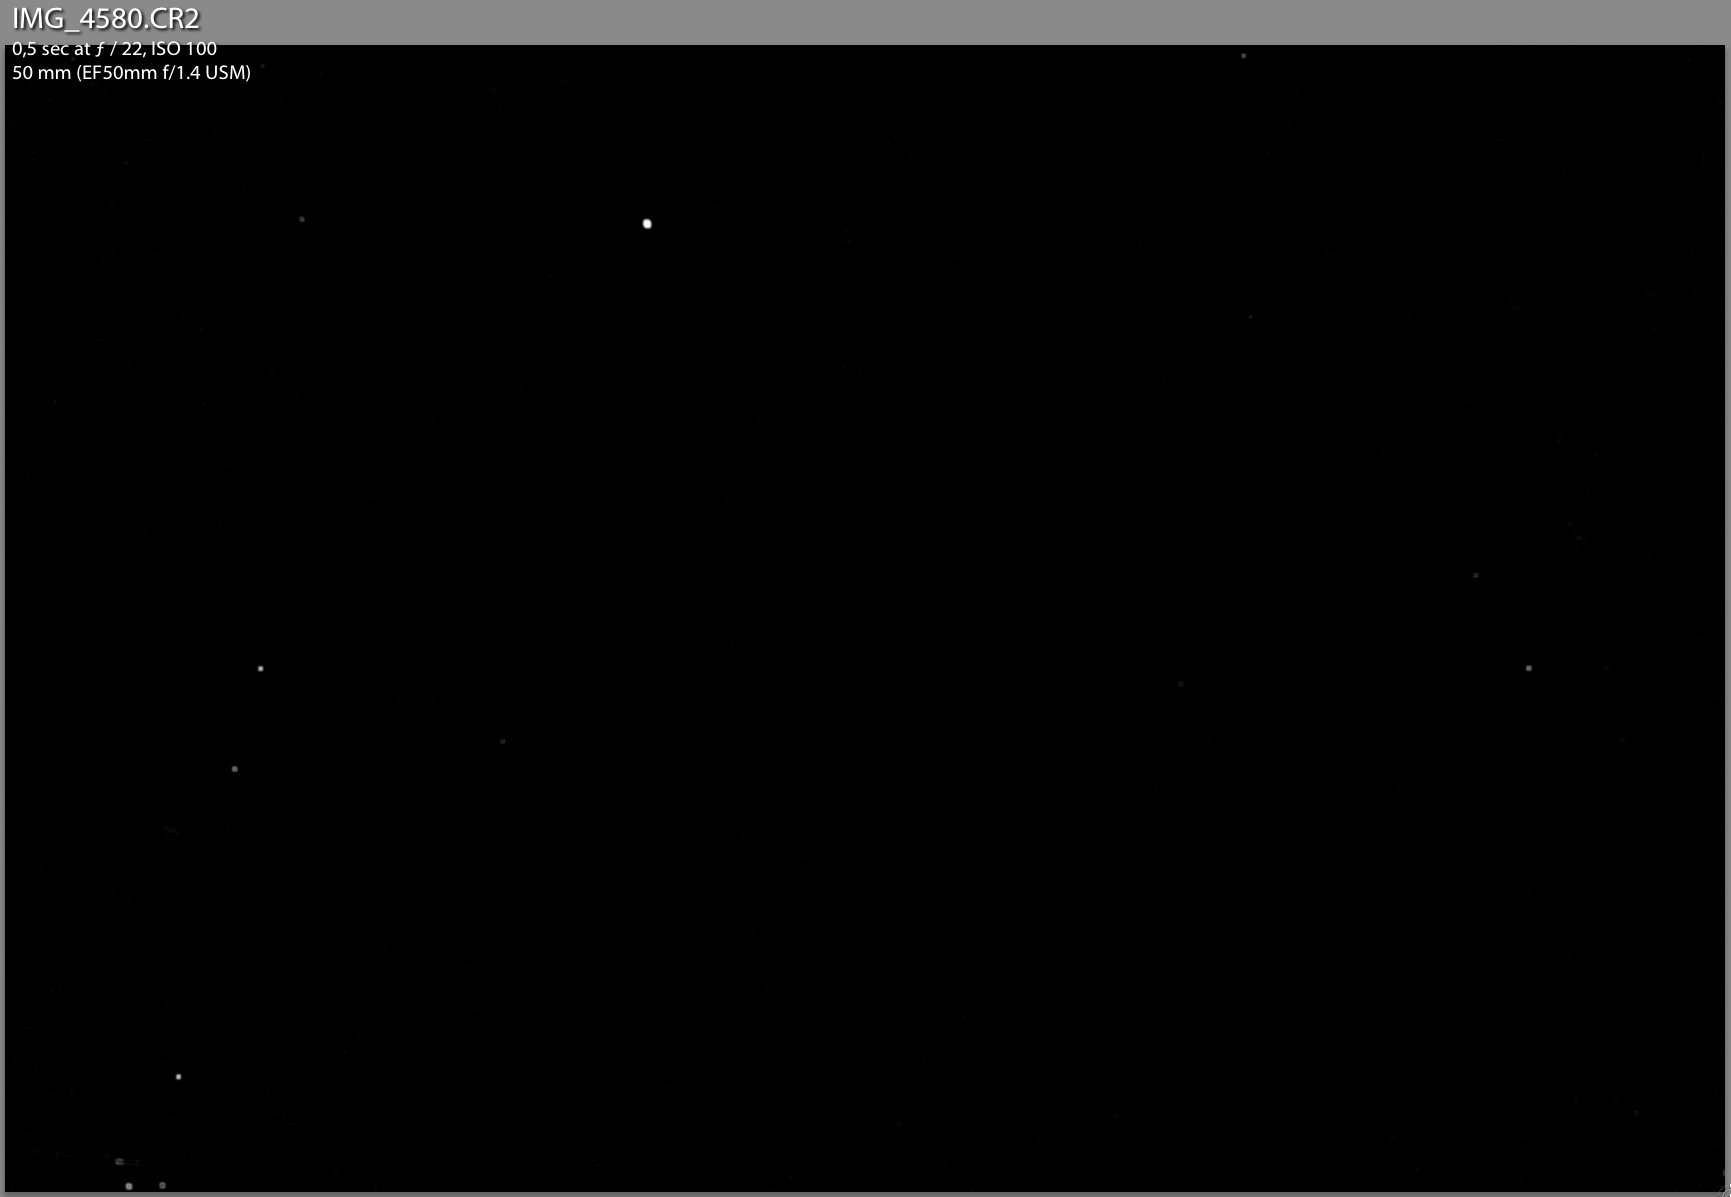
The best thing to do to reveal dust on your sensor, is photographing an even surface (or a grey cloudy sky) and make sure you have your lens off focus (only possible in manual focus mode) dial in your smallest possible aperture value, and adapt shutter speed to have a slightly overexposed image. It should look something like this:

(ALL IMAGES CLICKABLE FOR BIGGER VIEW)

Ludwig_desmet-sensorclean-4572

this is an image of an overcast grey cloudy sky, f22 – 0,5 sec at ISO 100.

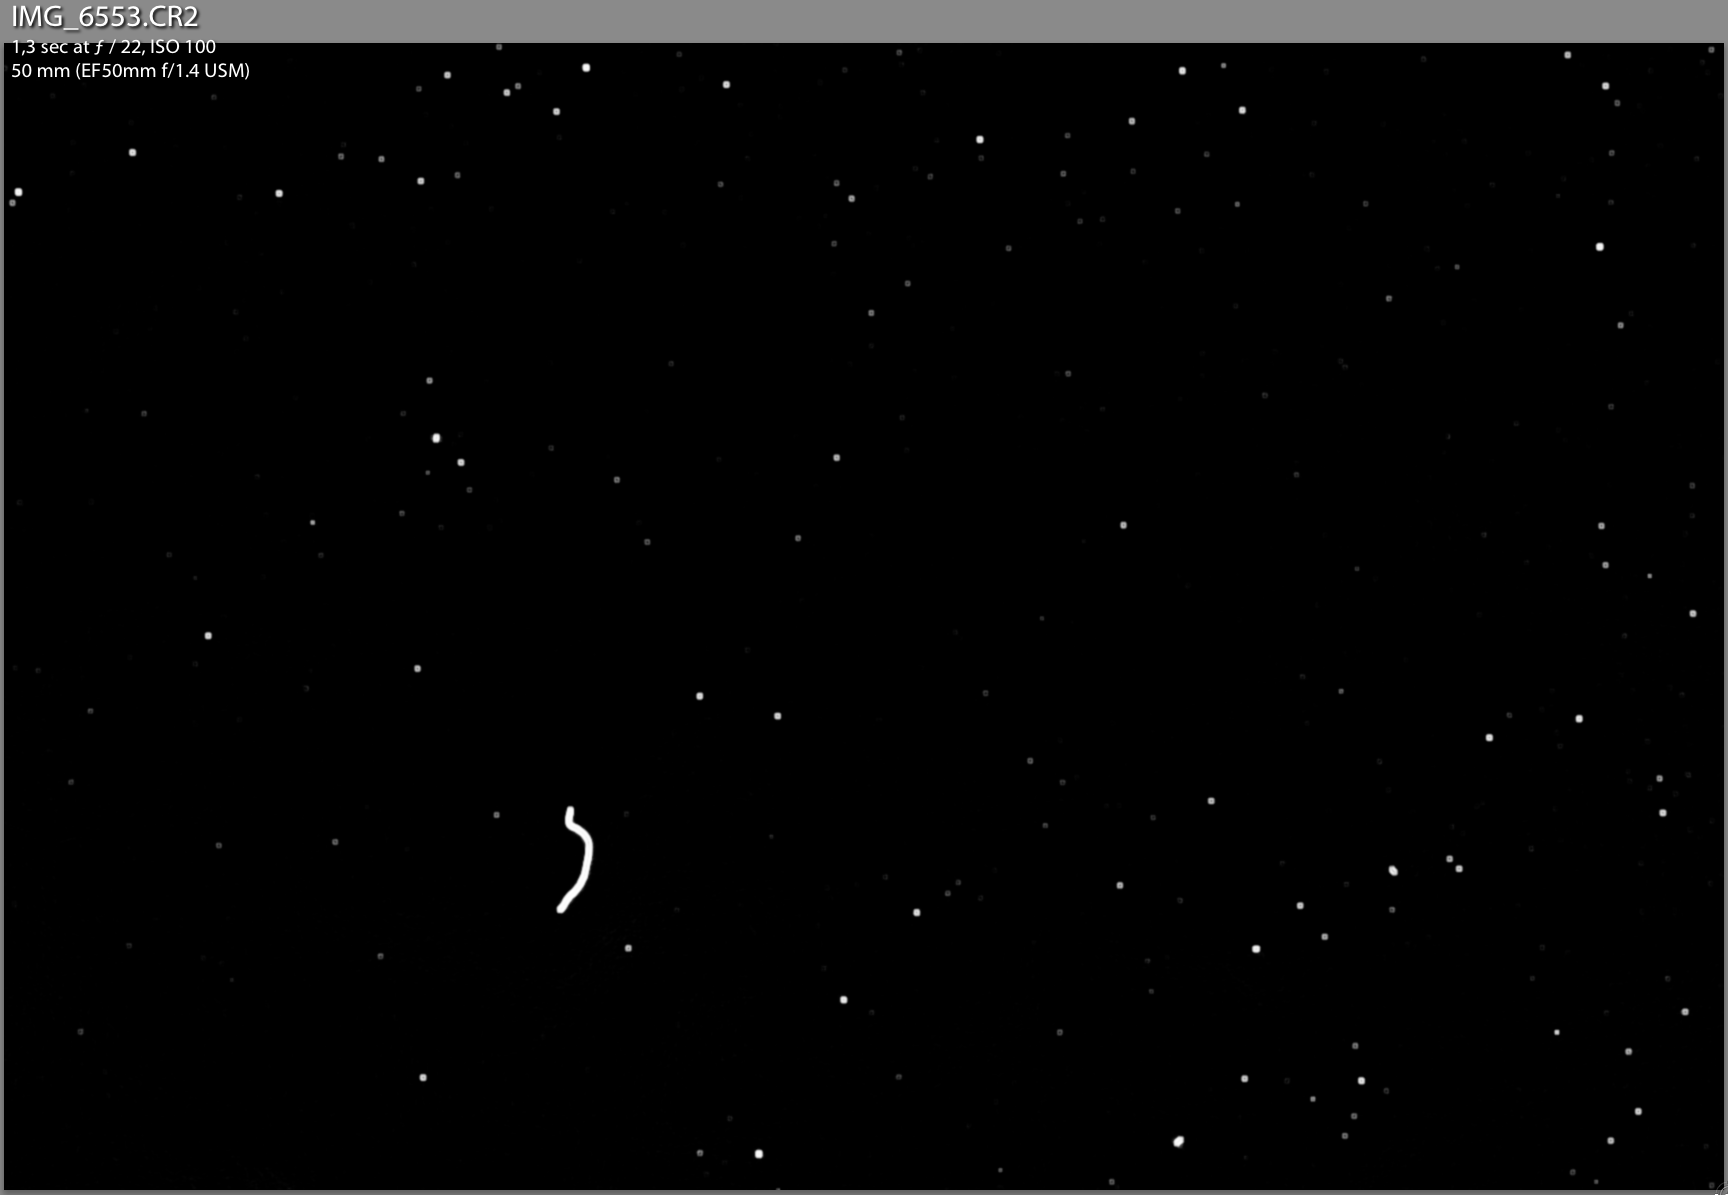
In Adobe lightroom 5, you can easily judge on how much dust you’ve gathered on your sensor by selecting the spot removal tool, and then checking the box visualizing spots just below the image. this turns your image into a black and white image, with all dust visible. (depending on the position of the visualization slider, you’ll see even the smallest dust spot)

Screen Shot 2014-01-06 at 10.54.33

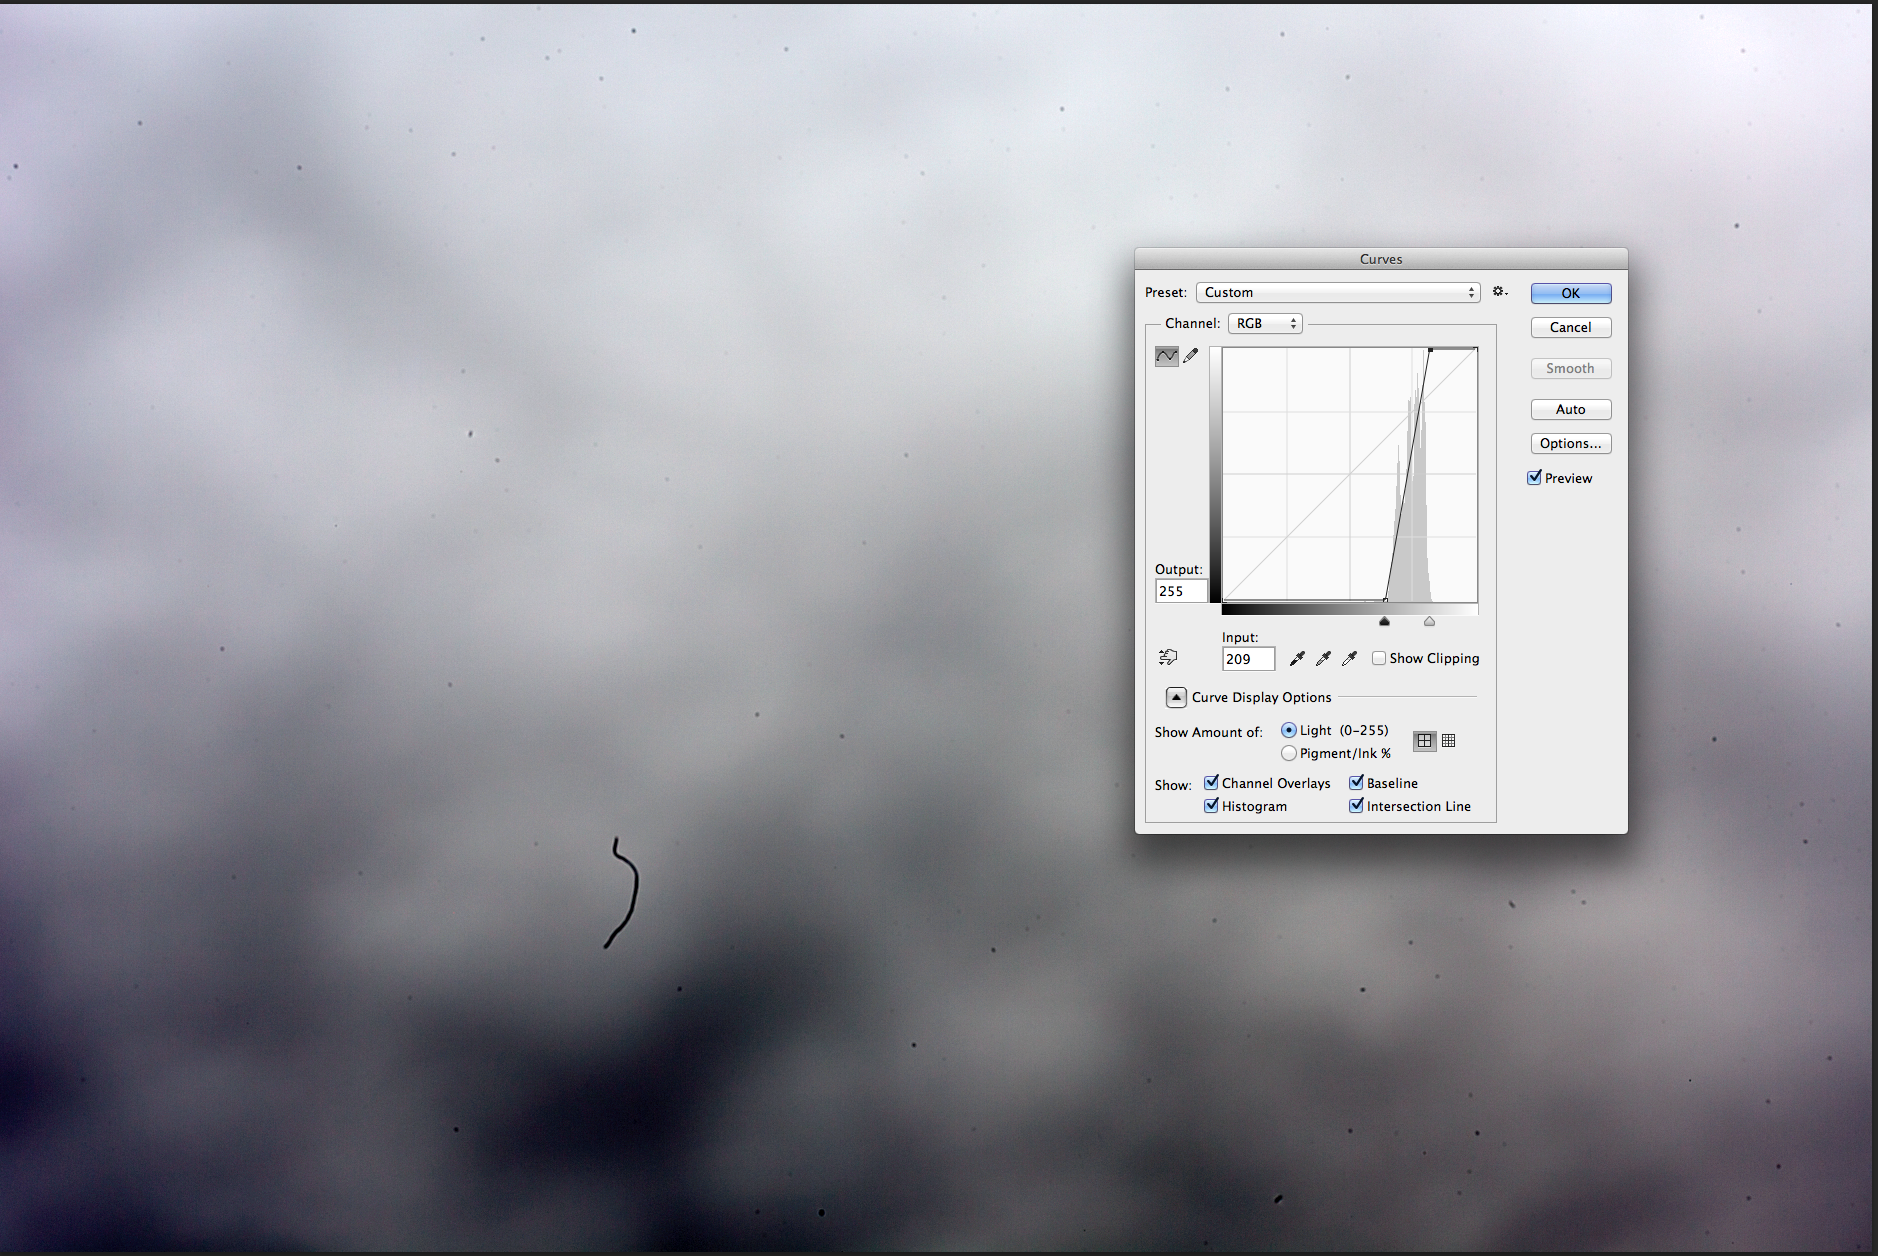
For those not working in Adobe Lightroom, in photoshop, you can similarly visualize the dust spots by putting a curve on your image, and putting the white and black point just left and right of your histogram. Since you have a low contrast image, your histogram should be rather small.

This is the first image of the other camera, with the above explained curve applied:

Screen Shot 2014-01-06 at 11.16.04

So these definitely need cleaning.

How to proceed? (this is for Canon 5D II, but it should be fairly similar on any other system)

1. make sure your battery is fully charged.

2. Get your lens of of the camera

3. find the menu item that says sensor cleaning -> manual cleaning

4. the camera warns you that the sensor will be exposed for manual cleaning.

5. Make sure you work in a clean environment, and have everything ready (enough light to clearly see where you put your swab down, cleaning fluid, sensor cleaning swab, โ€ฆ)

6. push the ok button on your camera. The mirror locks in the up position, the shutter opens. This remains so until you turn off your camera. If your battery is well charged, that should give you plenty of time to clean your sensor.

7. put some drops of cleaning fluid onto the first swab, insert it gently into your camera house, and put it down on one short side of your sensor. If you bought the right set of swabs, it should neatly fit the width of your sensor.

8. gently sweep across the sensor till you reach the other end, flip it over and sweep back. (in this way, you use both sides of the swab, without the risk of re-disposing any dust from the first used side. It took a while till I found out that that is probably the best way to do it. you’ll see in the different stage images.)

9. gently lift the swab away from the sensor (when you have reached the starting point of course)

10. dispose the used swab, no use in re-using the swabs, they are full of sticky dirt now.

11. switch of the camera, this should close the shutter and lower the mirror

12. put a lens on, and check the results. Repeat if necessary.

I used four swabs per camera, that’s because I’m a total beginner in sensor cleaning. I feel comfortable now to say that 3, maybe even 2 swabs should do to clean a sensor.

result after cleaning: You’ll still notice some dirt spots, but I can live with that for now (it was late yesterday evening, and I had to eat ๐Ÿ˜‰ )

Also have I set the visualize threshold high, so you can see even the smallest spot of dust.

Screen Shot 2014-01-06 at 11.07.33

Camera 2, before cleaning:

Screen Shot 2014-01-06 at 11.09.22

And after cleaning:

Screen Shot 2014-01-06 at 11.09.37

Not perfect, but for a first attempt very much ok with me.

see you soon, I’ll be posting another ‘at the Mansion’ shoot very shortly,

take care

Ludwig

How to find a good location – shoot with Karen

beauty, Personal Pictures, personal tips & tricks, Tips and Tricks

Some people ask me about these locations I work in.

I have been into urban explorer photography (also called urbex) for a short period of time. I din’t really get far into this. Not that it didn’t please me, but modeling work pleases me more, because you work together with at least one other person to a result. There’s not much conversation possible with an abandoned building or a landscape. (another discipline in photography, that I still do from time to time)

In urbex, most of the locations are very abandoned, and you might get in with permission at rare occasions, but most of the time, you just don’t ask permission, don’t know who to ask to, or just simply don’t bother. This includes the risk of being ‘discovered’ by the owner, the housekeeper or even the police, … (never occurred to me ๐Ÿ˜‰ )

As soon as I started doing model work, I convinced myself that it would not be a good idea getting the police behind my back whilst my model is working on the next intimate pose, or while she’s changing clothes, or some other awkward moment during the shoot. Finding locations is not easy, by far not. It has to be accessible, not too far driving from where you as a photographer are based (preferably), give plenty of light possibilities, give nice decorative possibilities etc. … And you need to get access at the times you want to shoot at.

My one and only advice in this matter is: Try to find the owner of the place, contact him or her, try to make a mutual beneficial agreement. Most people have shown great willingness whenever practically possible. I now have 4 different locations I regularly shoot in, and all 4 owners were very quickly sympathizing with the idea. I mostly offer free photo work – to some degree – if they would need any, be it for family or business matters.

This is what happened with the location of the shoot I’ll show you pictures of in this post:

While riding my motor trough the flemish ardennes (a part of our region called so because it resembles the ardennes – but actually it is more beautiful) I see this beautiful complex that seems like an old cloister, nursery school, orphanage, … and I decide to halt and look if I can find signs of people around.

After peeping trough some windows, knocking on the door, some kind of housekeeper gets his head out on the second floor, talking to me in a foreign language. (Being a Belgian citizen, I do speak and understand quite some languages, but clearly not this one) Impossible to talk to him, but he’s able to point me to a information panel hanging on the wall, that contains different phone numbers of the owner of the place. I have called the owner a couple of days later and she said:

“sure, no problem, I have been a model myself in my younger days. Just call me whenever you want to get in. When there are no groups (the location is rented as a summer camp house for big groups) you’re welcome.”

Easy as that, and something similar happened with the mansion, the old villa, the warehouse and the storage building. So, just ask, don’t ask for the impossible, be polite and be willing to offer some service in exchange. After that, be clear in your communication (when you want to shoot, for how long, with how many people, etc. …) and you’ll have a good chance for a lasting relationship.

One last remark about sharing locations with other photographers. Well, I’m very reluctant about that, and mostly for one reason. It is not because the owner granted me permission to shoot in a certain building, that he/she is also interested in receiving other photographers, or in being bothered by a different photographer every day, … Besides, the exchange offer they get from me, they won’t need it from another photographer, don’t they? ๐Ÿ˜‰

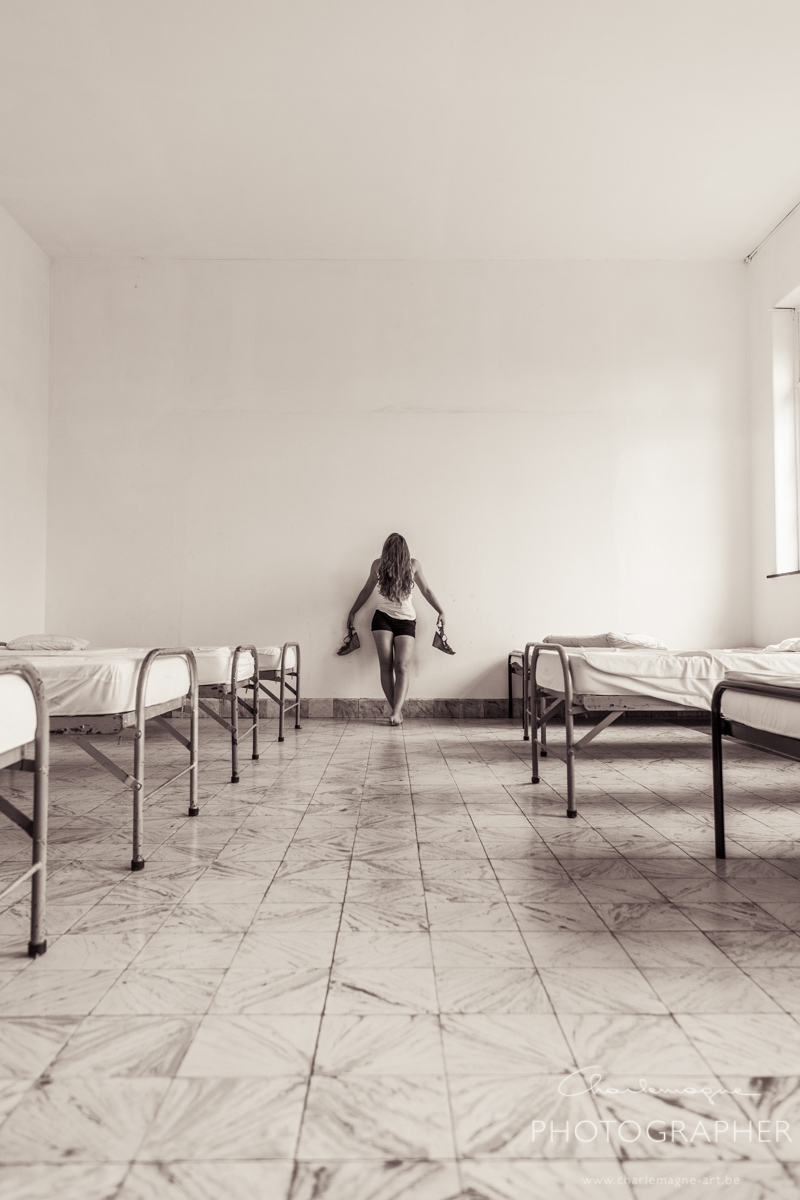
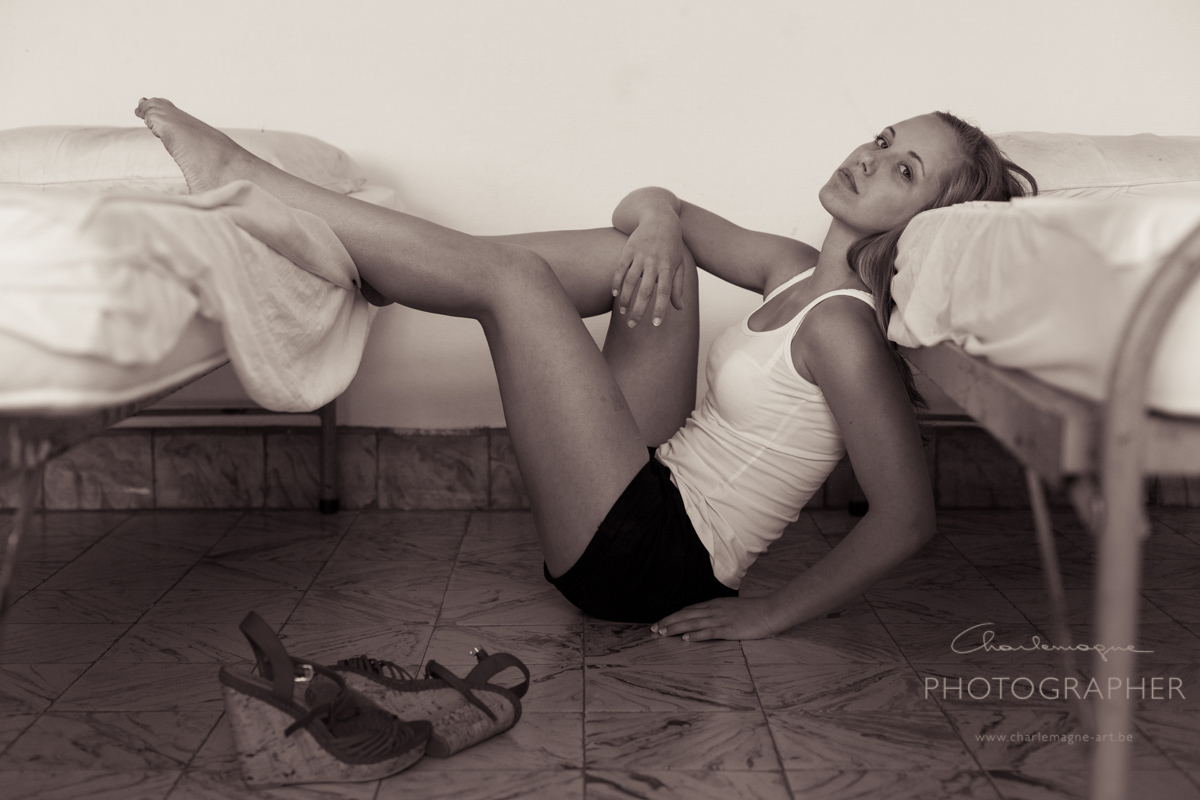
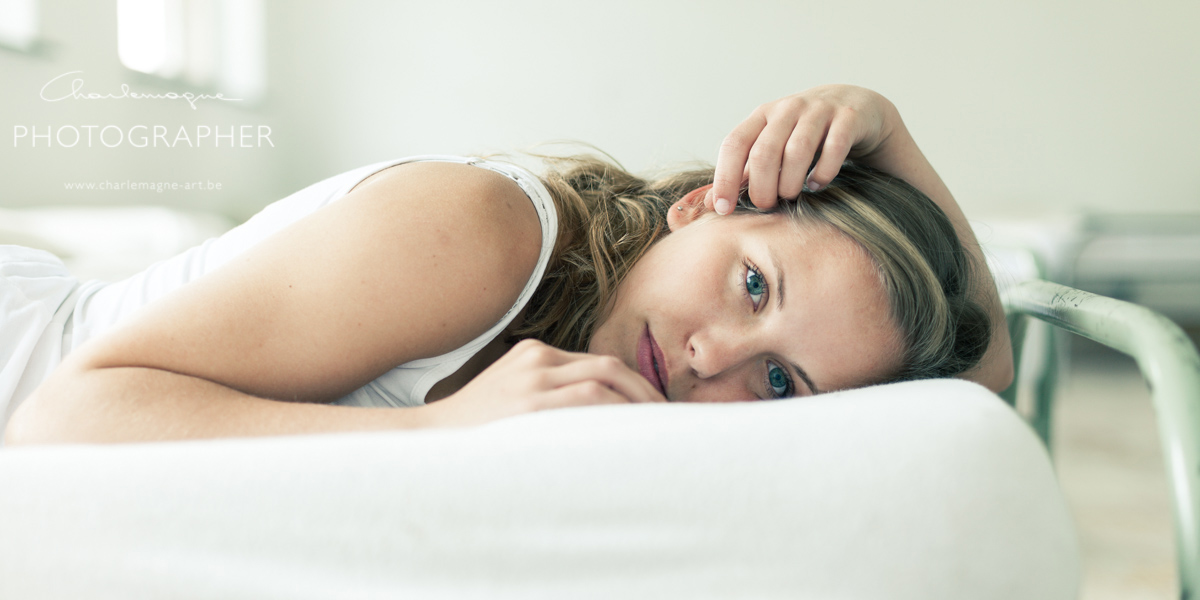
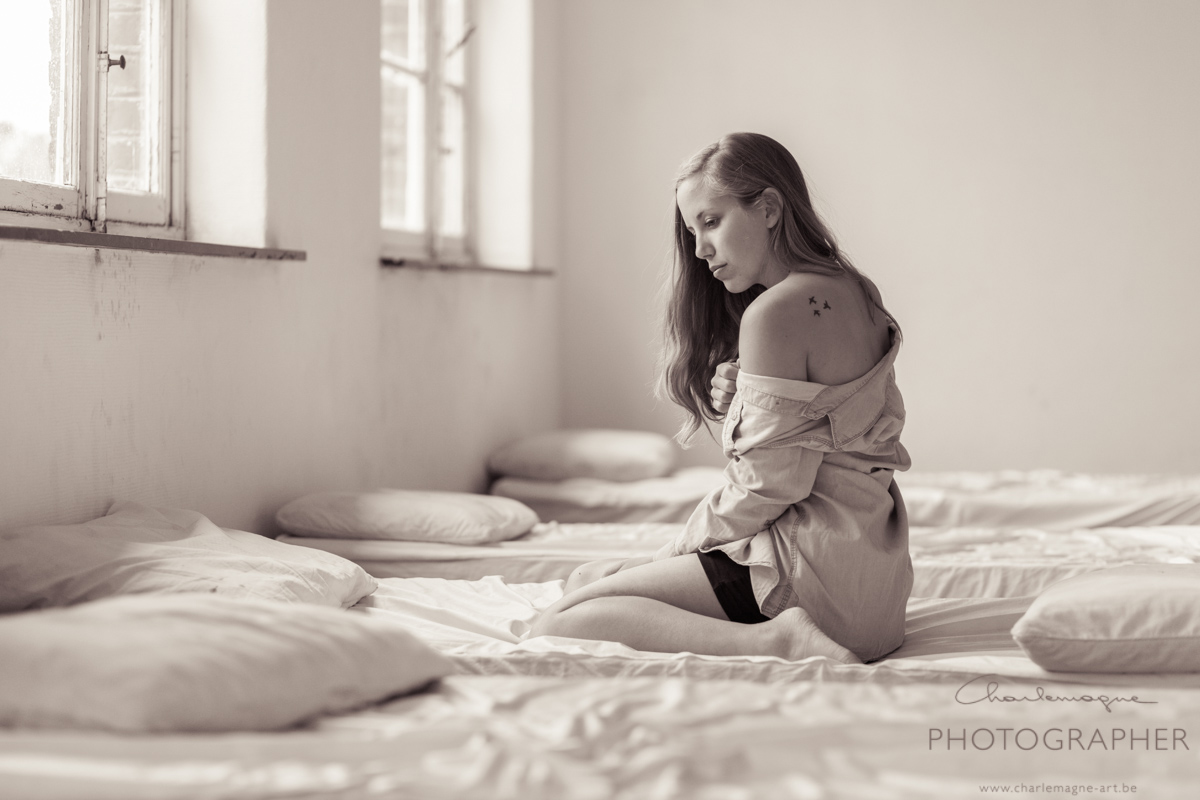
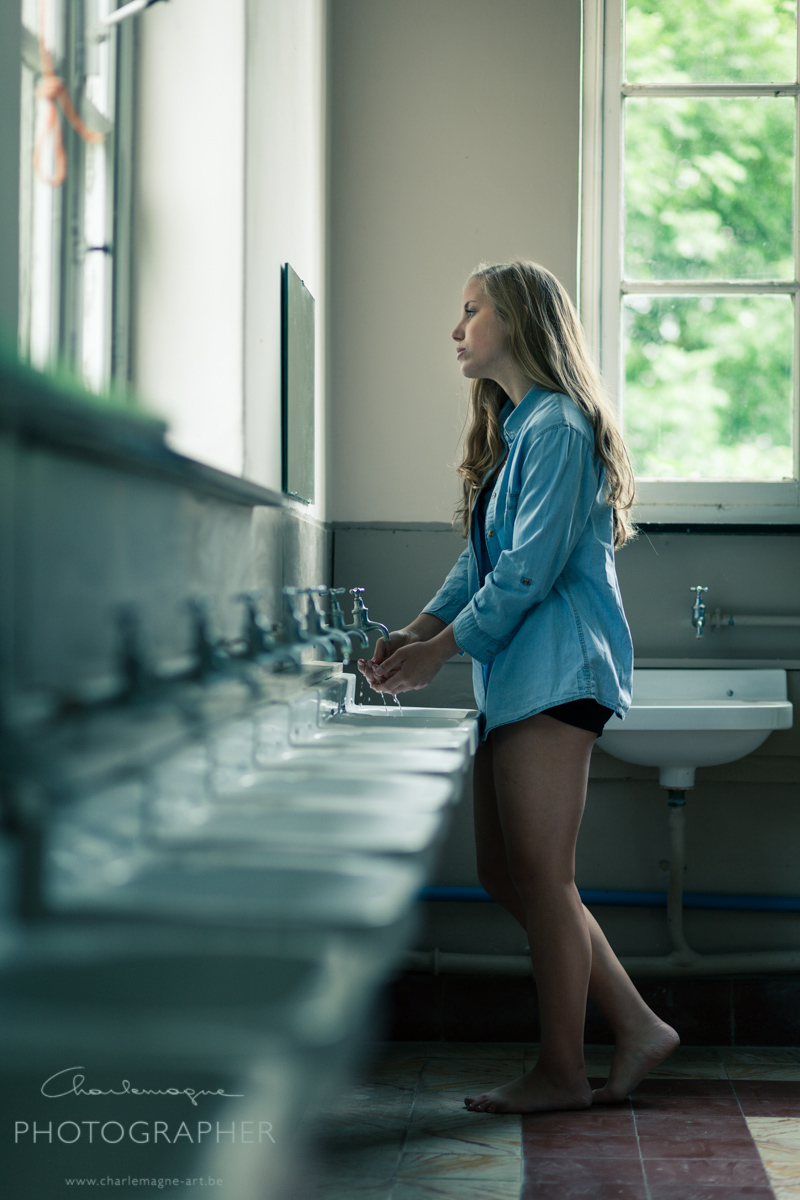
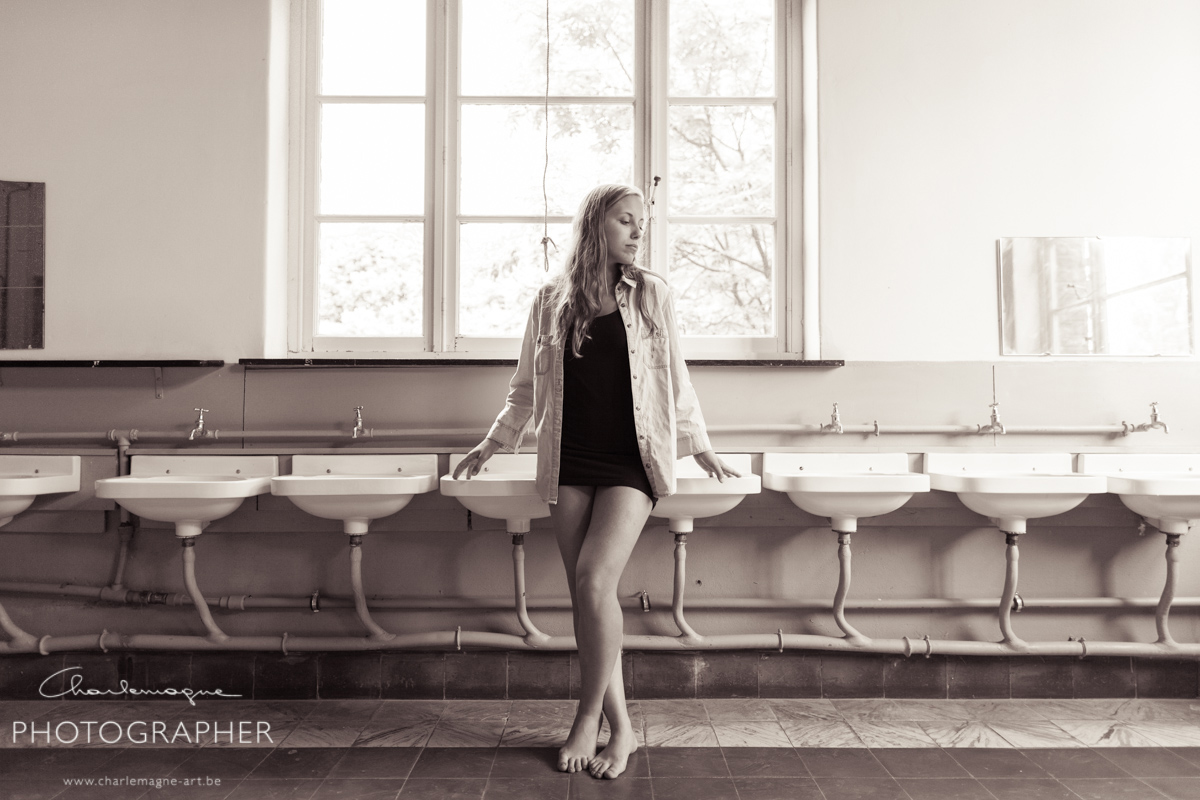
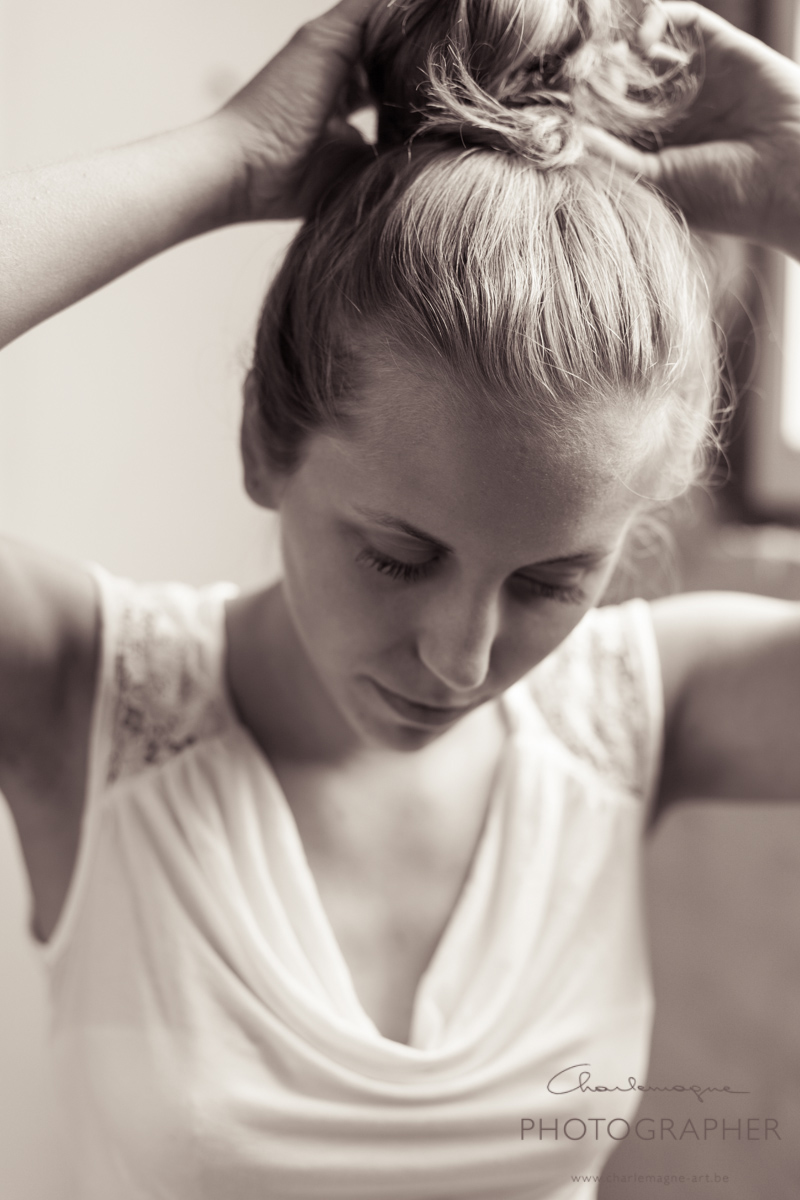
So, enough about locations. I worked with Karen for the first time, first time in this new building too. The sky was cloudy, so there was really not much light inside. It required some searching, trying a lot of different angles, but we managed to get some really nice images after all. Karen told me afterwards “the pictures are really superb”. Thank you Karen.

All images taken with Canon 5D II at ISO 200 (except one at ISO 100), Lenses used in this selection: Canon EF 24mm f1.4 L II, Canon EF 50mm f1.4, Canon EF 85mm f1.8, Canon EF 135mm f2.0 L. All natural light.

happy viewing

charlemagne-art-KarenW-0560

charlemagne-art-KarenW-0330

charlemagne-art-KarenW-0374

charlemagne-art-KarenW-0381

charlemagne-art-KarenW-0397

charlemagne-art-KarenW-0428

charlemagne-art-KarenW-0435

charlemagne-art-KarenW-0461

charlemagne-art-KarenW-0475

charlemagne-art-KarenW-0489

charlemagne-art-KarenW-0501

charlemagne-art-KarenW-0517

charlemagne-art-KarenW-0533

charlemagne-art-KarenW-0539

charlemagne-art-KarenW-0589

Any questions about this post, just ask!

Ludwig

Photographing the Harley

Personal Pictures, personal tips & tricks

As an end of study assignment for my studio/object module (photography courses at kips.be (Ghent Belgium) we had to propose an object to photograph.

amongst the possibilities were ‘perfume’ or ‘jewels’ …

I wanted to do something more ‘tangible’ and proposed a Harley Davidson motorcycle. My mentor could choose if he categorized it as being a perfume or a jewel. I guess both of the categories apply.

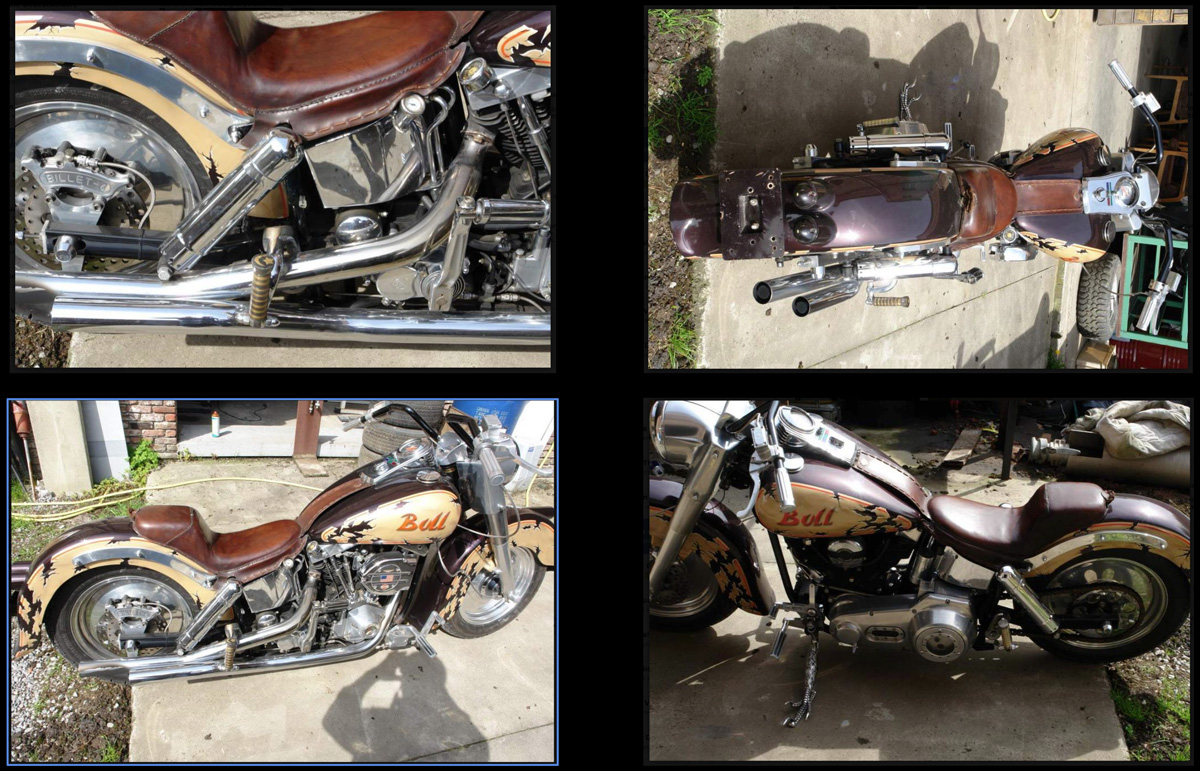
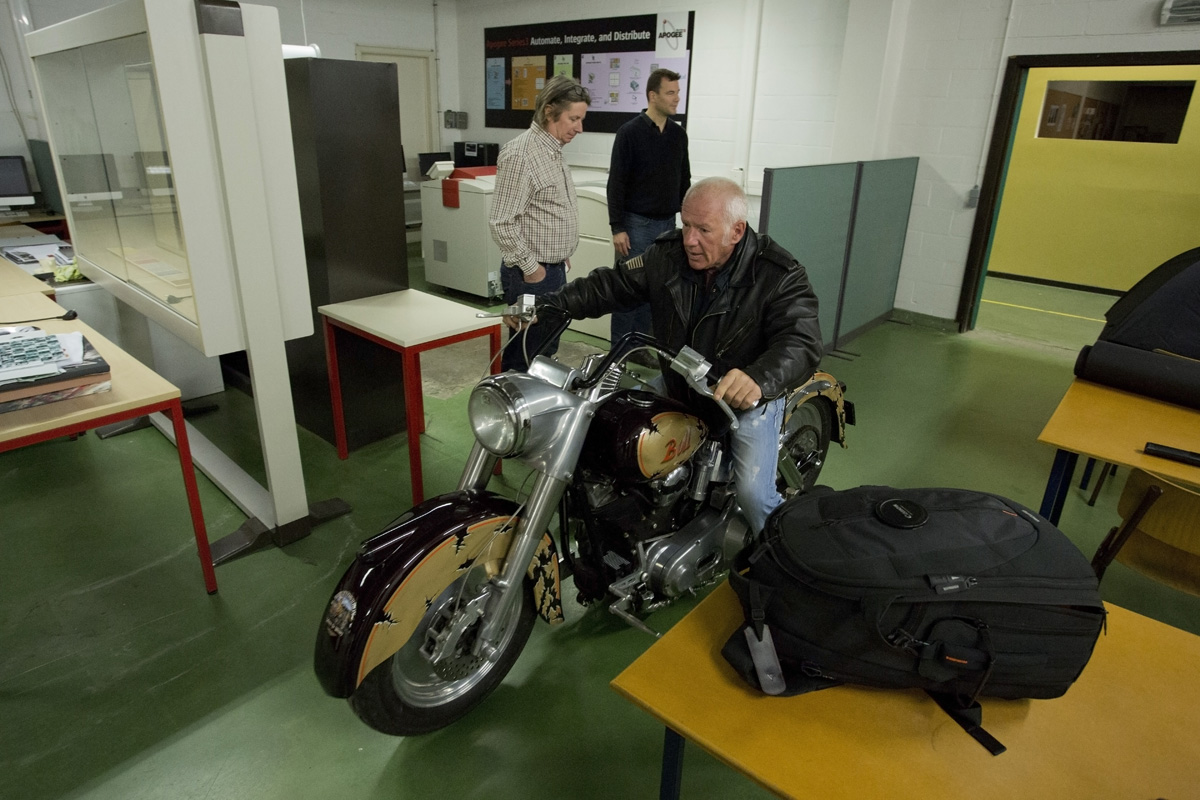
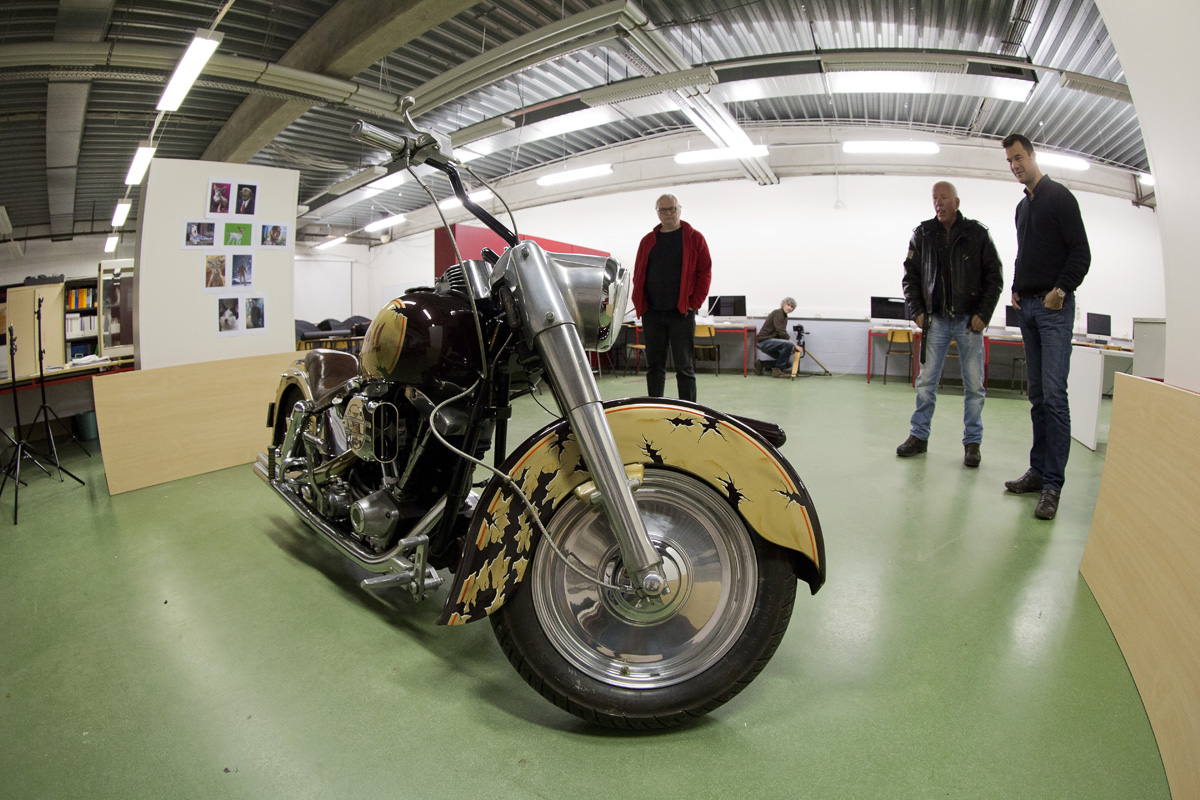
The Harley is not mine, its a customized 1981 Electra Glide from a friend of a friend, and hardly recognizable from the original. Franรงois is the owner of the bike.

the subject

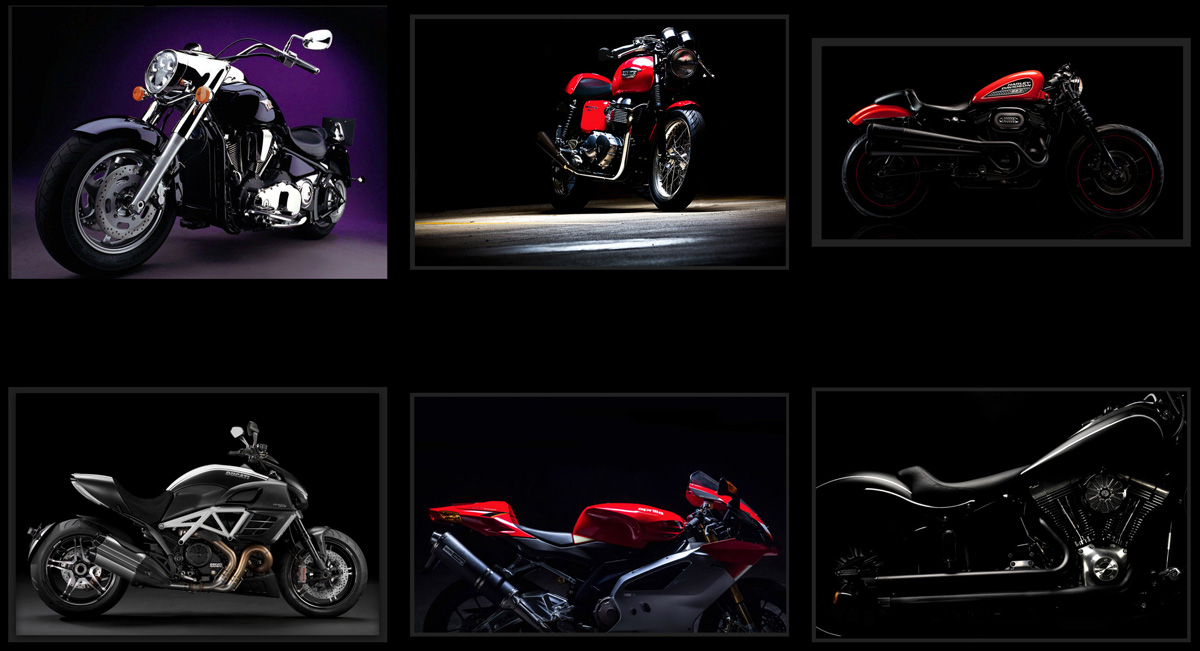
I had surfed a bit for inspiration too. There’s not so many studio shots of motorbikes on the internet, here are a few:

inspiration

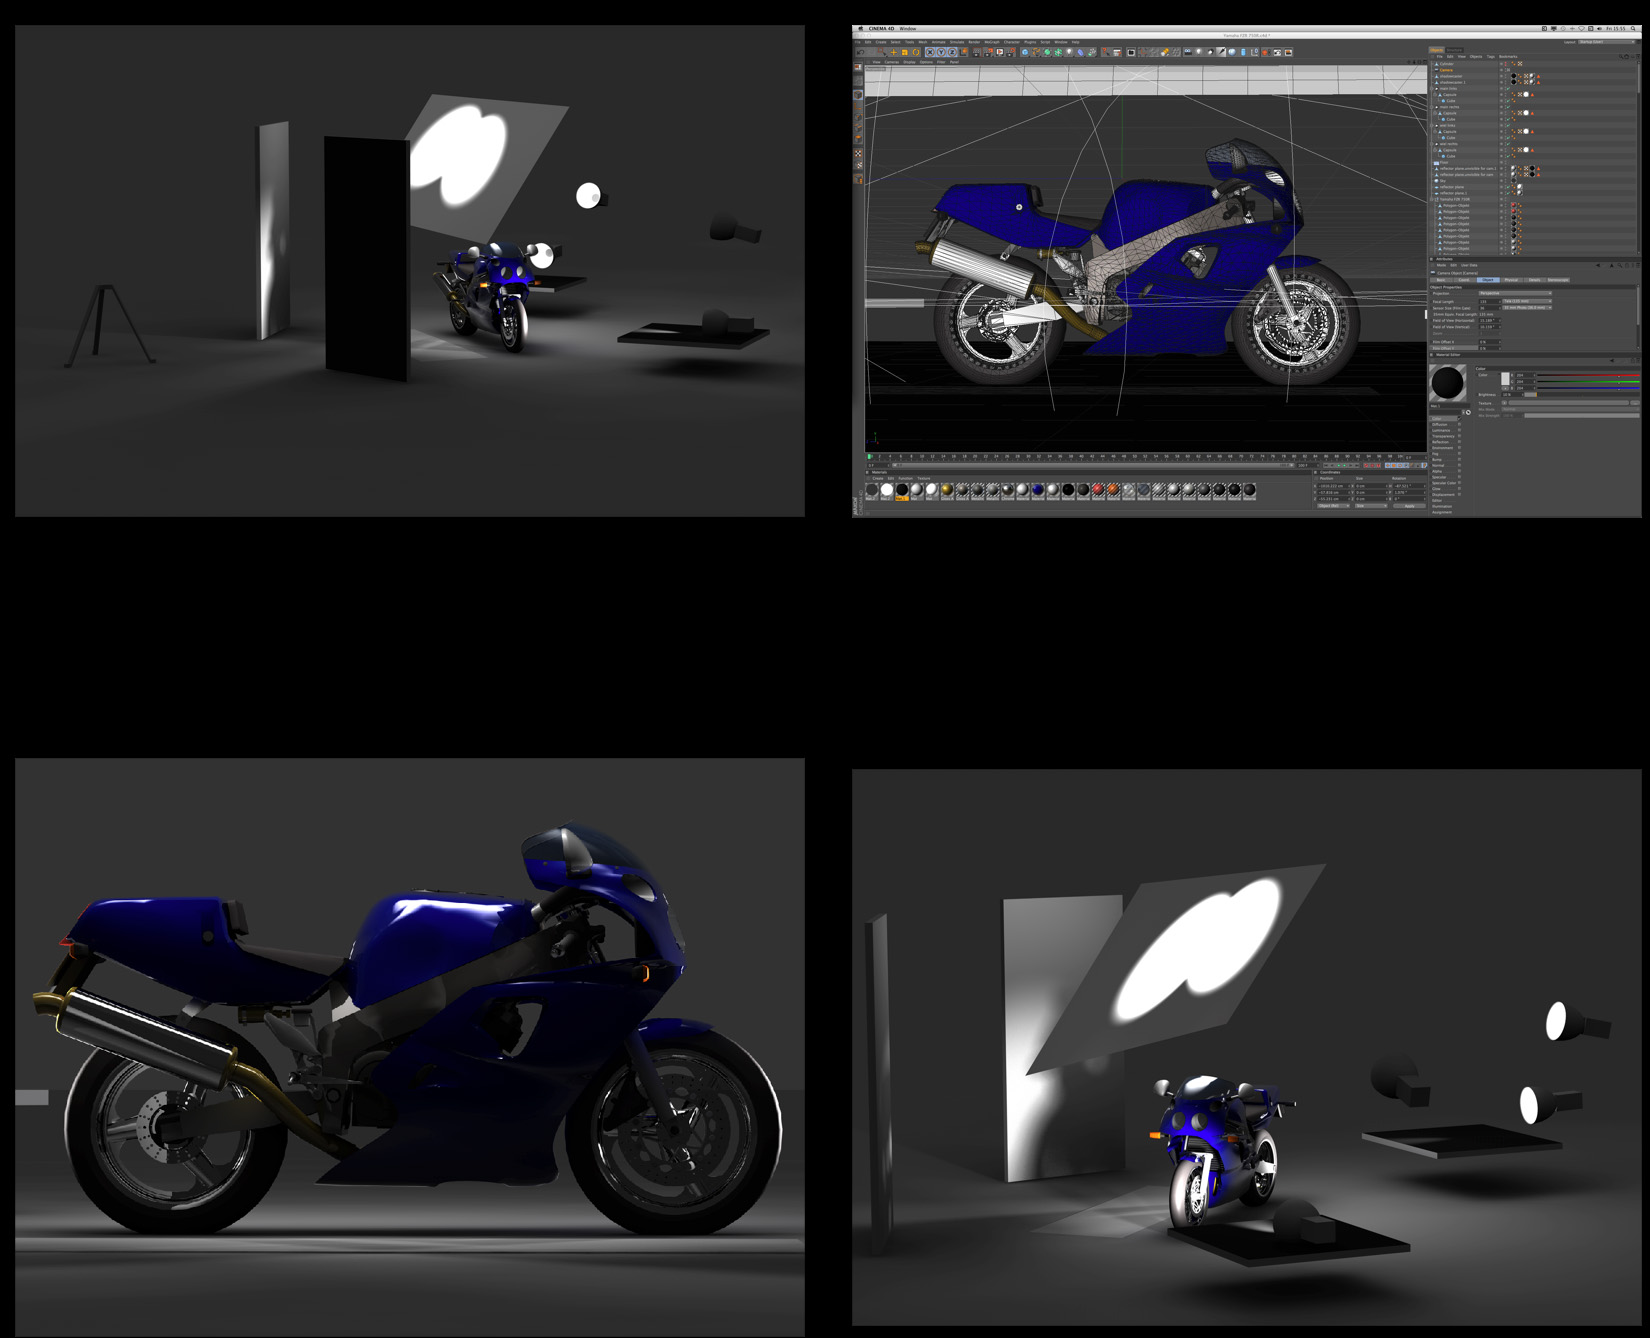
I had made some preliminary studies in 3D rendering (thats still my main job). I had discussed with my teacher that it would be best to lit the subject indirectly, with a large soft box from above. Since we don’t have softboxes that big at school, I had to come up with something else.

the virtual world

and then the ‘thing’ arrived.

I had shown Franรงois where in the school we wanted to shoot the bike. (I had three other classmates doing their work in the proper school studio, so I had to move out to another class) And he just drove it trough the hallways of the school. All students were awake at once on this early saturday morning.

3R7A0589

So, what’s next? You see me setting up the tripod and camera.

3R7A0596

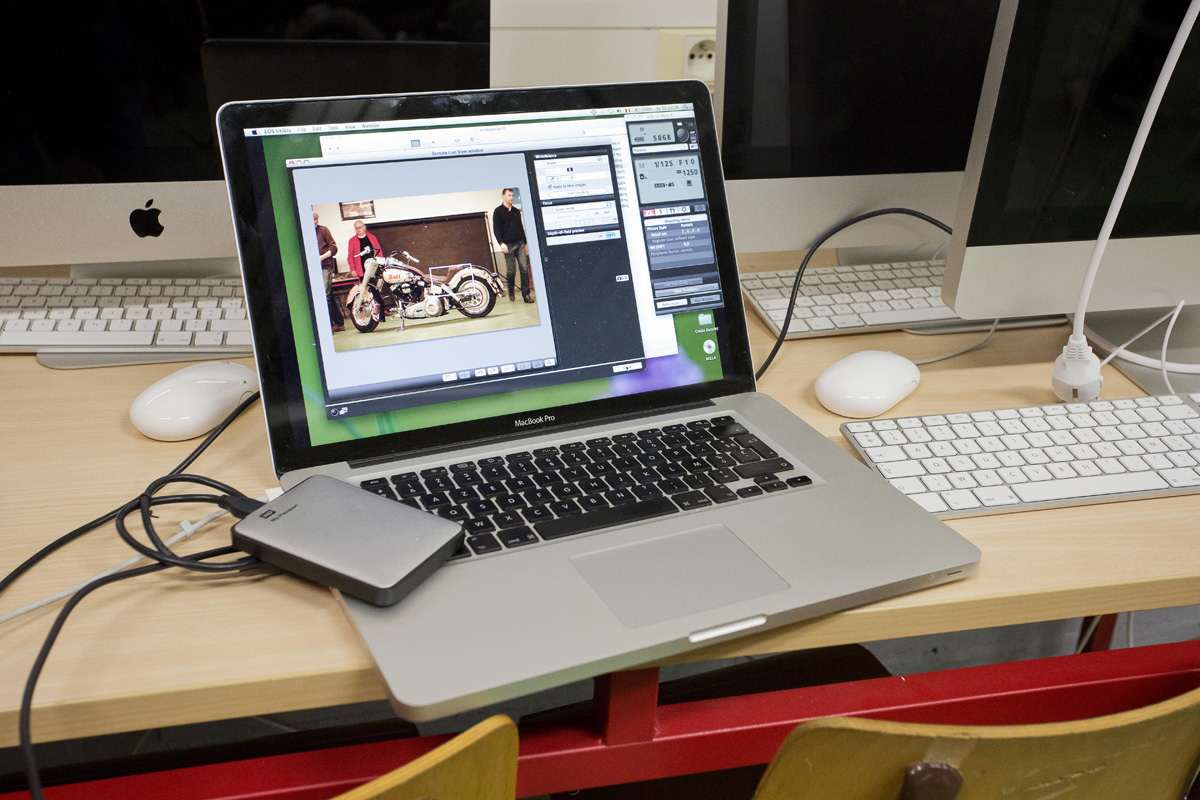
Checking on the framing, remote shooting with a portable mac, to be sure not to touch the camera in between shots. (I wanted to be sure I could compose different shots together in photoshop afterwards)

3R7A0600

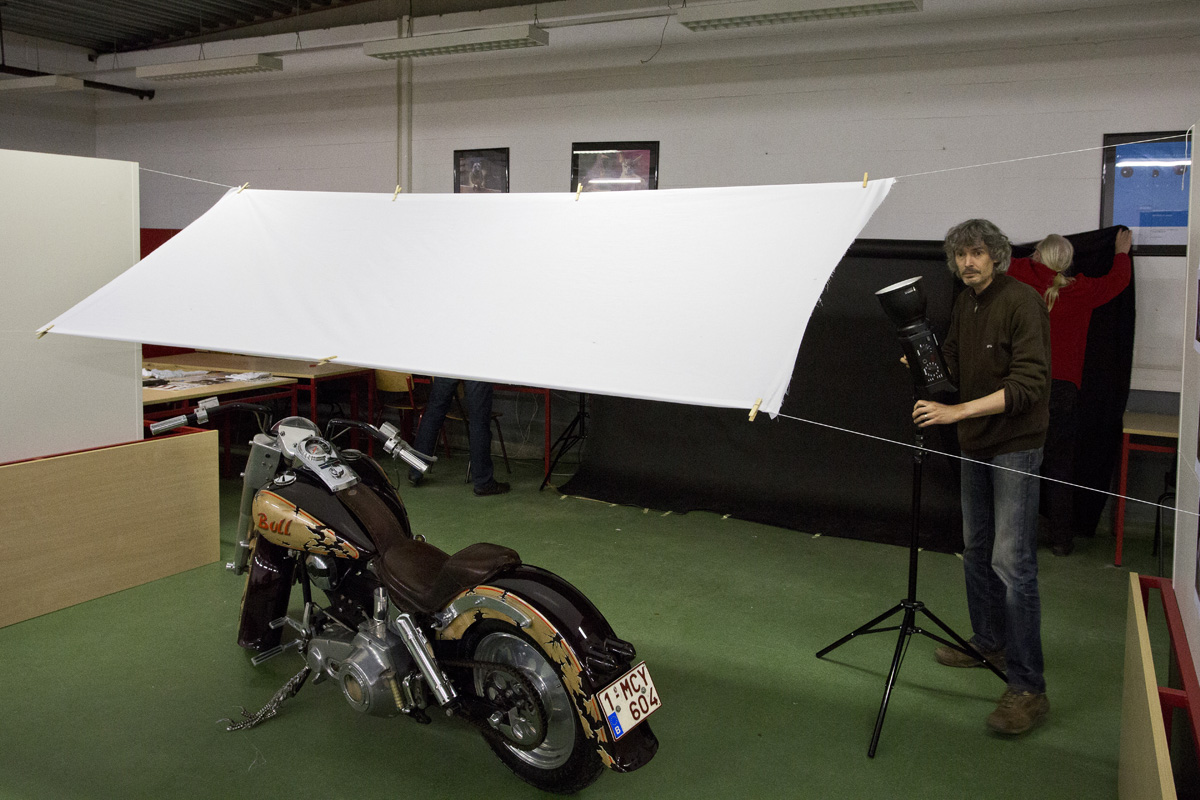
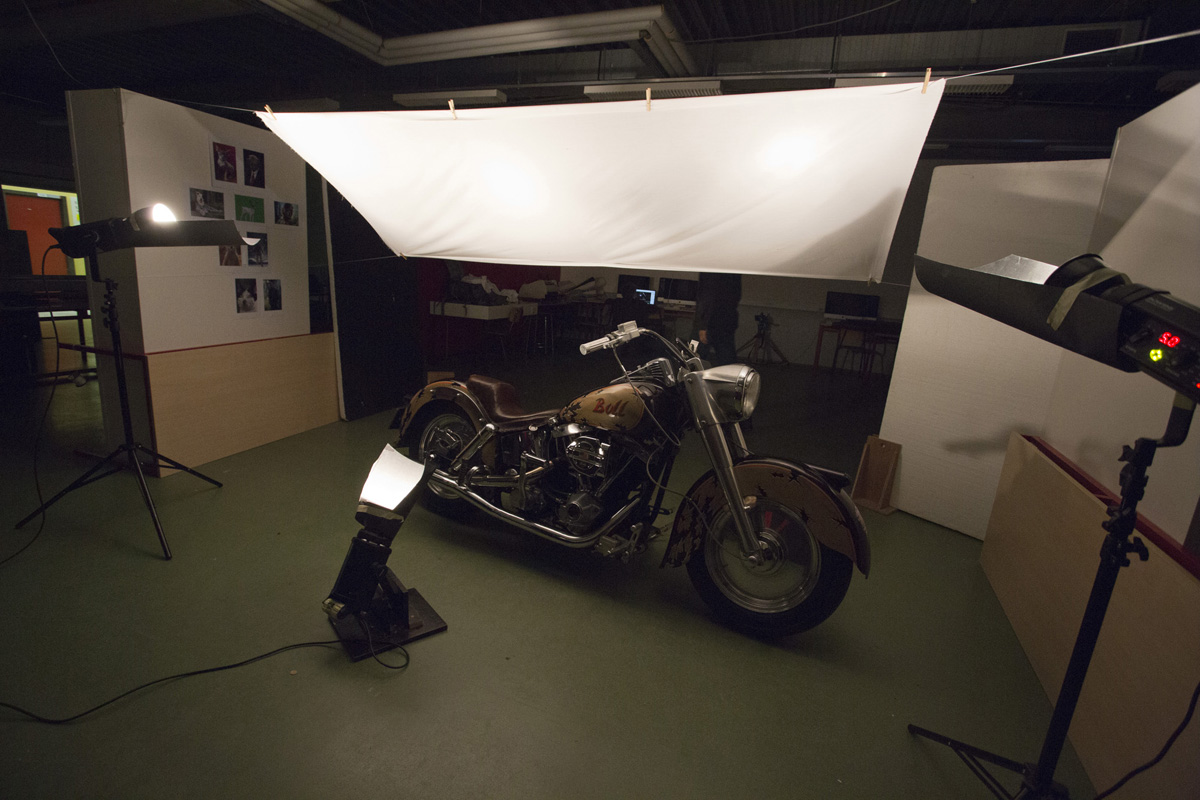
Me setting up a flash light for indirect flashing on the cloth. The cloth will serve as a huge soft box area.

3R7A0603

The setup, seen from the backside, you can see the tripod in the back:

3R7A0607lores

A big thank you to Serge (classmate) for these splendid behind the scenes pictures!!!

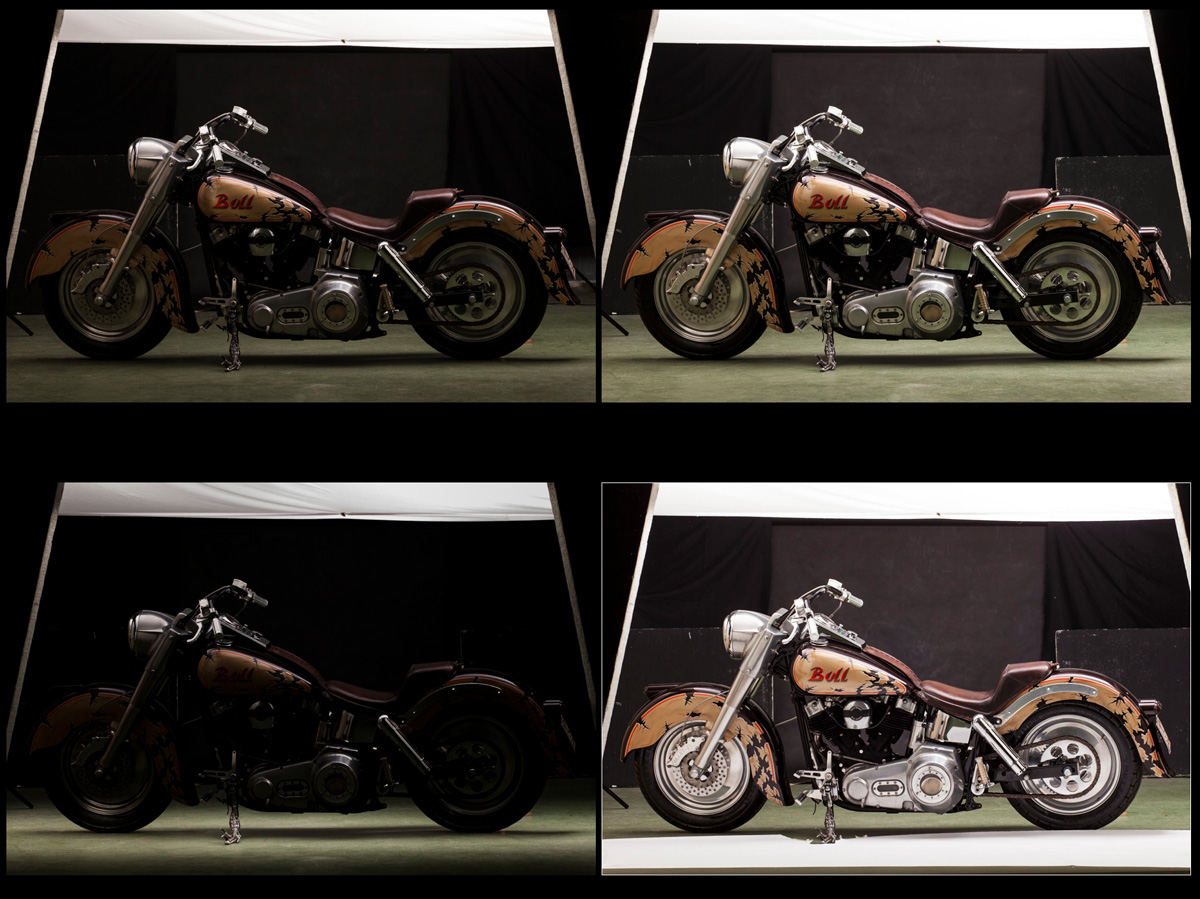
These are the original shots used for composing the final image. Note the shot with the white paper on the floor, for extra light from underneath.

For those interested, the shots were made with the Canon 85mm f1.8 at f10 shutter speed 1/125, ISO 100. Three 600Ws monoblocks at 3/6 upto 6/6 power, indirect on the cloth above.

originals

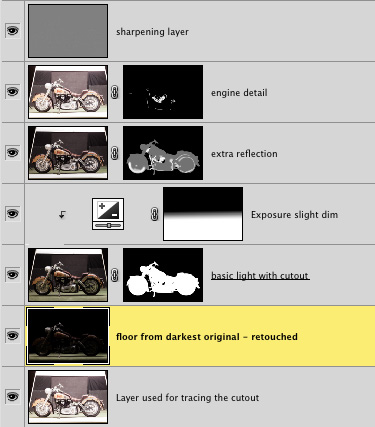
then the photoshop layered file for compositing. I named the layers in english, for your convenience (dutch is not really an understandable language)

photoshop compositing

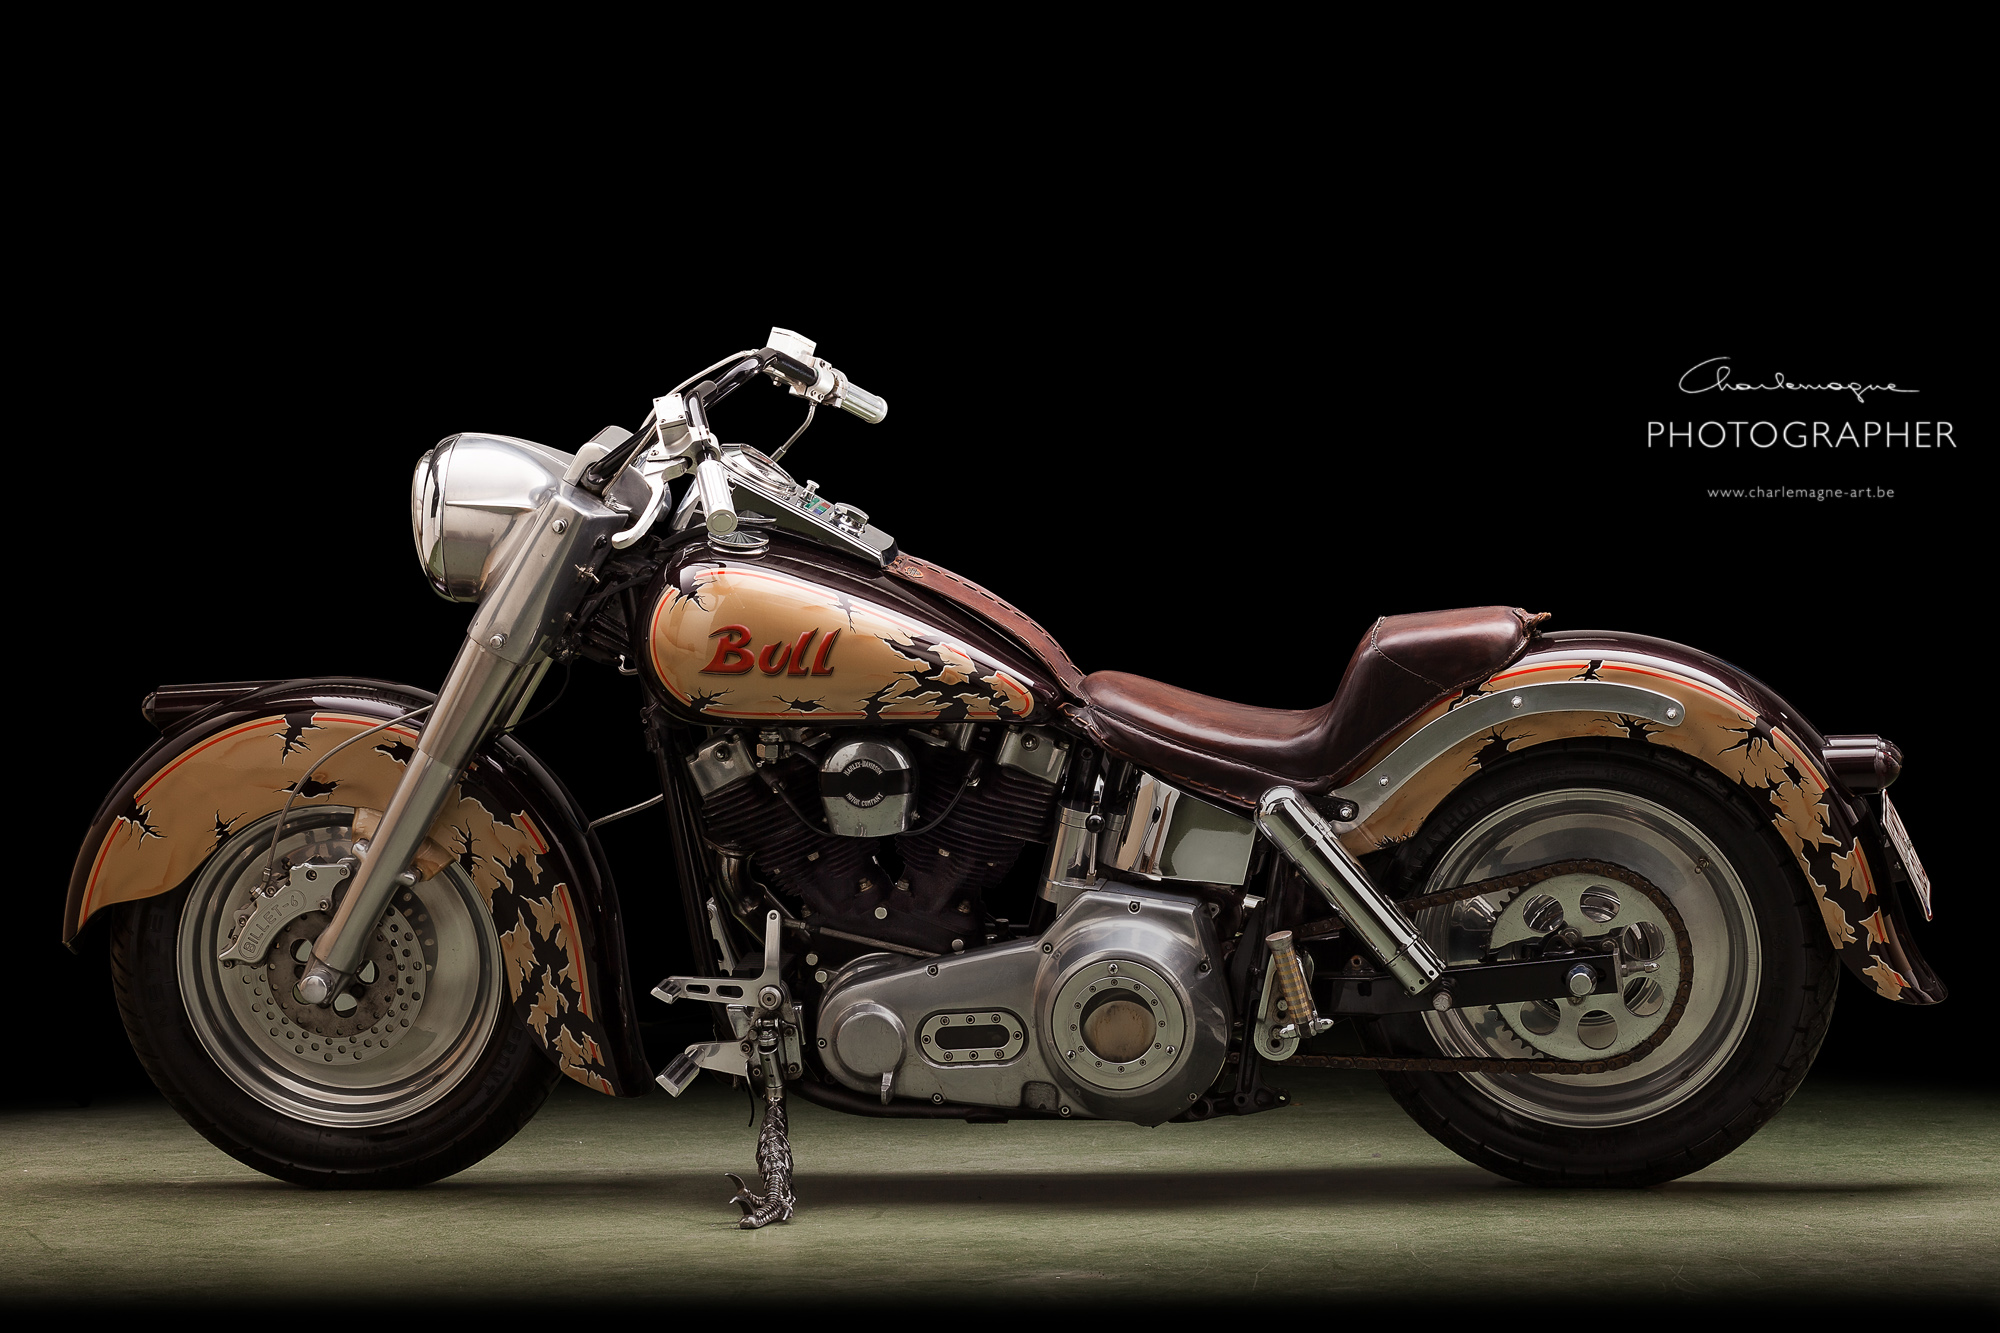
and then at last, the finals, click to see them bigger:

charlemagne-art-Links final

charlemagne-art-Rechts final

A big thank you to Anita, for bringing me in contact with the owner of the bike,

a big thank you to my assistants of the day – classmates Stef, Serge and Geert,

a big thank you to the owner of the bike, Franรงois, for driving about 60 miles to the studio, on a cold morning.

hope you’ve learned something.

take care, and see you soon,

Ludwig

Developing beauty – LR4 – example.

beauty, Personal Pictures, personal tips & tricks, Tips and Tricks

Since september this year I started giving Lightroom 4 classes. I have a group of 18 students, and they manage quite well.

Although there’s quite a lot to learn, most people with a normal level of intelligence, and some motivation and a basic knowledge of computer usage must be able to learn all the techniques available for developing in Lightroom.

The biggest problem however is to get a feeling about what decisions to make when developing. Actually what steps to take to improve an image.

Without claiming that I can give you a perfect example of a perfectly developed image, I would like to show just an example of a image development I did just recently.

I chose to turn it into a black and white image, and used some tinted processing. This is all very individual, and you should always adapt to your personal choice. That’s why this is the most difficult thing to learn I guess. It’s by no means an exact science.

First of all maybe a small light setup diagram, to show you how this image was lit.

Left you see the light diagram. I have two monoblock heads with soft boxes headed straight at my model. (one octa and one smaller square box) They are about equally powered, both on the lowest setting to allow for a large aperture setting. EXIF: ISO 100 – Canon 85 mm f1.8 at f4.0, 1/125 sec. Canon 5D II.

You can see two behind the scene’s pictures from my friend Michel. In the middle You see me metering light at the approx spot where my model will be, and at the right you see me working with the model. -Click for bigger image-
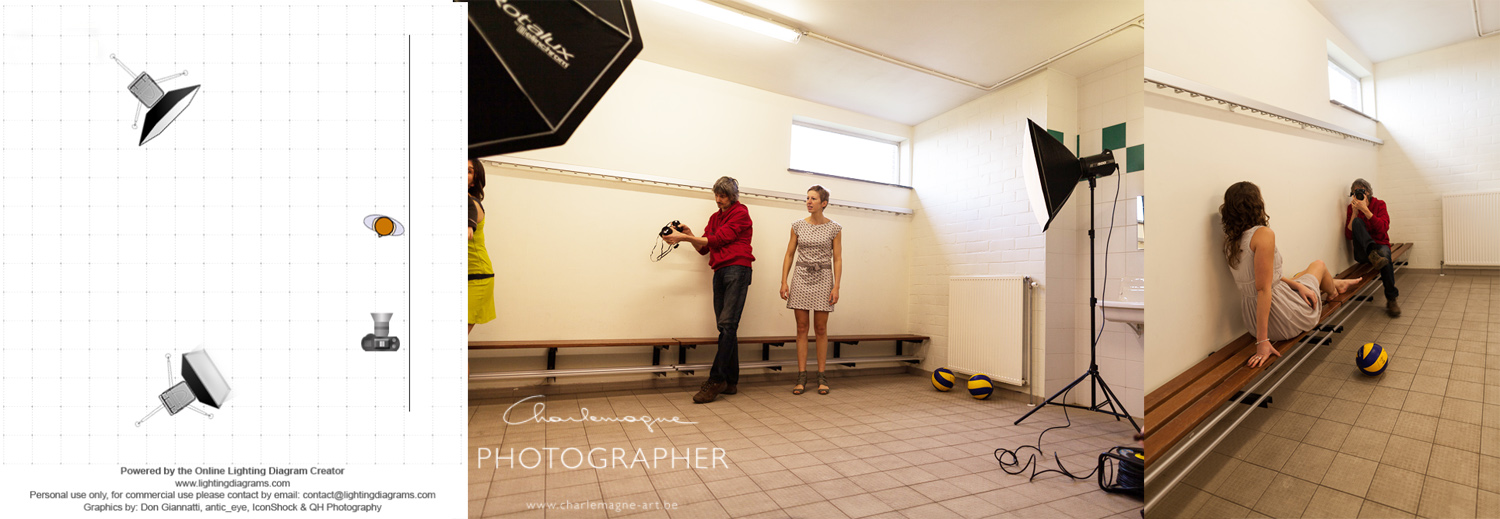
Location light setup

I have fairly evenly lit images with this setup, with the white wall bouncing back a lot of light to the shadow side of my model.

Next image shows the four stages of development:

Left: straight out of camera, no development settings applied in LR.

2nd: just some basic overall adjustments

3rd: Conversion to BW and split toning applied

last: final, local corrections applied

-Click for bigger image-
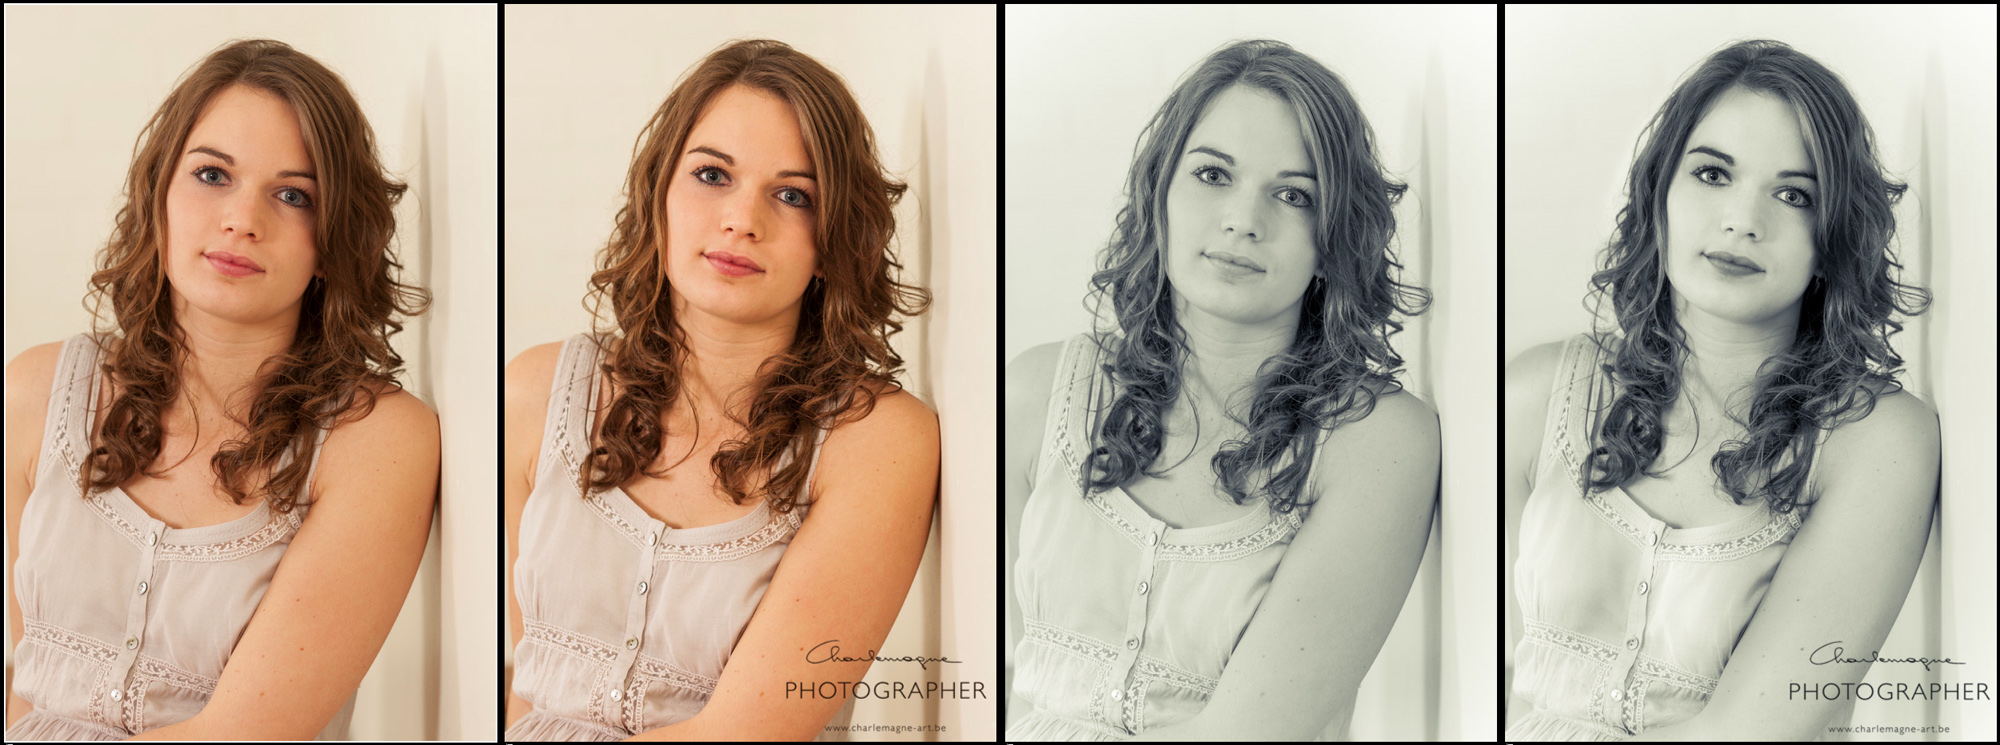
charlemagne-art LR4beauty developing process

Some more into the details:

2nd image corrections:

I adjusted white balance to 5500 (5D II chooses 5600 for flash)

Added some contrast +20 to give some more punch to the overall image

Shadows +26 to brighten up the shadow side of the model

Clarity +15 I feel like using clarity slightly makes the details stand out more

that’s all

3rd image corrections:

I rather bluntly converted this image to black and whit by dragging all saturation sliders in the HSL to 0.

Furthermore I experimented with the split toning colors and came to this setting: Highlights hue 67 – saturation 24 – balance 0 – Shadows hue 235 – saturation 19

This gave me a rather flat (for the skin) black and white – toned image.

The Split toning (or cross processing) is a good feature, but is often used to create a wow effect on an otherwise not so interesting image. Beware of it’s use!

About the black and white conversion, the image could have converted with some more lightness in the oranges, to lighten up the skin, but I did it afterwards with local brushing.

In between these, I applied some local retouches to the face, to remove some blemishes and imperfections. I worked around the eye and just under the lips. Far from correct, but just a quick edit.

Settings: Heal, with an opacity of 66
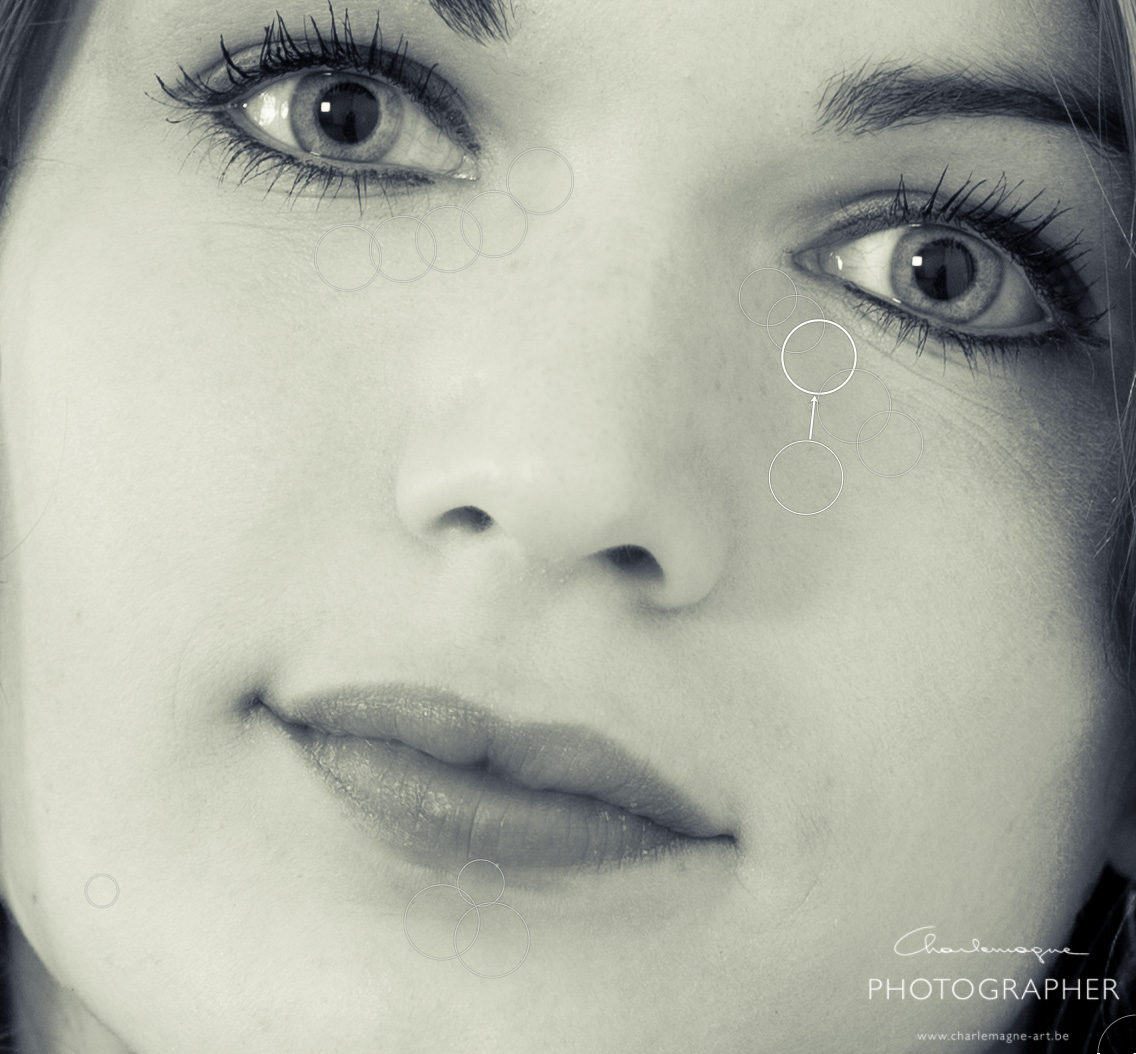
Charlemagne-art_developing_local blemishes

and then for the final corrections. I have used different brushes, and will show them all stripped apart. Here are the brushed images for each of the corrections. Sometimes I have to search for myself what is the best setting, so some brushes may undo some previous ones. Unfortunately you don’t see the image change, since I have all effects applied on every image. This is just to show you the different area each brush is applied to: -Click for bigger image-

charlemagne-art_processing_local_adjustments

then from left to right, what did I apply in my brushes (local adjustment tool):

1. Exposure 0,41 – Shadows -30 A rather bluntly applied overall skin enlightenment, also applied to the hair, but there I took some away again after.

2. Exposure -0,71 – Added some extra volume to the arms and face.

3. Exposure -0,27 – Contrast 54 to give some additional punch to the facial features. (eyebrows, eyelashes and lips)

4. Exposure -0,53 To accentuate some volume in the female shapes (I’m not into plastic surgery, but this is something I sometimes do)

5. Exposure 0,70 Idem

6. Exposure 0,26 To highlight the iris a little bit

7. Exposure 0,71 To soften the eye rings

8. Exposure 0,61 To clear up the eye whites a bit.

I’ll leave it up to you if this is a better image than the one I started with. Again, this is to each and everyones personal taste. Most of my images I don’t process that much, and this took me some 5 minutes all together.

Finally some more images from the same shoot, processed in the same way. -Click for bigger image-
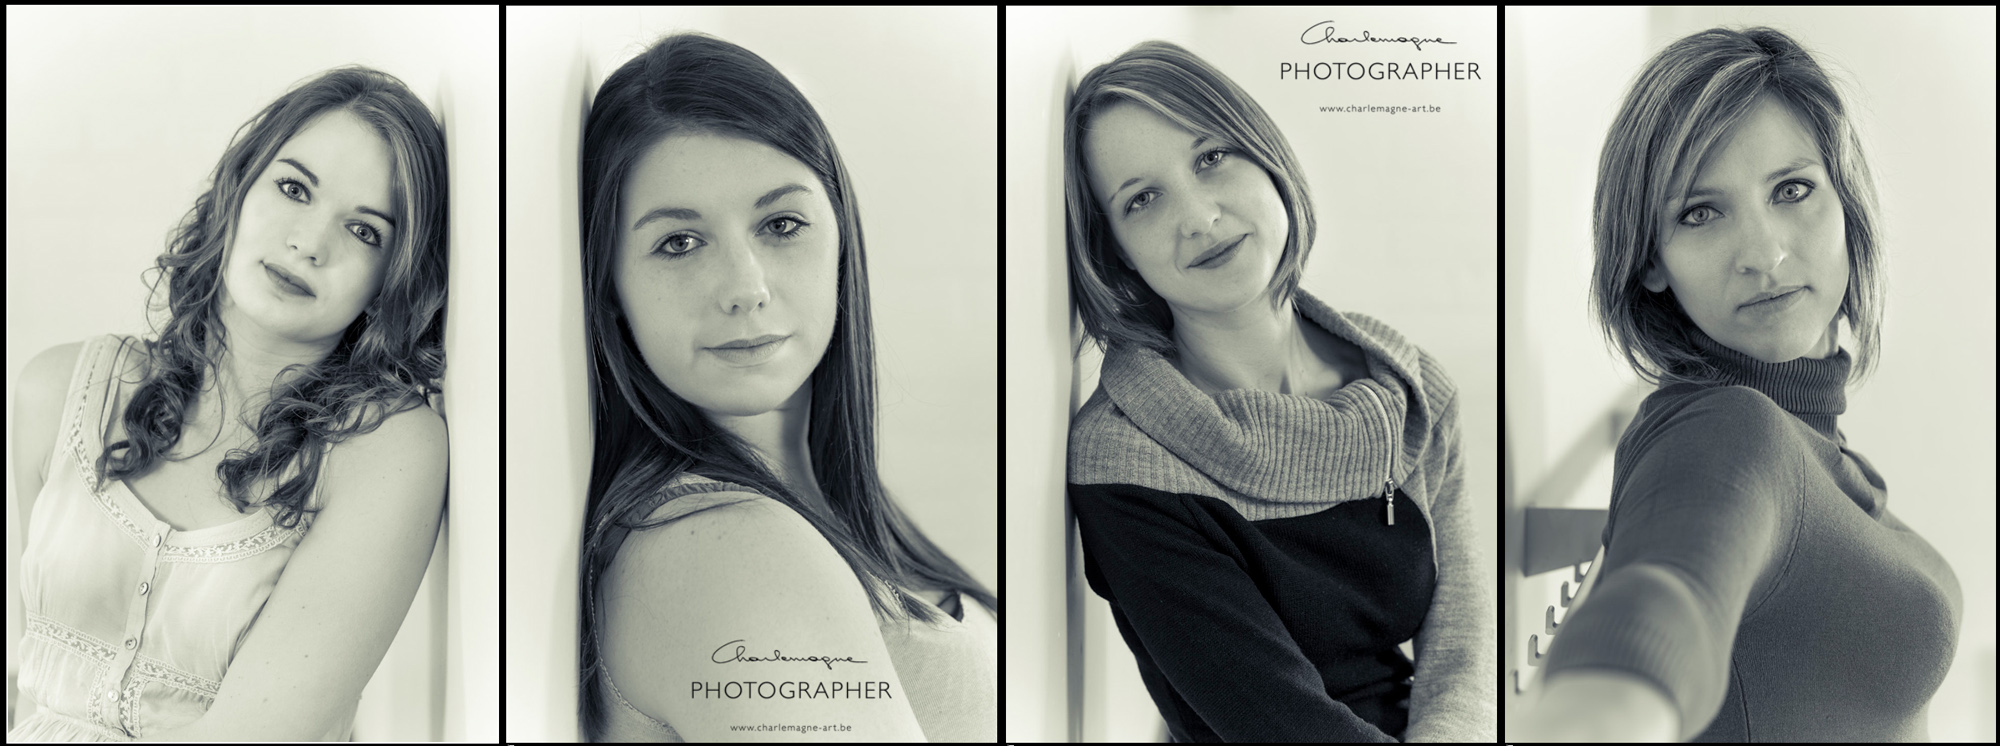
charlemagne-art_processing_beauty

Thank you for reading, come again soon!

Ludwig – alias Charlemagne –
Simple setup for kids shoot

people, Personal Pictures, personal tips & tricks, Tips and Tricks

I did some kids shoots in the previous weeks and I wanted to share this simple setup for nice pictures.

I was asked to do some portraits for a cousin and then with the same setup I took some pictures with our two boys together. Setup is the same and is like this:

I have a simple black cloth as a backdrop, a flashgun EX 580 II with a small softbox on a stand as a main light, a large styrofoam board (220×120 cm) as a reflector panel and a second flashgun (snooted with a self made insulator foam snoot in the back) to provide some rim light.
The results look like this (not the outdoor shot, nothing to do with this setup):

After the ‘brothers’ shoot, we had some fun with a balloon. They threw it up before their heads, and I shot it when it just passed their face. (I admit, we had to repeat this several times) I had some fun in photoshop afterwards.

Hope you liked this post!
Ludwig

North Sea

landscapes, Personal Pictures, personal tips & tricks, Tips and Tricks

Hi,
long time since I posted some new images. I have been busy preparing the two exhibitions and that is now over, with the last exhibition opening this saturday evening. You are still very welcome to come visit the exhibition. (wednesday, saturday and sunday from 14:00 h till 18:00 h. in ‘de Oude Brouwerij’ Ronse.)

I have been to the North sea on april 22nd, and I wanted to show you some images I brought with me. I have further experimented with the ND Grey filters, I used them before in Calais/Cap-Griz-Nez too.
Here I used only the ND 1000 filter, which blocks about 8 stops of light, and let’s pass only 1/1000th of the light. This allows for long exposure times in plain daylight.

The technique is quite simple: you setup your tripod (best a good sturdy one, because when the sea surface is coming over the breakwater, you get some nasty winds blowing you almost out of your clothes.) and make your best composition possible. Verify your normal exposure. Now without further touching your camera, switch to manual focus if not already done, screw on your ND filter and calculate your new exposure time. In my situation, I had to lengthen the exposer time x1000. E.g. 1/100 sec without filter became 10 seconds with filter.
Then wait for the sea tide to come up. Get cold, try to protect your camera from waves splattering on the rocks, almost get blown over, get wet feet, get a rain shower on your head, and then decide you tried your best and try to find some shelter.

All images taken with 17-40 mm on Canon 5D mark II, exposure times of about 50-60 seconds. Aperture f1/16 up to f1/22. The first shot is composed out of 4 exposures, I converted the images to BW in Lightroom, then added a blue’isch color cast in Photoshop.

Hope you liked them, click for bigger version!

ludwig

Workshop announced

personal tips & tricks, Tips and Tricks

I just announced a new workshop for starting photography enthusiasts. It will run over 4 saturday afternoons, and will cover the basics you’ll need to improve your summer holiday pictures. More information on www.charlemagne-art.be .
If you happen to know somebody who’s interested in improving his/her photography skills, this is the occasion. Spread the word.

Hallerbos shoot – BTS

landscapes, people, Personal Pictures, personal tips & tricks, Tips and Tricks

A 10 minutes behind the scenes video from our shoot in Hallerbos.
Some parts are english spoken, in-video conversations are mainly dutch, without subtitles, but nevertheless great to look at. ๐Ÿ˜‰

thanks to Martine and Raf for filming

Enjoy!

Workshop Bert Stephani

Internet tips and tricks, Tips and Tricks

Hi,

Last week I had the chance to follow the workshop ‘advanced speedlight techniques’ with Bert Stephani, contemporary portrait and fashion photographer from Steenokkerzeel, near Brussels.
There were three participants, of the four spots available. We had some coffee to start with, typically Bert I guess. ๐Ÿ˜‰
Bert is easy going, cool, relax and above all, willing to share his experience. We had an interesting day, full of practical tricks and tips.

Some of the lessons learnt:

โ€ข When setting up a light situation, use your hand as a stand in for your model. It’s freely available, and never bored with your tweaking lights over and over again. In the meantime, your model can freshen up or relax a while.
โ€ข When setting up a combined available/flash light setting, first expose for the available light, then the flash, and last but not least, take pictures.
โ€ข When taking pictures with a model, encourage your model, talk it trough the shoot, give clear posing instructions, … introduce mini-breaks from time to time to make your model relax, and to offer yourself some time to think about new ideas. Don’t break the posing flow or the contact between yourself and your model by looking at the results. When your light setup has been setup well, all images should be fine afterwards.
โ€ข Be relaxed and confident as a photographer. Whatever your mental status is, it reflects on your subject and in your images.
โ€ข Work your light situation in function of the story you want to tell.
โ€ข Don’t give workshop instructions and bake sandwiches at the same time. (first bakery products got carbonized)

Some of the strong points of the workshop:
โ€ข Bert has a large studio space – the barn – , offering plenty of possibilities, different light situations, props, …
โ€ข We could freely ask for personal advice on challenging projects and thus influence on the content of the workshop.
โ€ข The atmosphere is cool and informal

Some of the weak points of the workshop: Sorry Bert if this bothers you, I feel like I need to be complete for my readers.
โ€ข The workshop seemed not prepared and rather un-structured and slow-paced. I don’t know if this is typical for Bert’s workshops, or just on this particular occasion.
โ€ข Workshop was marketed ‘including teaching, model fee and bread lunch’, the teaching was there, the bread lunch too, but there was no model, so participants had to stand in as a model for the other participants. I have no problem with modeling as such, but it limits your ‘photography time’ during the day, and on our last ‘assignment’ only one person could be the photographer, so neither me nor the third participant had images from this setup. As a participant I felt I had not the same level of ‘hands on experience’ during the teaching, when I was acting as a subject.

some images taken during the workshop:

struggle for a portrait

people, Personal Pictures, personal tips & tricks, Tips and Tricks

Hi,
I’m at number 15, people who have come at my studio to pose for the professions project. All people I have photographed are un-easy with posing, and it has been a challenge to make them feel comfortable enough to get a good portrait and a nice depiction of their professional occupation.
Last I had a directors assistant and I would like to show you a bit of the shoot in evolution. I always ask people to bring something related to their job, and to be creative in what they bring (otherwise everybody brings a computer nowadays). She had brought a small calculator and a cellphone, because she does a lot of pricing calculations and she is on the phone half of her working time.

First of all I do a shot to verify my light setup, a quick close portrait will do to check on the detail in the highlights and the shadows.

First we tried with the calculator and a portable home phone I have here at hand. Phone in left hand, phone in right hand, didn’t work out to my feeling.

Ok then, let’s try only the calculator, maybe we’re going to get somewhere, … duhhhh, nope, nothing ‘directors assistant’ alike.

Maybe when we use only the phone, the pose will be less ‘forced’ and more natural, try putting a hand on your hip, nice, but not so ‘verymuchbusywithalotofthingsatthesametime’. This looks more like a well dressed woman calling her friend.

Now what do you really do in your job, I asked Ellen, …
Well, I’m often occupied with a lot of papers, trying to fix a date for an appointment in my bosses agenda, whilst running from here to there, …
Oh, okay, let’s find you some papers, an agenda, a pen, and hold that calculator and phone while I go find what we need.
I gave her some invoices strolling on my desk (she gave them back after the shoot ๐Ÿ™ an agenda, a pen, …) and I quickly grabbed my camera.
While she was struggling to get all those things comfortably in her hands, I took a shot, MY SHOT! We did some less panic’y shots for her too, but I had my shot! The directors assistant, getting thrown ten things at the same time to her head, and trying to deal with all of them.

I have no proper background system yet, so I need to do some retouching on the background, painting some areas black, next I do some local adjustments for some extra exposure to the hands, the shadow side of the face, the shadow side of the dress, I add some more exposure to the orange tones and that’s it for my final image.

After that, I took a picture of Ellen and her husband Bart, as a bonus, because I made her work so hard. Thank you Ellen, thank you Bart!

more professions – light setup
people, Personal Pictures, personal tips & tricks, photo gear, Tips and Tricks

And my project on profession portraits goes on.
I have quite some people spontaneously offering to pose for my series of professions. A classical portrait with a – small/not so small – glimpse of the job they do.
Below, you’ll see the library assistant, the plumber, the health coach and the actuaris. For you to find out who’s who, can’t be too hard I guess. – click on the images to view larger if you have difficulties finding out –

for my fellow photography enthusiasts, I’ll include a more detailed light setup, which is actually very simple:

1. I have a black cloth hanging up in the back of the room 3 to 4 meter behind my subject.
2. I have a reportage flash (Canon 580 EXII) in a 70×70 cm softbox from Lastolite on the right of my subject, which is my only light source. It is set at 1/4 +0.7 power and very close to the subject (maybe half a meter). I put it so close because this allows me to lit only my subject, and have the background almost black, thus reducing the post-processing. it is at the subjects head hight, slightly aiming down.
3. I have my large Lastolite tri-grip on the left side, on the ground + my diy reflector on a small stand, I had to use this extra reflector, because otherwise I don’t get enough light on the shadowside, and I recon my own reflector is just a bit more reflective than the trigrip, which is larger but softer.
4. I’m at about 3,5 meters distance from my subject, at about hip-height, to make my subject seem larger and fiercer, more ‘standing out’ I use my 85 mm 1.8 lens, at f8 on a full frame camera, to get a decent sharpness overall.
5. I have different subjects ๐Ÿ™‚ They are all uncomfortable with posing, believe me! I ask them to turn their body slightly towards the main light, looking at me. Then we do about 15-25 shots, until I think we have a good shot, representing both the personality and a good pose.

The images are taken in colour, as raw files, and treated in LR afterwards. I use the standard BW settings, but have some minor local corrections with adding or removing exposure. I then remove the unwanted parts in the image (my background is not large enough for this distance, so I need to remove some ceiling that is not black, sometimes I need to move a small part of the reflector on the left.

I hope you like the pictures, if you are willing to pose for me, please give me a sign trough email or by reacting to this post. In return, you’ll get the chosen image in high resolution, free for personal use.
If you have any questions about the setup, ask it.

ND filters

personal tips & tricks, Tips and Tricks

Hi,
I bought 2 neutral density gray filters some weeks ago. I would like to show you some results.
ND filters are used to take away light from the scene, to a certain amount.
There are two different types of ND filters on the market: fixed stop value filters, and variable filters. The latter work with two polarizing filters rotating over each other, and they have a stopped down value between 3 and 8 stops. The fixed value filters consist in a single sheet of shaded gray plastic or glass or whatever. The Polarizing filters version has the advantage that you can vary the number of stops of light blocked, they have the disadvantage that they create an interference pattern when used at the darkest setting (showing as a darker cross in your image, especially when used with wide angle lenses on a full frame body)
I have bought a 3 stops (also called 8x because it allows only 1/8th of the light to pass) and a 10 stops (also called 1000x) ND filter, for my 17-40 mm wide angle lens.

a 1000x ND filter blocks 999/1000 of the light, this makes it possible to use long exposure times in full daylight. The examples below are from 20-80 seconds for the exterior images, 400 seconds for the interior images. This makes all moving subjects fade away, to the point of becoming invisible if they do not halt during the exposure time. I have taken images of a crowded train station hall (Gent St.-Pieters) a very crowded shopping street (Gent Veldstraat), the E40 Highway on a very busy day, … without moving subjects visible.
One remark, the 1000x ND filter creates a lot of vignetting and a white balance shift towards red, I’m not sure if this is a typical ND filter thing or specific for the ones I got.
I also joined two images without the use of the ND filter, to make obvious what the effect is. Click for full size!


DIY reflector

personal tips & tricks, Tips and Tricks

Hi,

everybody will know the difficulties of shooting a model in bright sunlight. Working with the model aimed at the sun will get you peeping eyes, working with the sun in the back will get you dark faces, unless flashed. Most fashion/model shooters use reflector screens to overcome this problem. Model with the sun behind, light reflected towards her/him to light up the model. Most famous make is Sunbounce. A decent reflector will make your purse at least 200 euros lighter, similar size as the one described here.
I’ve made a diy reflector last week. Cost to me: 0 Euros, because all re-used materials. Cost if materials bought new, probably below 10 euros. Time to make it: 15 minutes.
1. Take a insulating board, styrodur, (polystyrene) or similar, in a handy size. Mine is 60 cm x 125 cm. (approx 25 x 50 Inch) Make sure it is rigid, not styrofoam, since this will more prone to breaking.
2. Use some dots of silicone/adhesive, spread all over the board, slightly more concentrated on the edges to ensure a good fix. Rather use dots than lines
3. Cut a length of radiator reflector foil (the kind of foil you fix behind a radiator, to prevent the heat from entering the wall in stead of heating your room) , slightly longer than your insulating board.
4. Spread it nicely over the insulator board, reflecting side outwards ๐Ÿ˜‰ . Press gently all over the surface, to make sure the silicone or similar gets well spread.
5. Trim the edges of the reflector foil to match the size of your board. Let stiffen the silicone.
6. Done.

I’ve been using it in my last shoot, works very well. Can’t compare to the real thing however because I don’t have one, but I saw my model peeping eyes when I came too close with it.

Free lensing

Internet tips and tricks, Tips and Tricks

Hi,
I found out about free lensing yesterday. Checked some references on the web.
This is what I found. Free lensing is the technique where you take pictures with the lens off the camera !
So, you get your camera, screw your lens of, and hold it before the cam to take pictures. Crazy huh!
What are the consequences:
No communication between camera and lens, so no aperture settings, which means you’ll work with full aperture opening of your lens. (unless you use an older lens with aperture ring)
No AF (you could have guessed that yourself, couldn’t you?)
No IS (image stabilization) of any kind. You’d be happy if you manage to keep lens and body more or less stable.
risk of dropping your lens while manipulating your camera.

so what on earth would make you want to do this?
by taking of the lens, you can play with the image DOF plane, like with a technical camera, a tilt-shift lens, or whatever system that allows to move the lens independently from the film plane (sensor plane)
this means your sharpness plane no longer runs parallel to your film plane.

a bit difficult to understand maybe, but look at the images.
You’ll see that I get sharp and unsharp in the same depth plane. Text on monitor is supposed to be flat, although only some lines are sharp, the others are not.
The lamp cover has some pearls sharp in front, some in the back, none in-between.

I’m not sure this is the best technique for tack-sharp images, but it can produce very artsy images at least. I took these some moments after I read this post, so I’m an absolute beginner. I will possibly never do something serious with this, but I thought it was funny enough to share.

If you want to give this a try, please note:
I won’t take responsibility for damage to your camera or lens.
Keep i mind that the sensor is at some moments disposed to the outside environment, never attempt this in a dusty area.
Lenses developed for a full frame camera will give better results, due to their bigger image circle.
try using some old analog lenses, they are cheap, and always developed for full frame negatives.


Low Key selfportrait

Internet tips and tricks, people

Hi,

I had to make a selfportrait today for an article in the Dutch online magazine EOSZINE.

after some web-surfing, I stumbled on this youtube video: about low key portraits anywhere.

Basic principles are: fast as possible shutter, and small aperture will get the environment black. The flash will light up the subject (me). Since I have not really finished my Studio, I thought I’d give it a try.

This picture was taken with my ‘old’ EOS 450D and the 50mm f1.8

Setup: flash just left of me, trough umbrella 105cm, 580EX II flash at 1/8th power, manual mode. Triggered with Cactus V5 transmitter.

Camera: 1/250th f9.0 ISO200

(actually the camera doesn’t sync at 1/250, it has a max sync speed of 1/200 but the black band is hidden in the black backround on the left side)