Film ‘scanning’ with the DSLR camera

Analog, Lightroom, personal tips & tricks, photo gear, Tips and Tricks

Ok, something I wanted to do for a long time:

On some fora, people have been asking how I scan my negatives, actually I’ve quit scanning, and digitise my 6×6 negatives with the Canon 5Ds high resolution camera, and a Canon 100mm Macro lens. For me it is quicker than scanning, I get a RAW negative file to work with, and I had all gear I needed for building a simple setup.

I have been looking for a new scanner for a while, genre Epson V800, but found them to be a little too expensive for my taste and limited use. I already had this Canon 5Ds camera, and I had a Macro lens, so I wanted to give it a try digitising with the camera in stead. I’ve built this setup to do so, (actually writing this blog post has inspired me to make it even better) …

see images below …

• I have two lamps (generic building LED lamps from a DIY store) that I point to the back, where I have a white foam board installed. I don’t care about the white balance because I work with black and white film, so I get rid of all colour anyway.

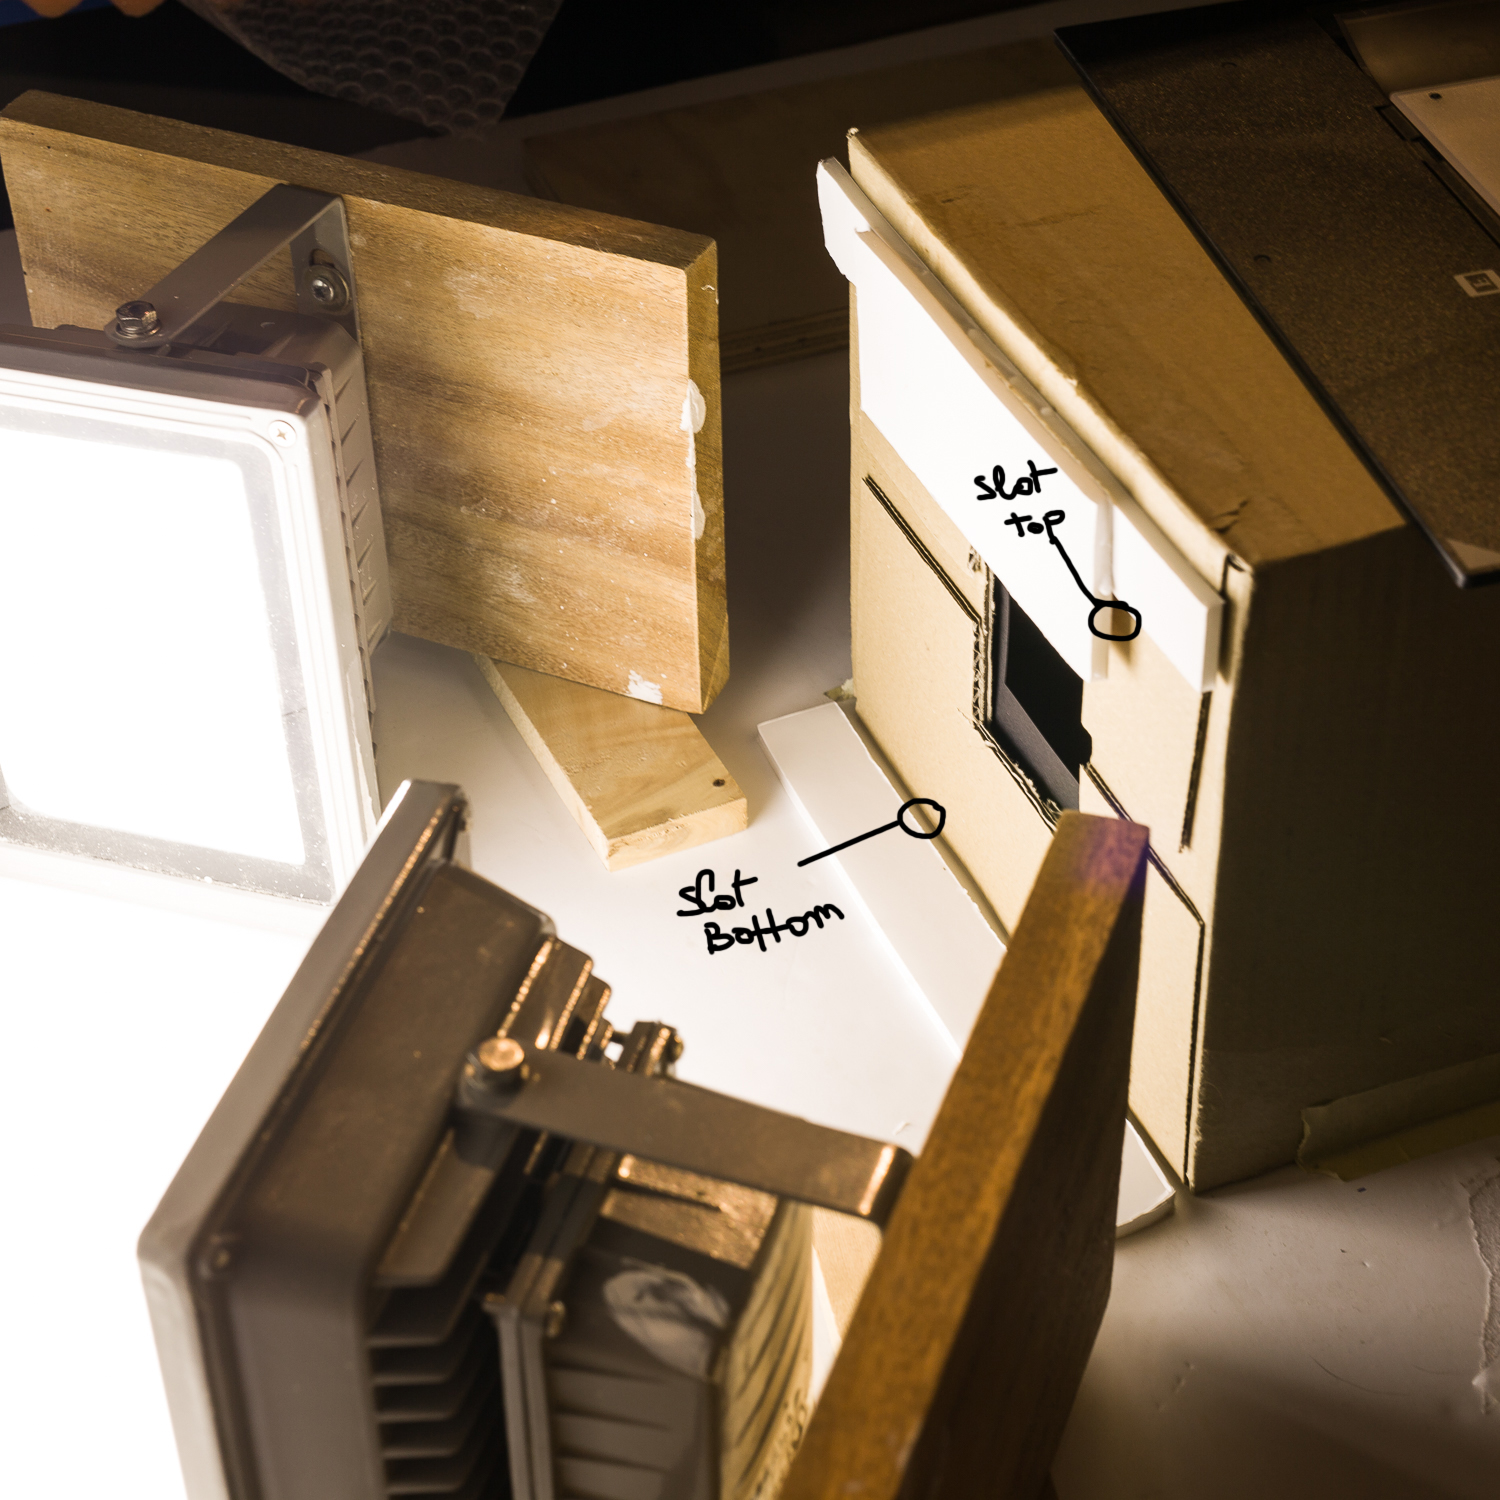
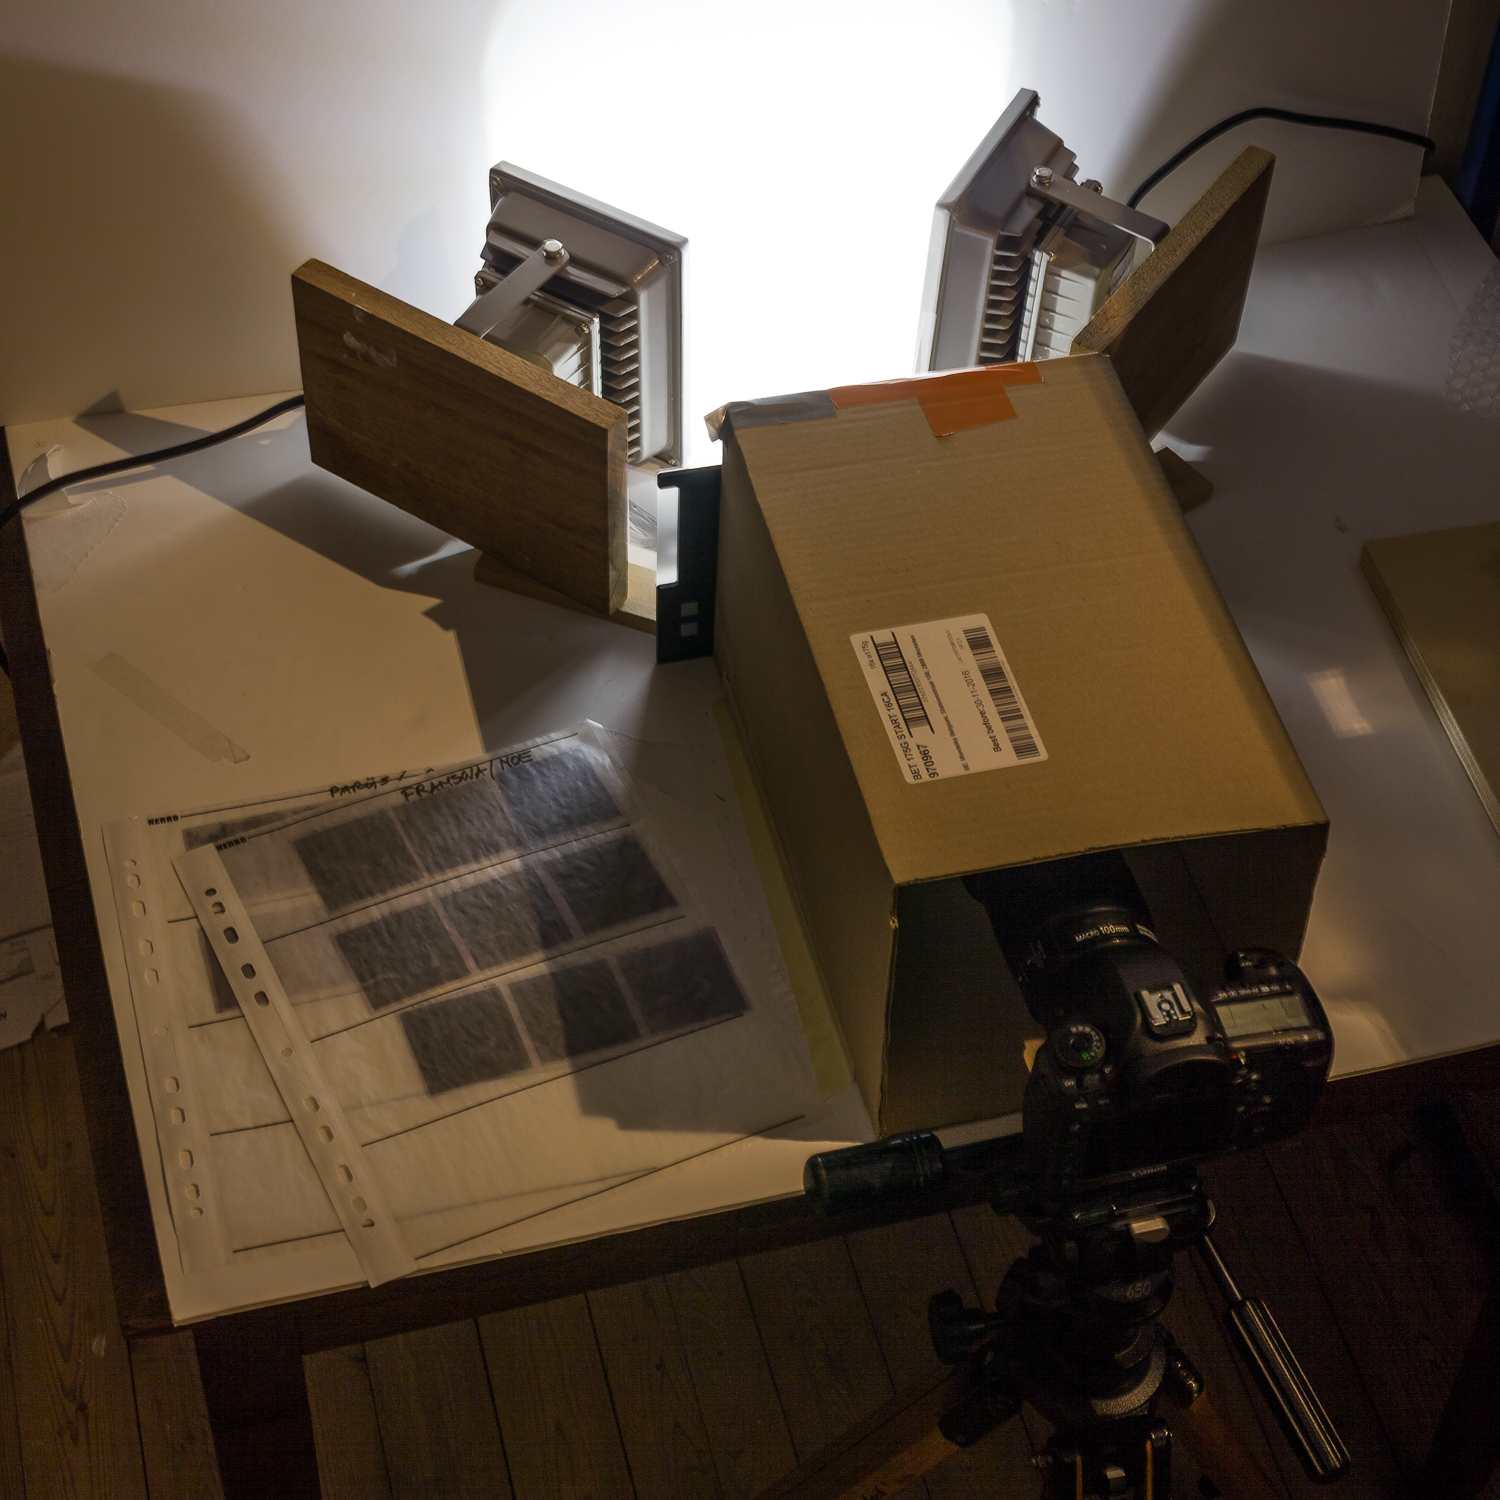
• At a relatively small distance (30cm – 1 foot) I have a cardboard box, fixed to a base board (same white foam board, cardboard box taped to it), with a hole in the back end, a little bigger than the negatives I am working with. On the inside of the box, I have put a black paper, with a square cut hole in it, to better fit the actual size of the negatives. The front side of the cardboard box is open, and takes the camera.

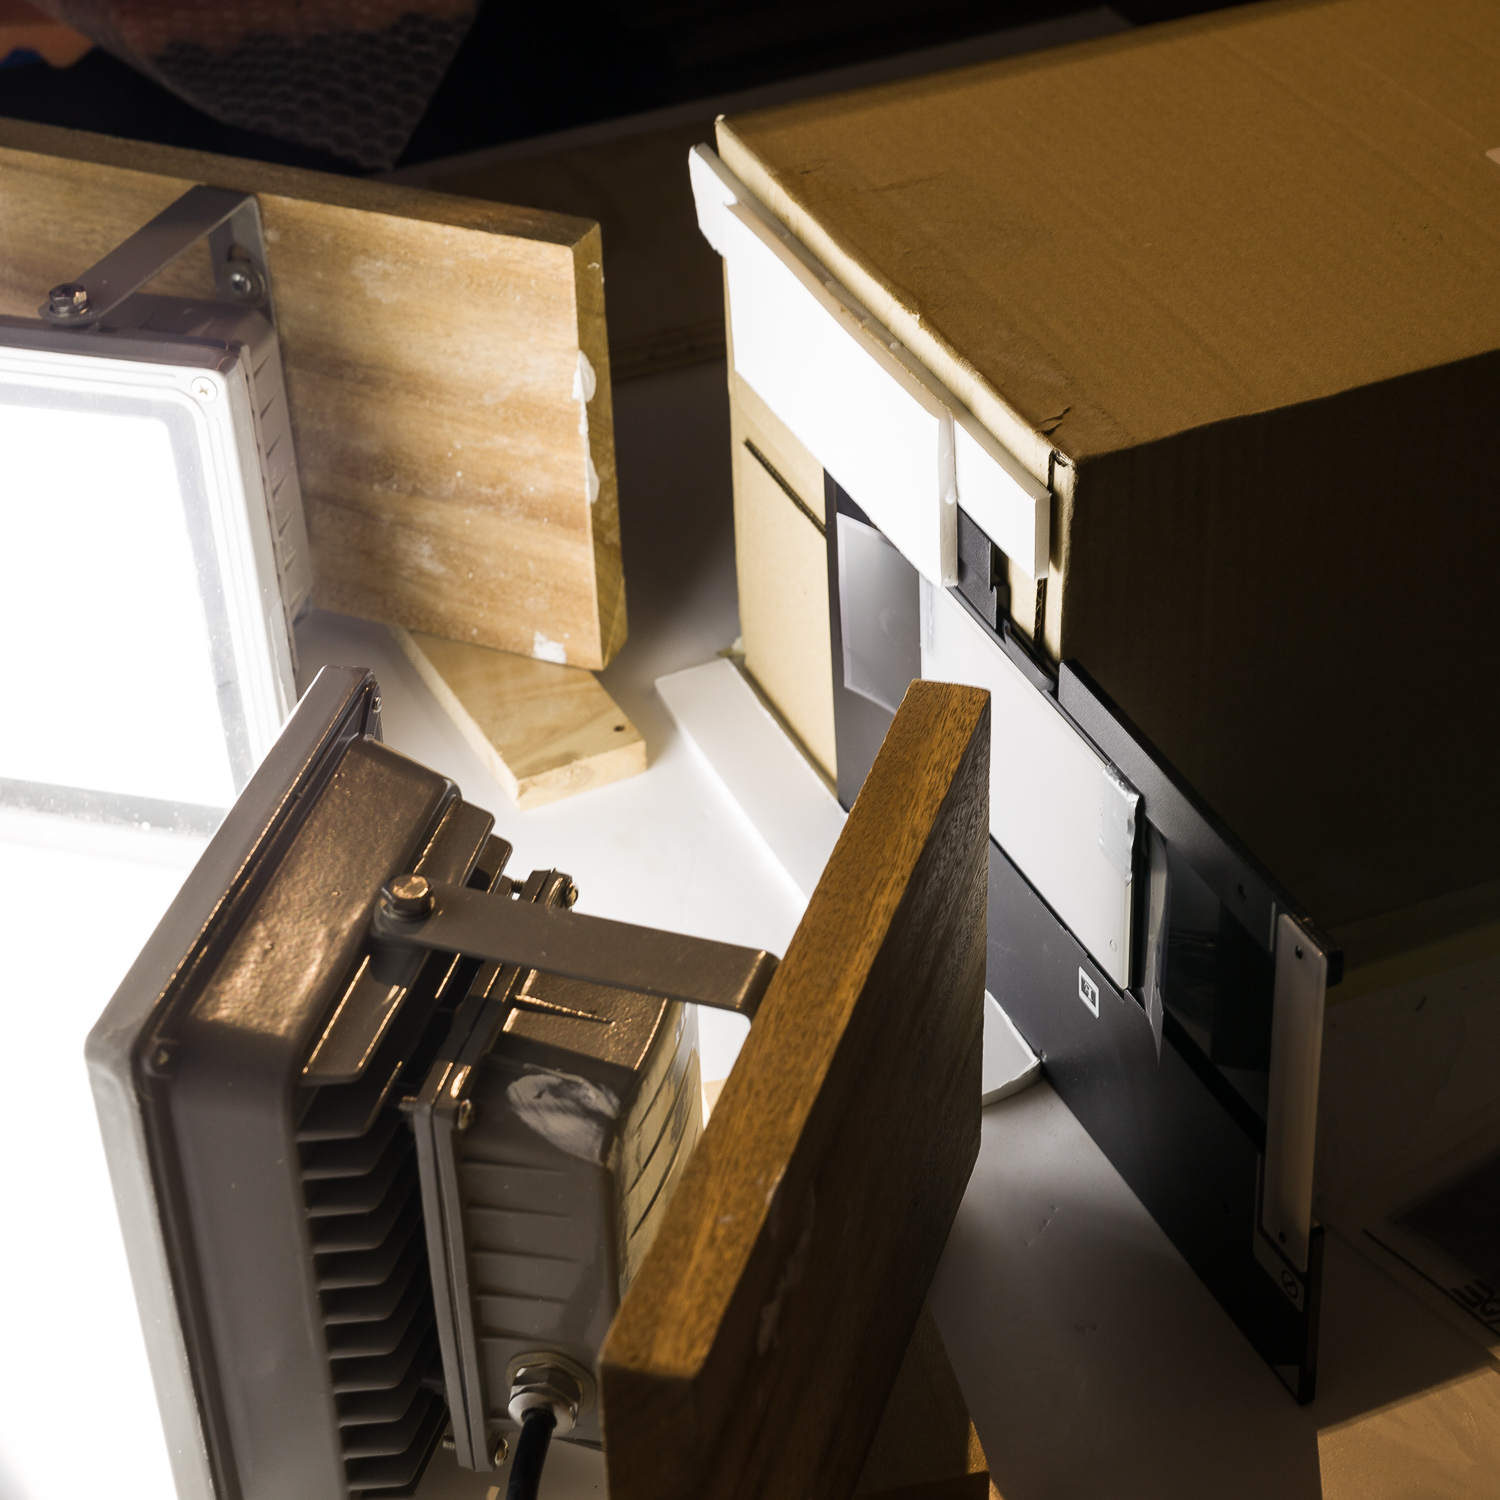
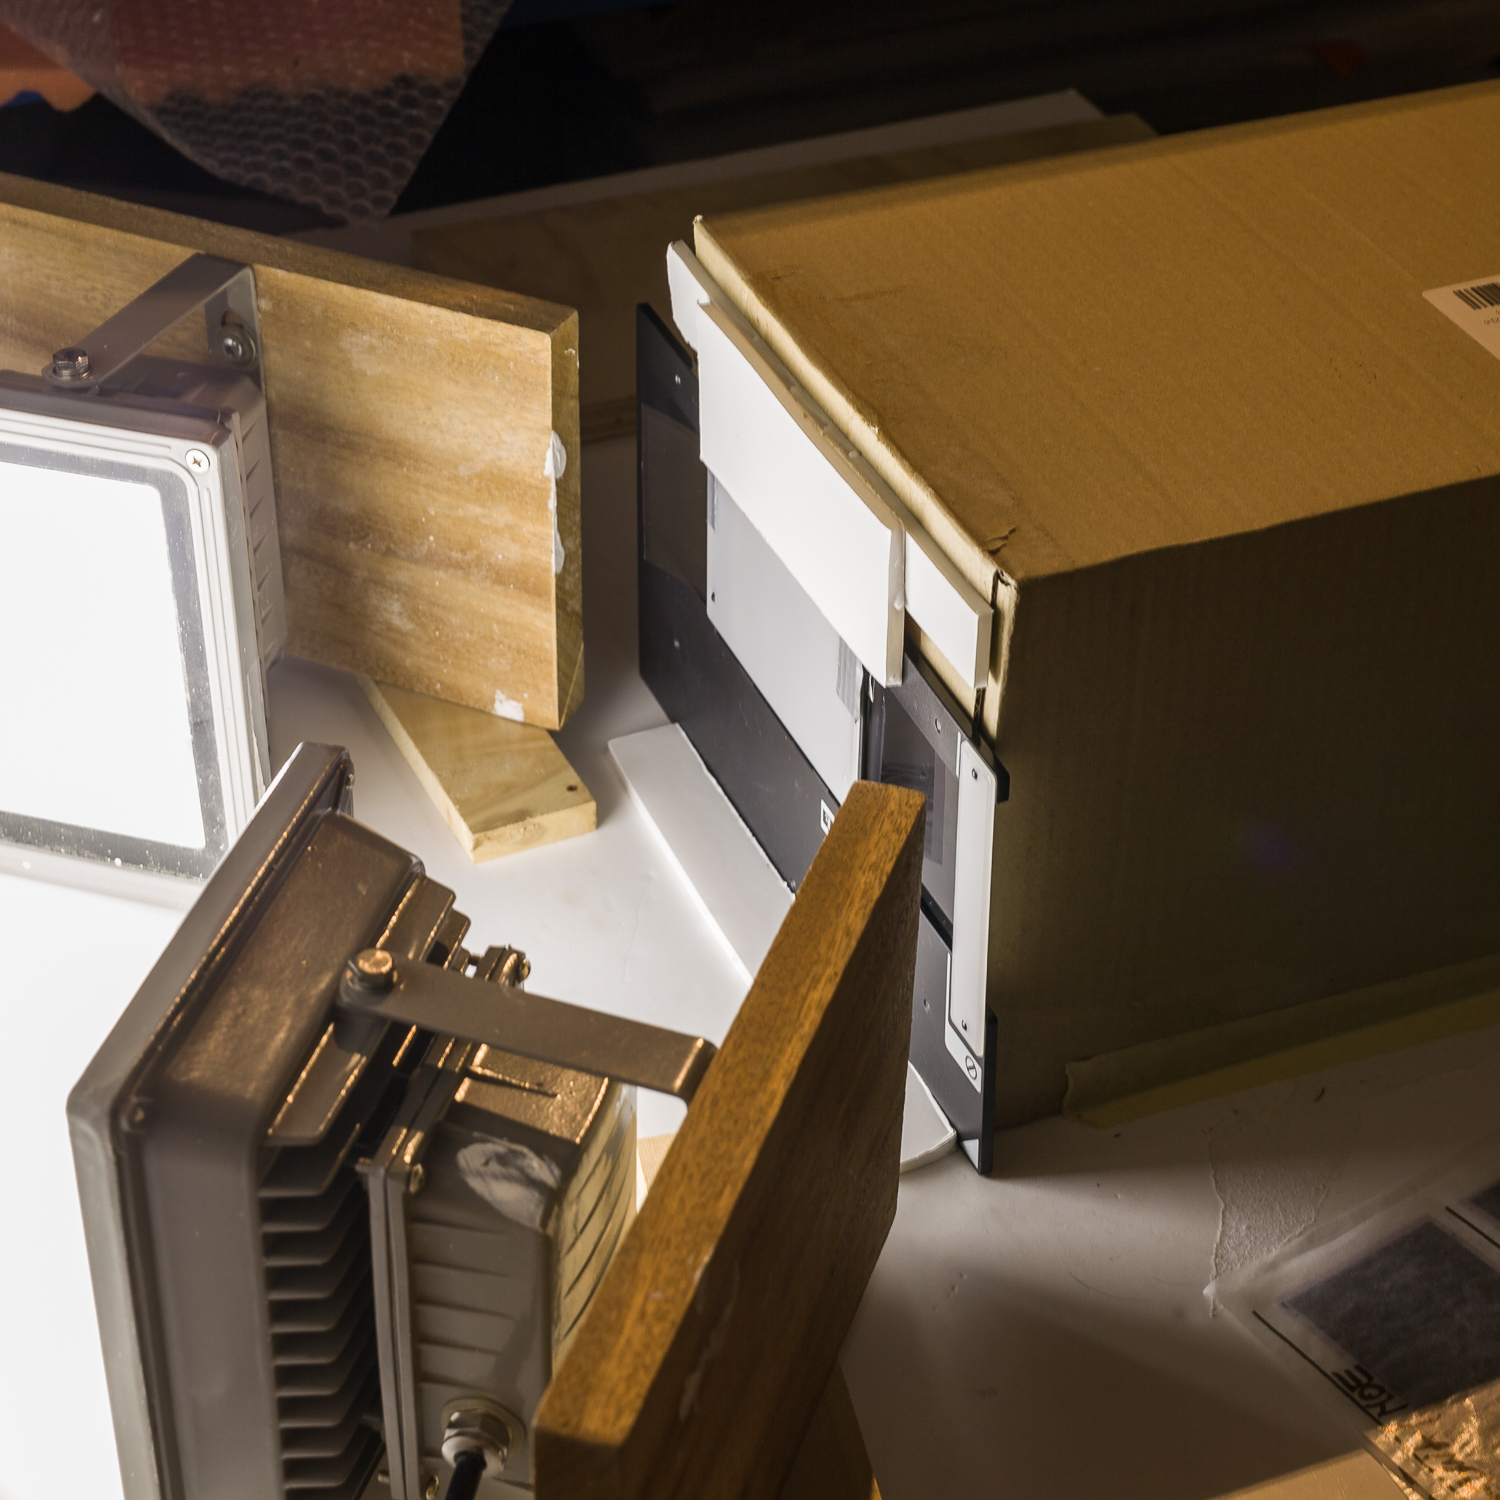
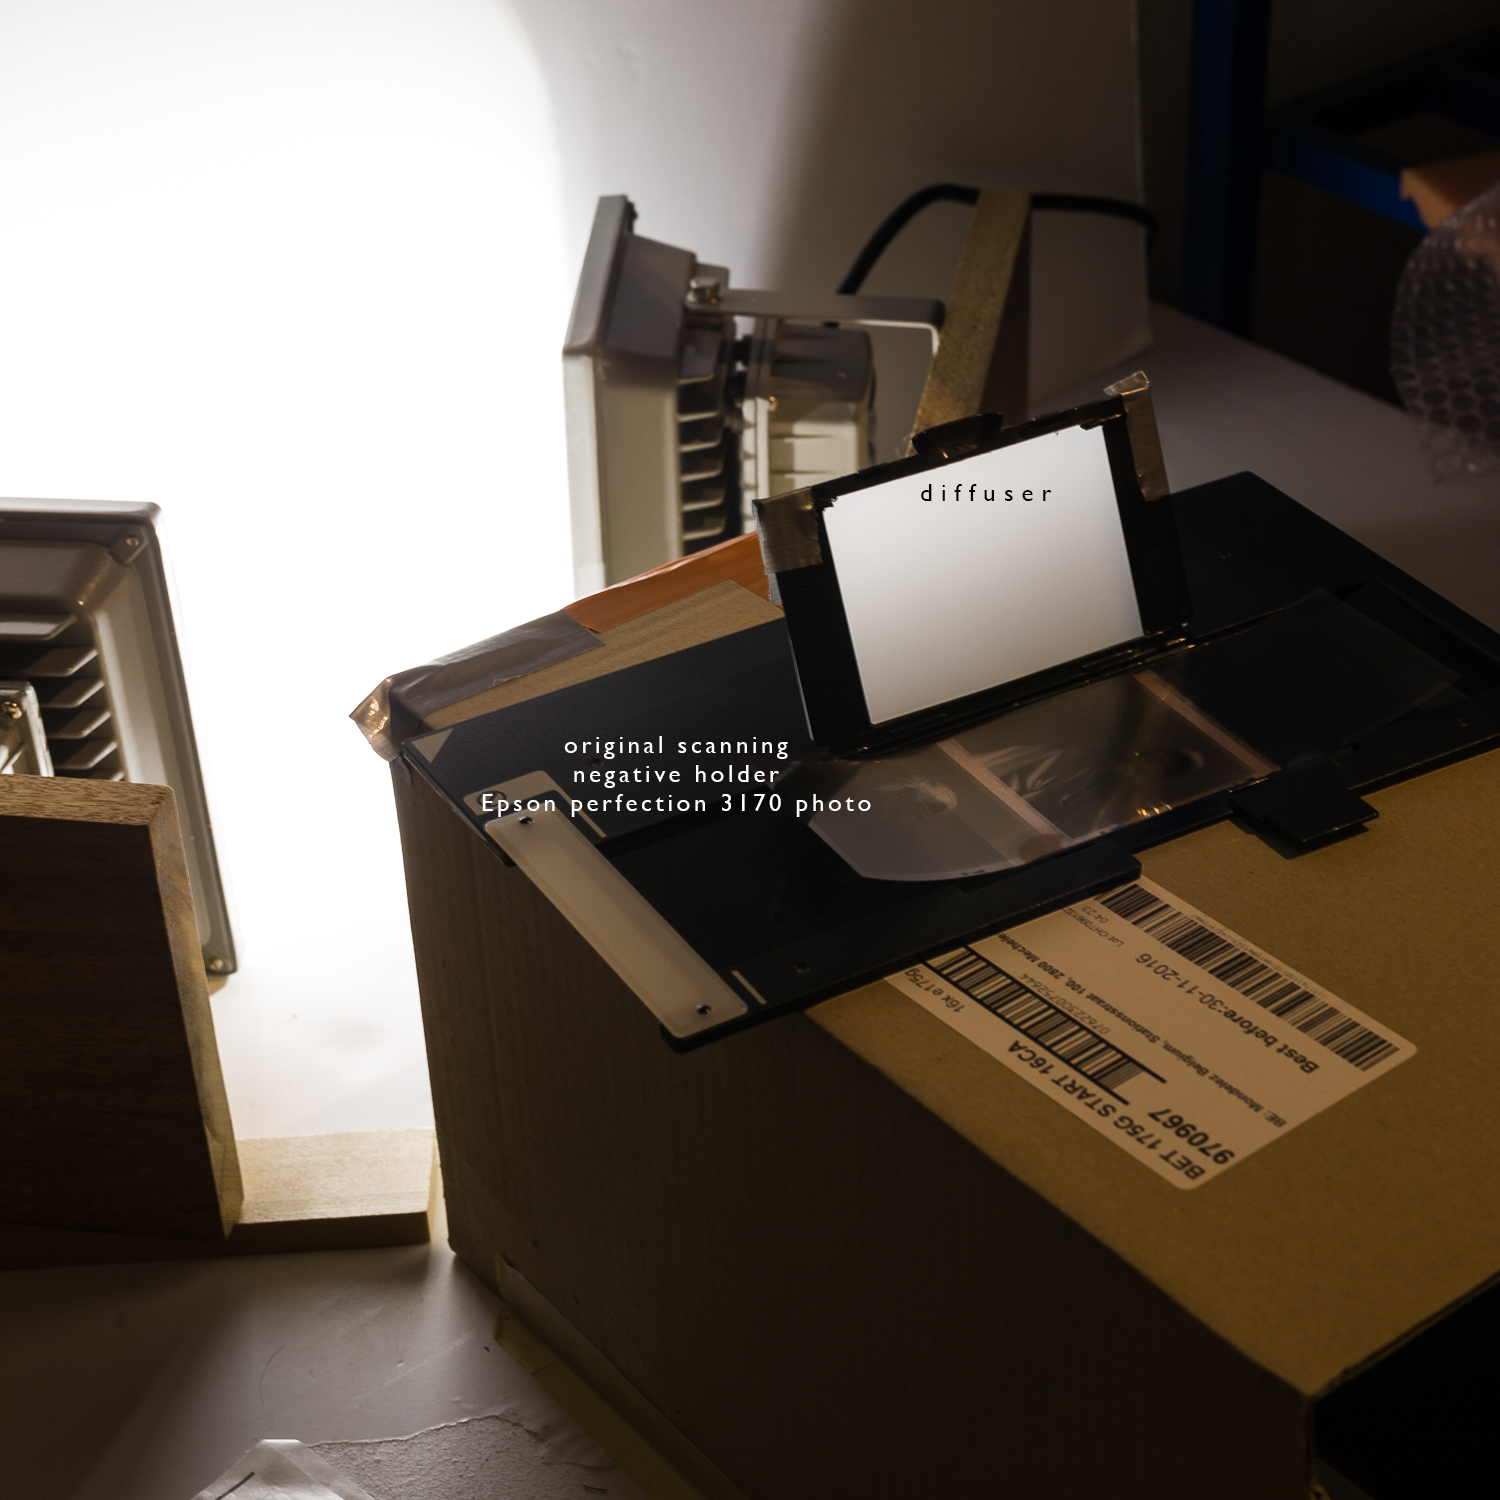
• I use a negative holder from an old scanner, but I cut the film frame a tad wider, to be able to see the negative’s edges all around. I kept the original diffusor window.

• On the base foam board, I fixed a sort of slot (foam board strip with double sided tape fixing) that holds the bottom of the film holder, between the slot and the cardboard box. On top of the cardboard box, I fixed a second slot, that holds the top edge lid of the film holder, and I slide the film holder in from left to right (right to left on the images)

• I put my camera to fit the film frame (with a little margin all around) and I have my settings to give best quality: ISO100, f8 1/6 sec … I vary shutter speeds based on the negatives I have (sometimes the negatives are a tad under- or overexposed, I try to have as much light as possible in my ‘scans’ without clipping the highlights). Low Iso for the least noise possible, f8 seems to be the limit aperture before diffraction sets in on this camera, shutter speed long enough to get rid of the flickering effect in the lamps. I work on a tripod and with a 2 second interval between mirror lock-up and opening the shutter. (standard available on the Canon 5Ds, to prevent camera shake due to the mirror flipping up)

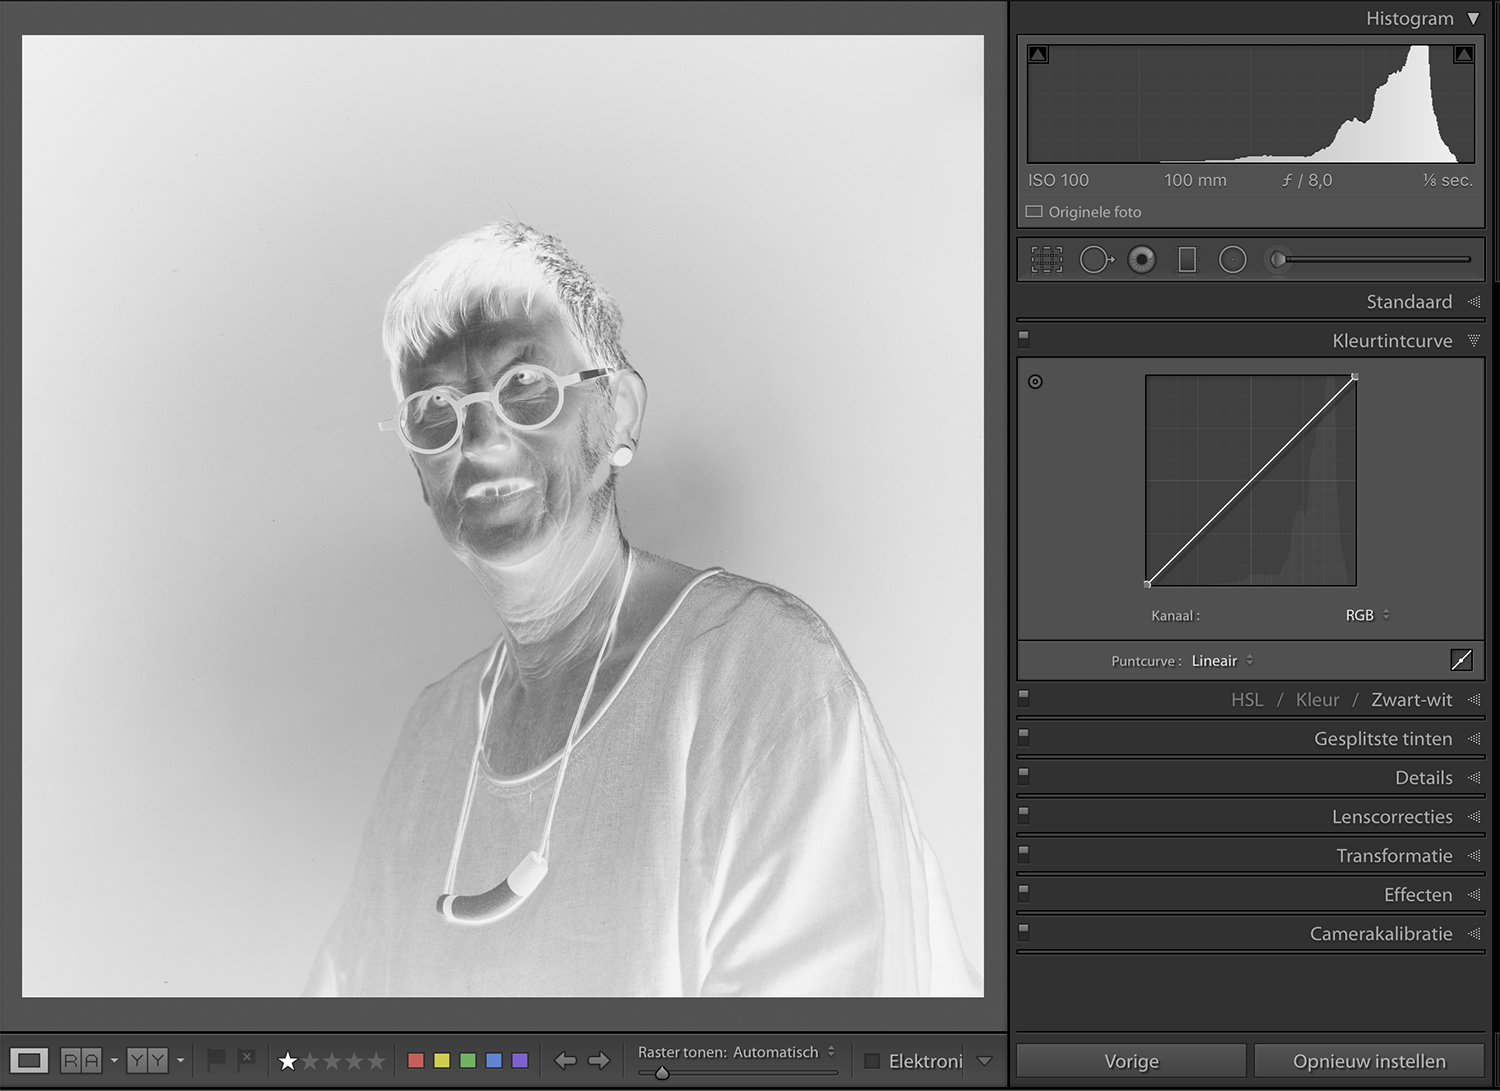
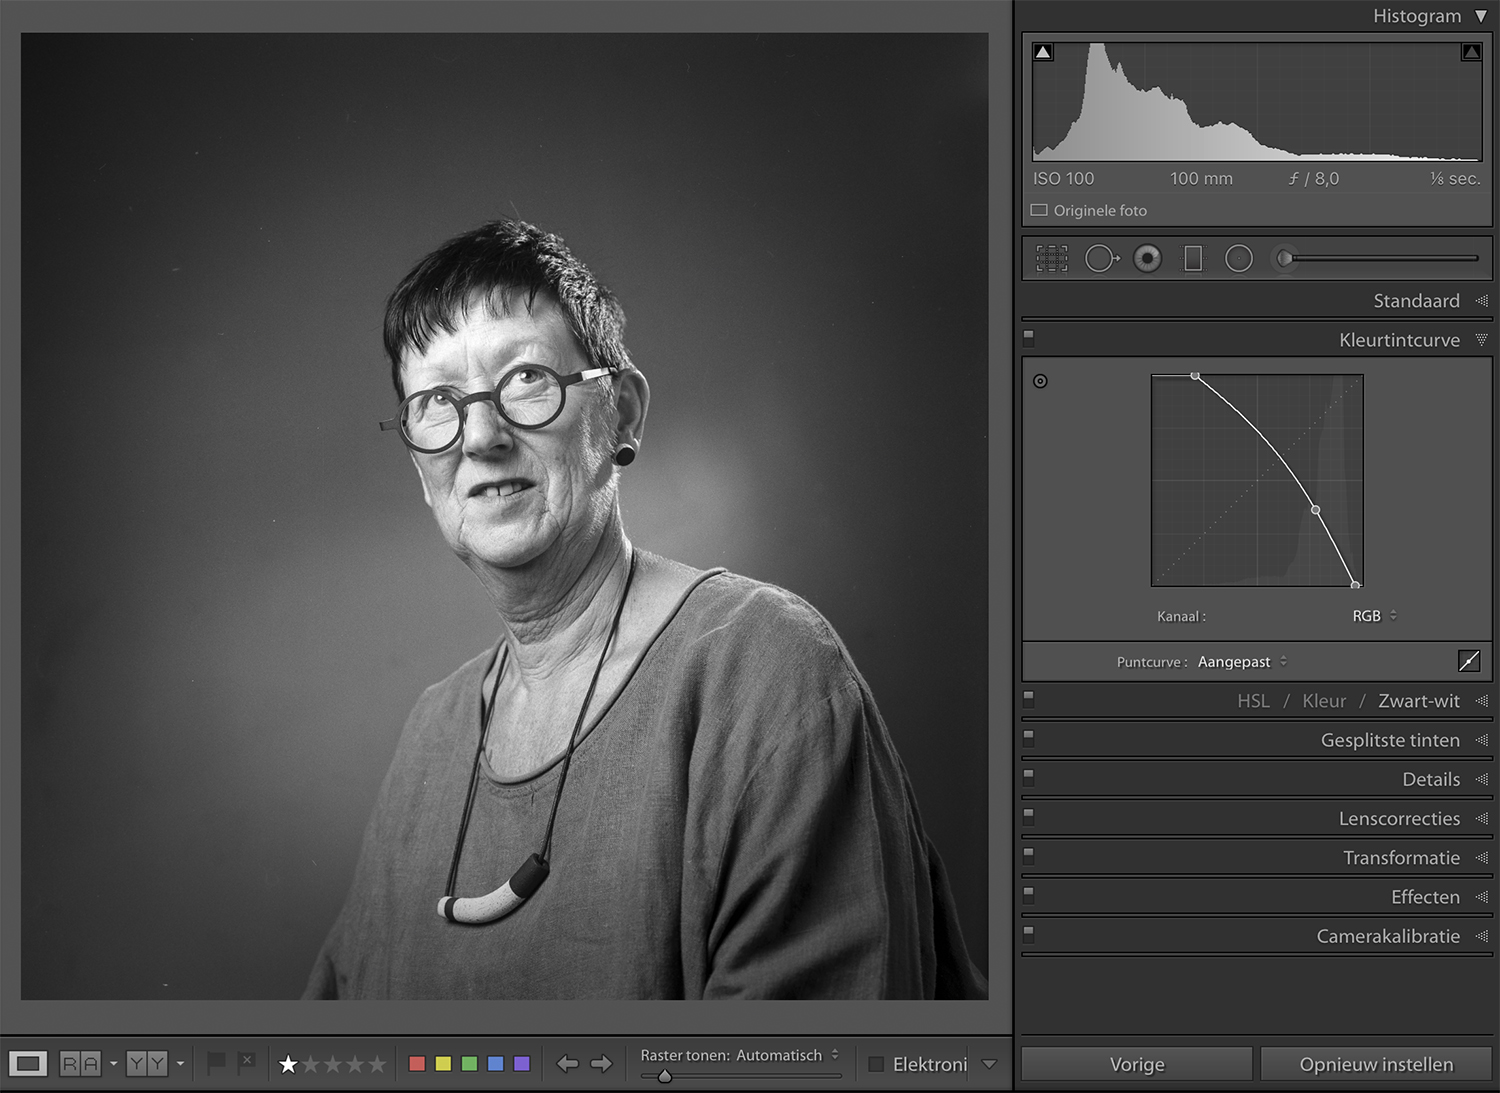
• I import the images in LR and reverse them by using the tone curve panel. In this same panel I also manage the white and black point settings by moving in the left and right corner point to where the histogram starts/ends, and eventually a lightening or contrast tone curve.

• Then I further develop the image using the standard development panel and local adjustments (that takes the most ‘getting used to’ because all sliders work ‘negative’)

• I remove dust and scratches in photoshop.


the images should clarify a lot:

the complete setup:


a look over the camera’s shoulder:
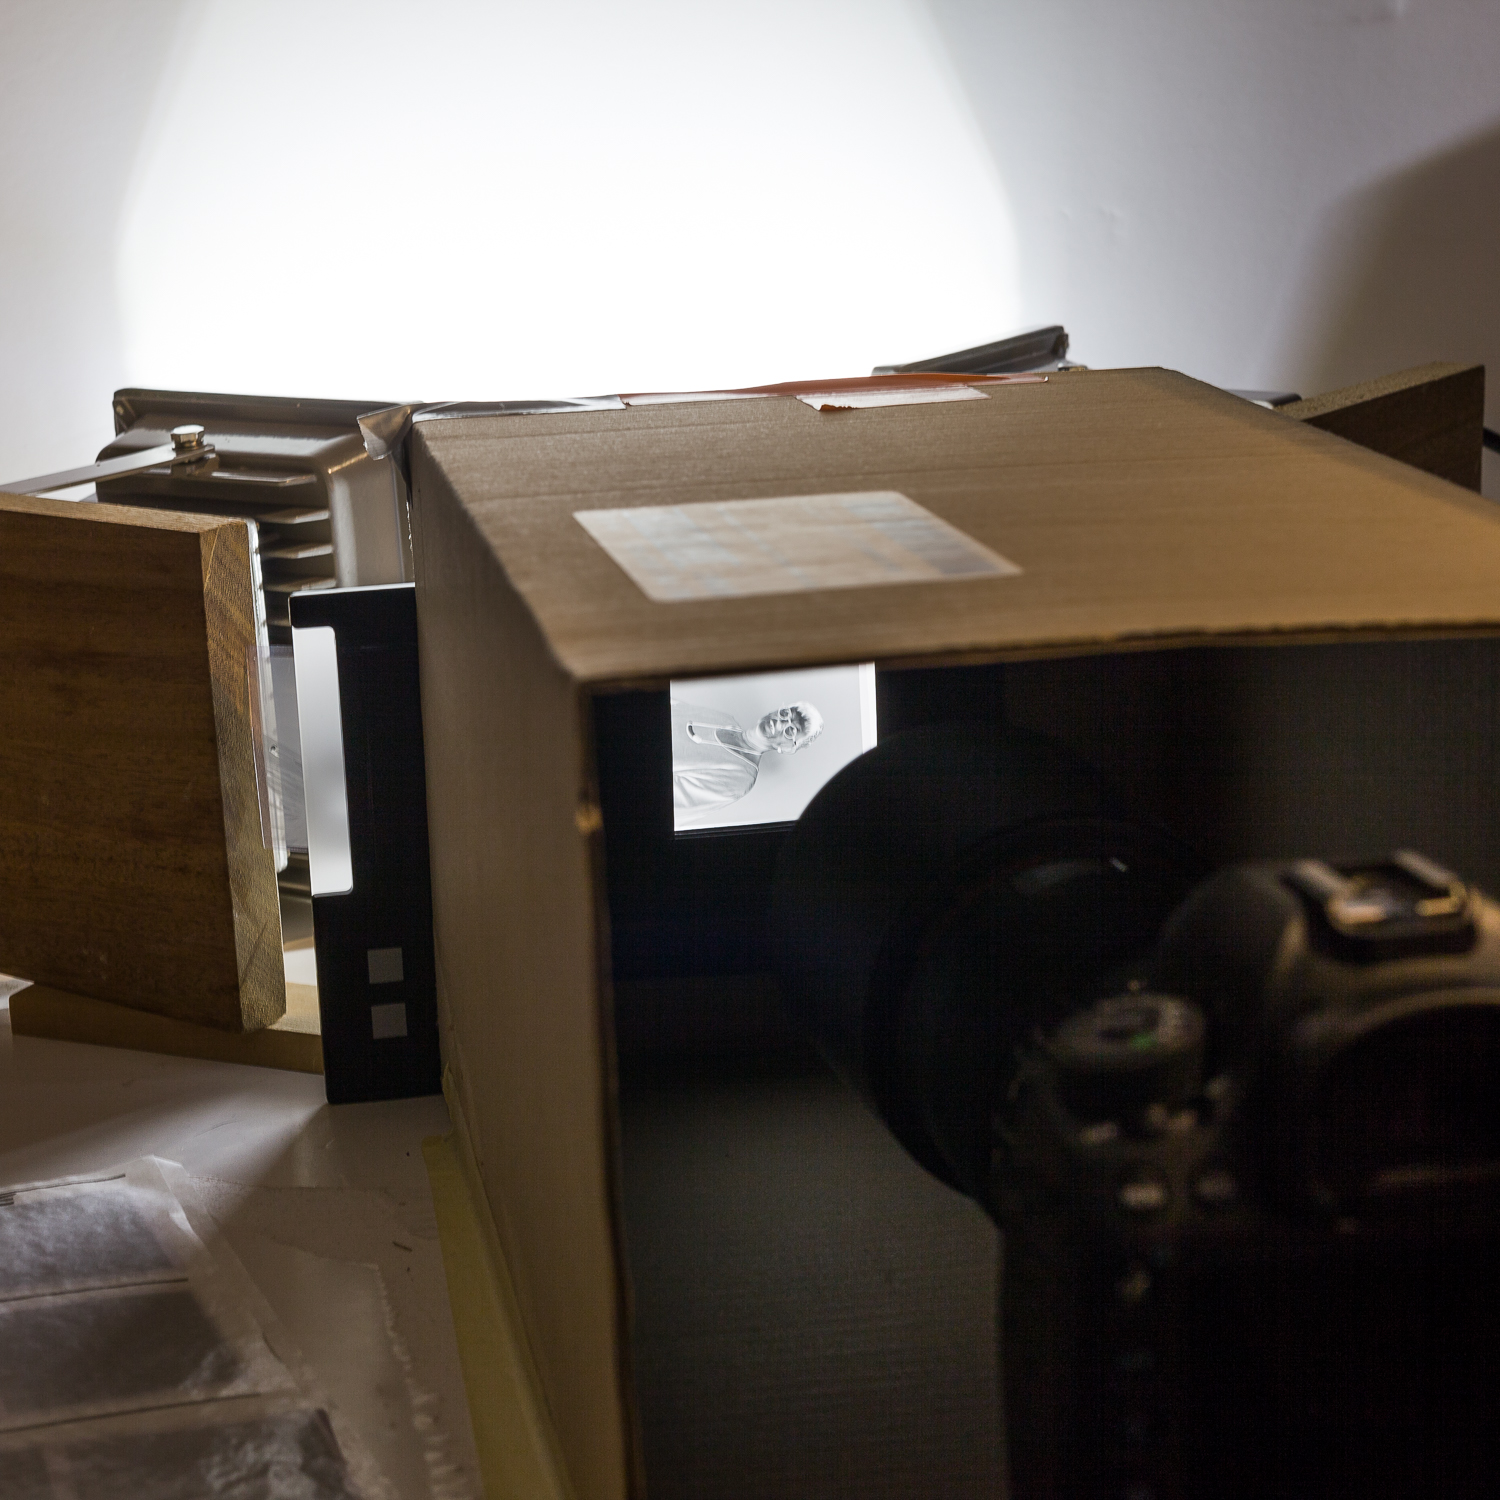
the negative holder removed to change the film strip

the back end of the cardboard box, notice the black paper frame on the inside, and the (modified today) film holder slot for top and bottom edge of the film holder.

film holder sliding in place, notice the top ‘tab’ being held by the slot

film holder in place, looking on the diffusor

Lightroom, tone curve for negative-positive conversion

I manage to scan a film of 12 exposures in about 15 minutes, with a resolution of at least 5000×5000 pixels. That is perfectly fine with me, and gives me all film detail, up to the grain in the film.
dust in the wind …

landscapes, Lightroom, location, Personal Pictures, Tips and Tricks

… nothing lasts forever but the earth and sky


Milky way over Fort Mahon (Ambleteuse France)


ludwigdesmet

the recipe:

  1. Find yourself a group of crazy photography students, willing to go out at night in freezing temperatures for yet another experiment. Cover up well. Provide yourself with a headlight.
  2. Look for a low light environment, some kind of deserted landscape, no cities around. (This only half worked out, the Fort is near the village of Ambleteuse, hence the brightly lit right side of the building)
  3. find yourself a nice location that can serve as a foreground: A Fort, pebble beach, some straying rocks will do. Use your headlight to find your way around. (things will be black out there)
  4. Locate the milky way in the sky (if you have fulfilled step 2. of the recipe it should be visible to the naked eye), put up your sturdy tripod and compose. Fix your tripod well.
  5. Take some pictures (settings here: 10sec f1.4 ISO1600) I took a panorama of 5 images vertically. Taken on a Canon 5D mark II.
  6. Merge images in Lightroom (you’ll keep a RAW editable file). Post Process if needed. It probably will be needed, I played with exposure, contrast, blacks, white balance, …
  7. Sit back and start counting the stars.

grtz,

Ludwig

High Key made easy

beauty, Lightroom, Nude, Personal Pictures

hi there,

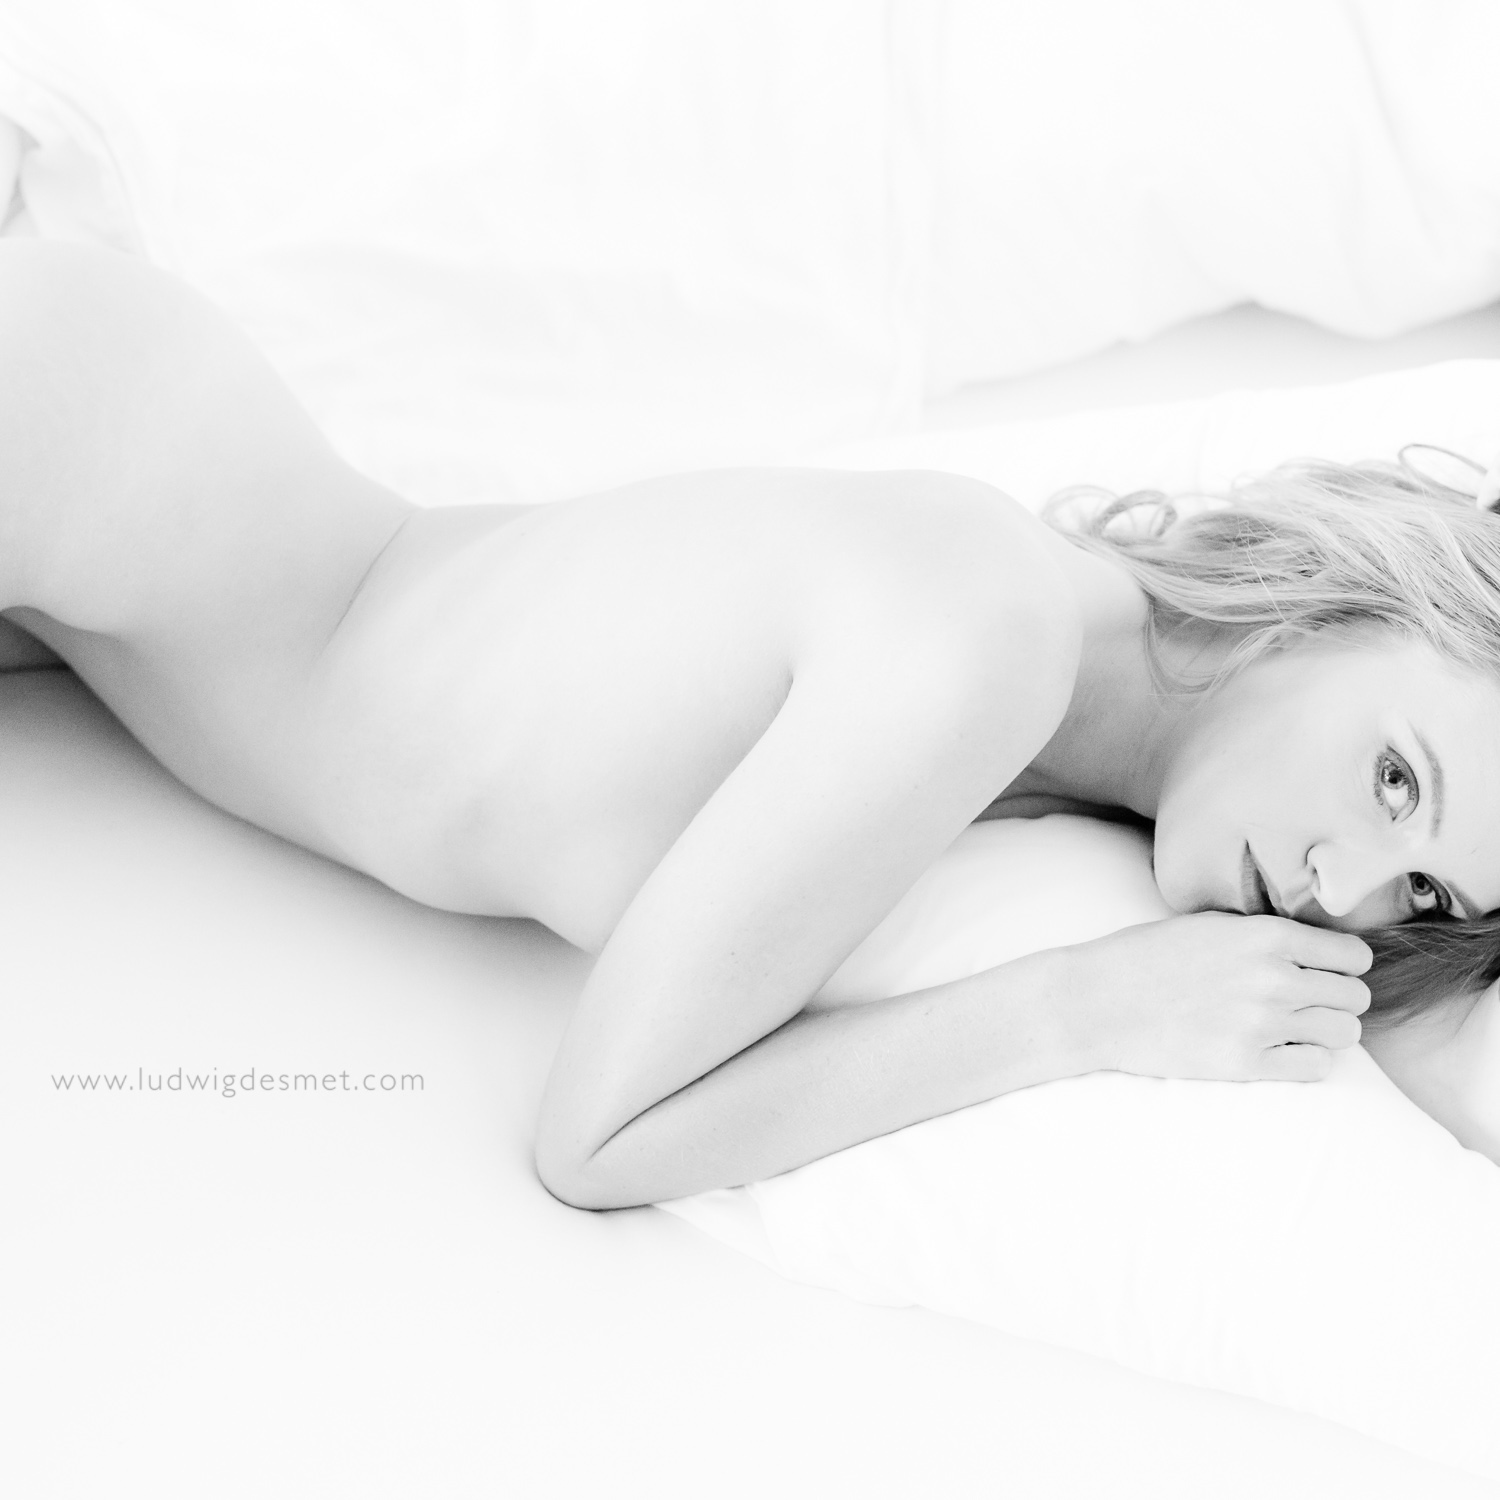
this below image had quite some succes on Facebook and different groups I published it onto. Actually people were asking about the way I did the high key development.

It was a rather straightforward and easy process, a little explanation below.

ludwigdesmet-3948

The lighting conditions where not good, NOT. 🙂

I needed an ISO setting of 2000 to be sure to have sharp images, that’s at least way over my usual limits. (I rather keep ISO settings below 800) You’ll see that the image has some noise in the shadow areas (like the throat area).

the original image looked like this: quite even light conditions, although the light was a little directional (from the left), there were no hard lights, no deep shadows.

ludwigdesmet-3948-2

I work in lightroom, my settings:

exposure: +2.10 / contrast: +40 / highlights: +67 / shadows: +36 / blacks: -42 / Clarity: -11 … that was about all I did. The image looks like this now:

ludwigdesmet-3948-3

next I added some light using a local brush with + exposure, to get rid of the remaining bed sheet shading. No big secrets, just add plenty of exposure to make things white.

At last I added some noise reduction to get rid of too much grainy noise in the shadow areas. …

I hope  you like the image, I certainly do.

The image was taken at a private tuition day with Sacha Leyendecker.(http://www.sacha-leyendecker.com) The model is Steffi Rubia Stringsi, from Brussels. The image was taken in an available light studio in Köln, Germany.

see you soon.

ludwig

Camera calibration explained – part I

Lightroom, personal tips & tricks, Tips and Tricks

One of the often overlooked features of Lightroom is the camera calibration tab.

Camera calibration optimises the way Lightroom will interpret the RAW files of your specific camera. It reorganises the colour values in relation to a pre-defined target, and the way your camera reproduces this target.

In very short, RAW files do not have a colour profile embedded, nor do they contain a predefined color reproduction definition. It is up to your raw-editor to interpret the raw files and do some kind of a pre-development when importing and previewing on screen.

Current Lightroom versions use the ‘Adobe Standard’, or one of the options also available in your camera image settings modes (with Canon, this is for instance: Camera faithful, landscape, portrait, standard, … )

This is no guarantee for a correct reproduction of colours or brightness values.

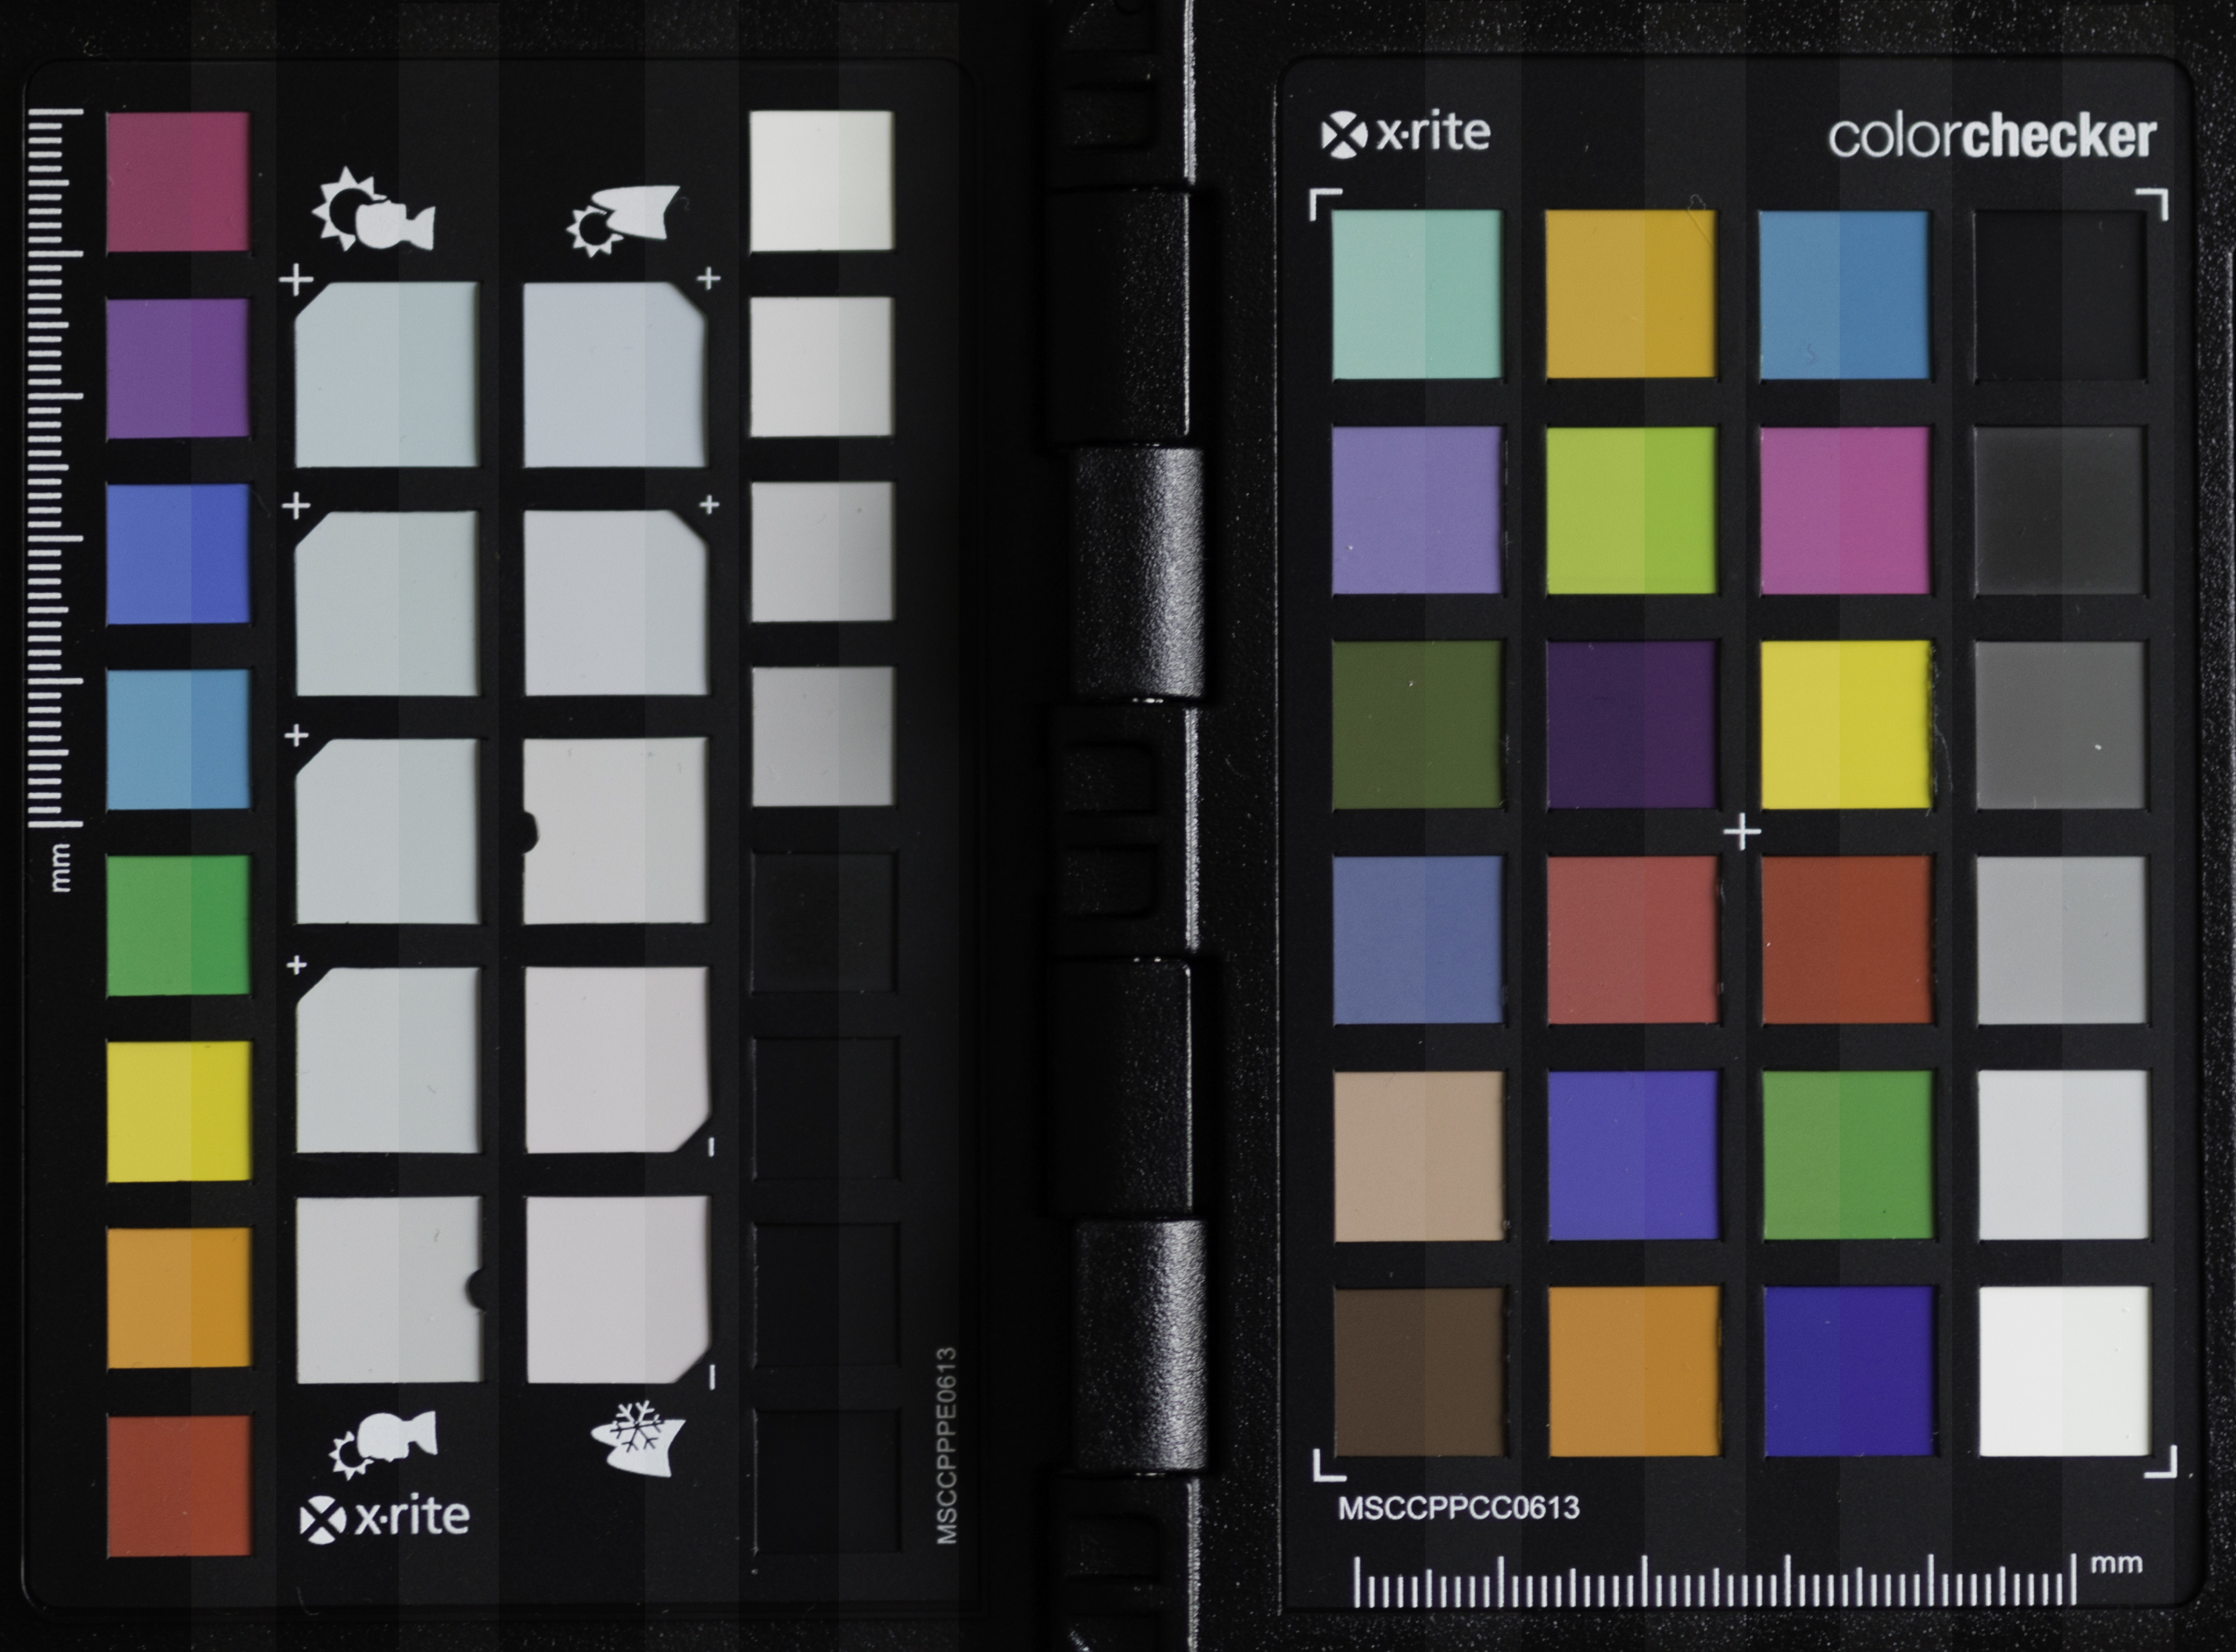
In comes the camera calibration tool. I have the colorchecker passport photo from X-rite. This is a combination of a small piece of hardware (a plastic booklet with 2 screen printed colour target sides and a white face) and a piece of software to be installed on your system.

The simplest way of doing a camera calibration is a single light situation calibration, in which you take a picture in the light situation you will use for your images, including the colorchecker target. Take care the target is lit by the same light as your images that follow.

After that, shoot your images.

In Lightroom, you will need the first image with the target included to make build your camera profile. This is very simple by selecting the image -> export -> Colorchecker passport. This will automatically compare your camera’s ‘target reproduction’ with the target’s known values in the software, and build a ‘custom camera profile’ for you to start with. The new profile won’t show up until restart of Lightroom. (there are certainly more detailed step by step explanations on Youtube 😉 )

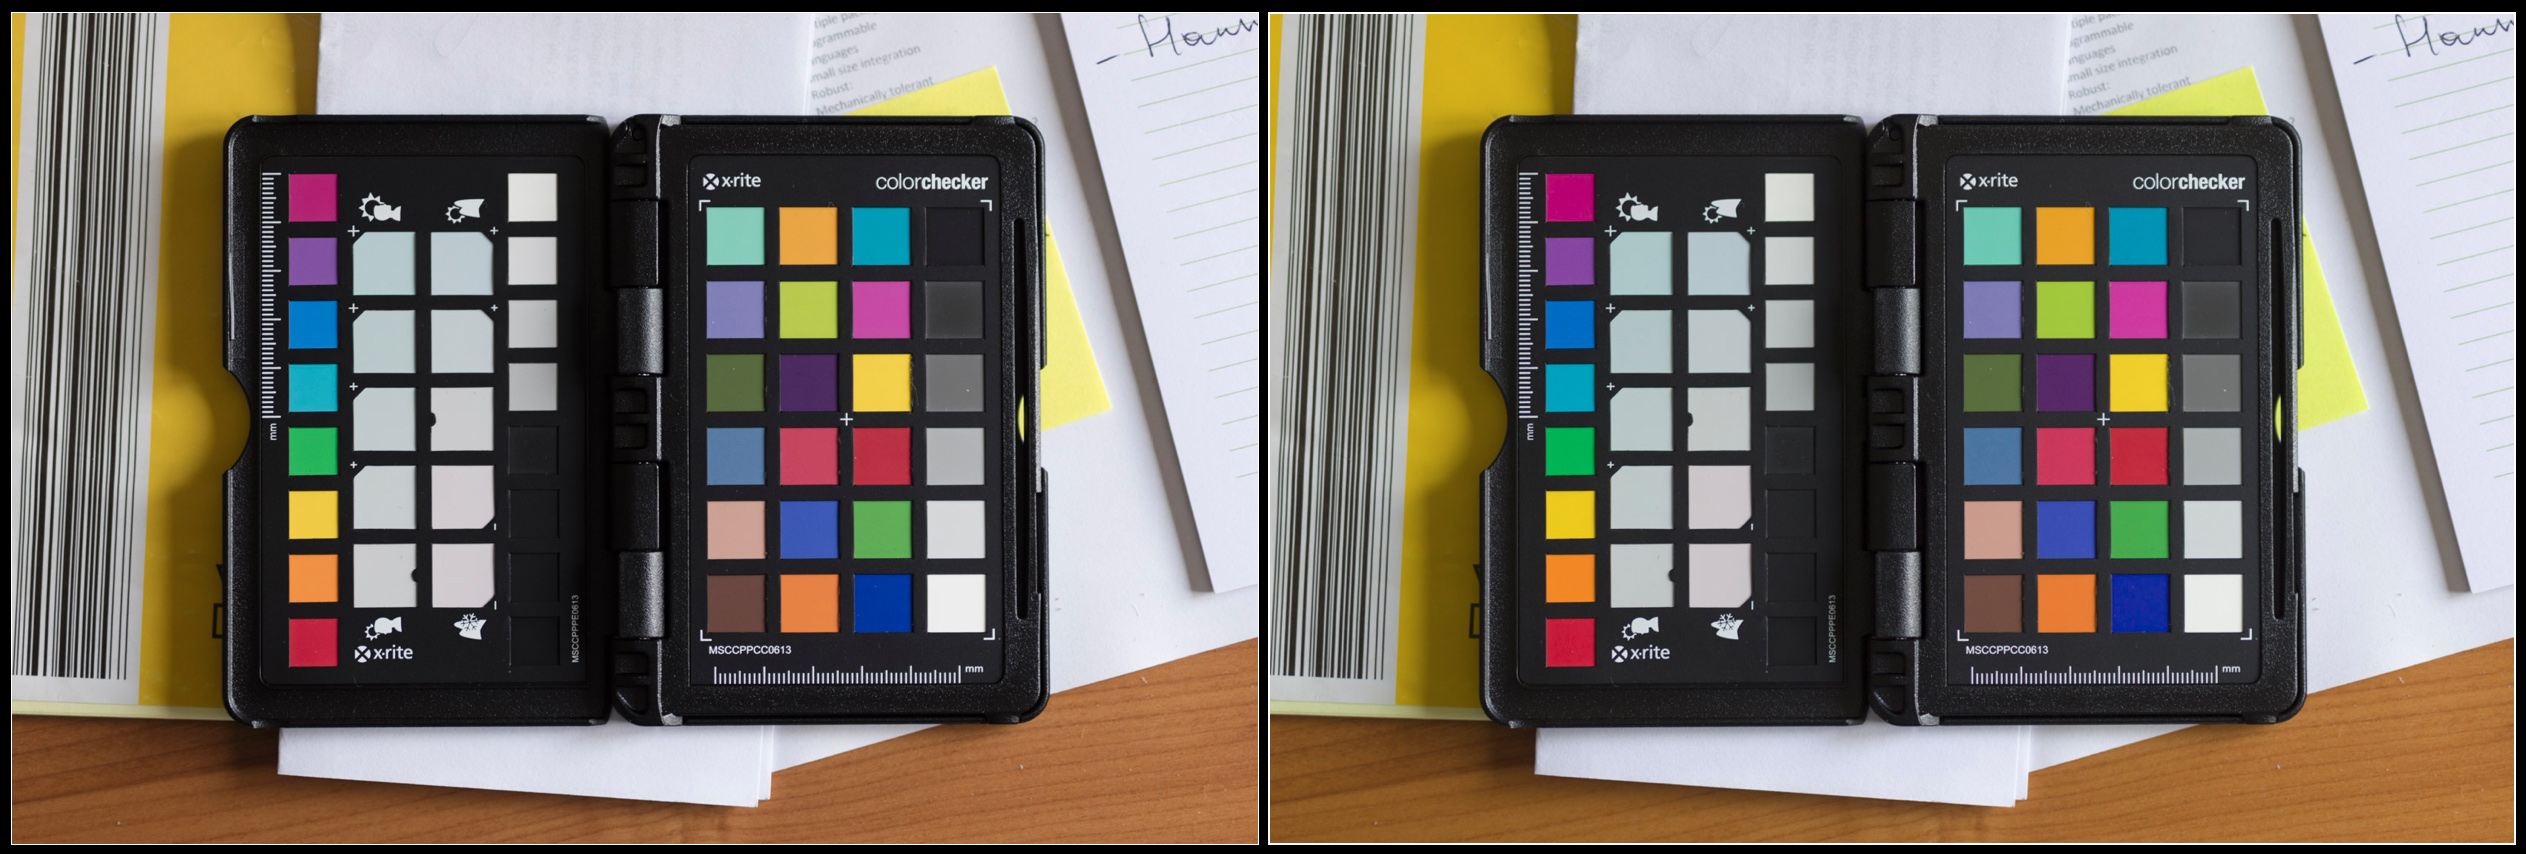
Below you can see the target without and with the newly activated camera calibration.

target change split

not a big deal you’ll probably say, and this camera is indeed rather color-correct compared to some others I’ve seen. To make things more obvious, I placed both images onto each other, and made a layer mask to cover up half of the targets:

target change half-half

left half with ‘Adobe Standard’, right with my custom color profile on the Canon 5Ds.

Colours are more saturated, some a tad lighter, others a little darker, some colours shift slightly, (note the purple and the yellow-green on the right) but especially the blacks are less deep. This is especially helpful if you need to uplight the dark tones (shadows) in LR.

These are two versions of the same RAW file, but they get different RGB values. This means that the initial state of your raw file is very much dependent of your Camera calibration settings. If you are very fond of let’s say the ‘camera portrait’ picture style settings on your camera, then you might as well use this profile in your RAW-editor. (as photographing in RAW will not edit the data in your images, but the preview on the camera’s back is based on a jpg file modified by the settings in your camera. your preview will still get the ‘camera portrait’ picture style view, but your RAW will not reflect it.

That is why an image might look good when importing in LR, and then switch to something dull a second later. The initial look is from the embedded preview file, generated by your camera, the second look is from the preview generated by LR, based on the camera calibration settings currently active (standard setting = Adobe Standard)


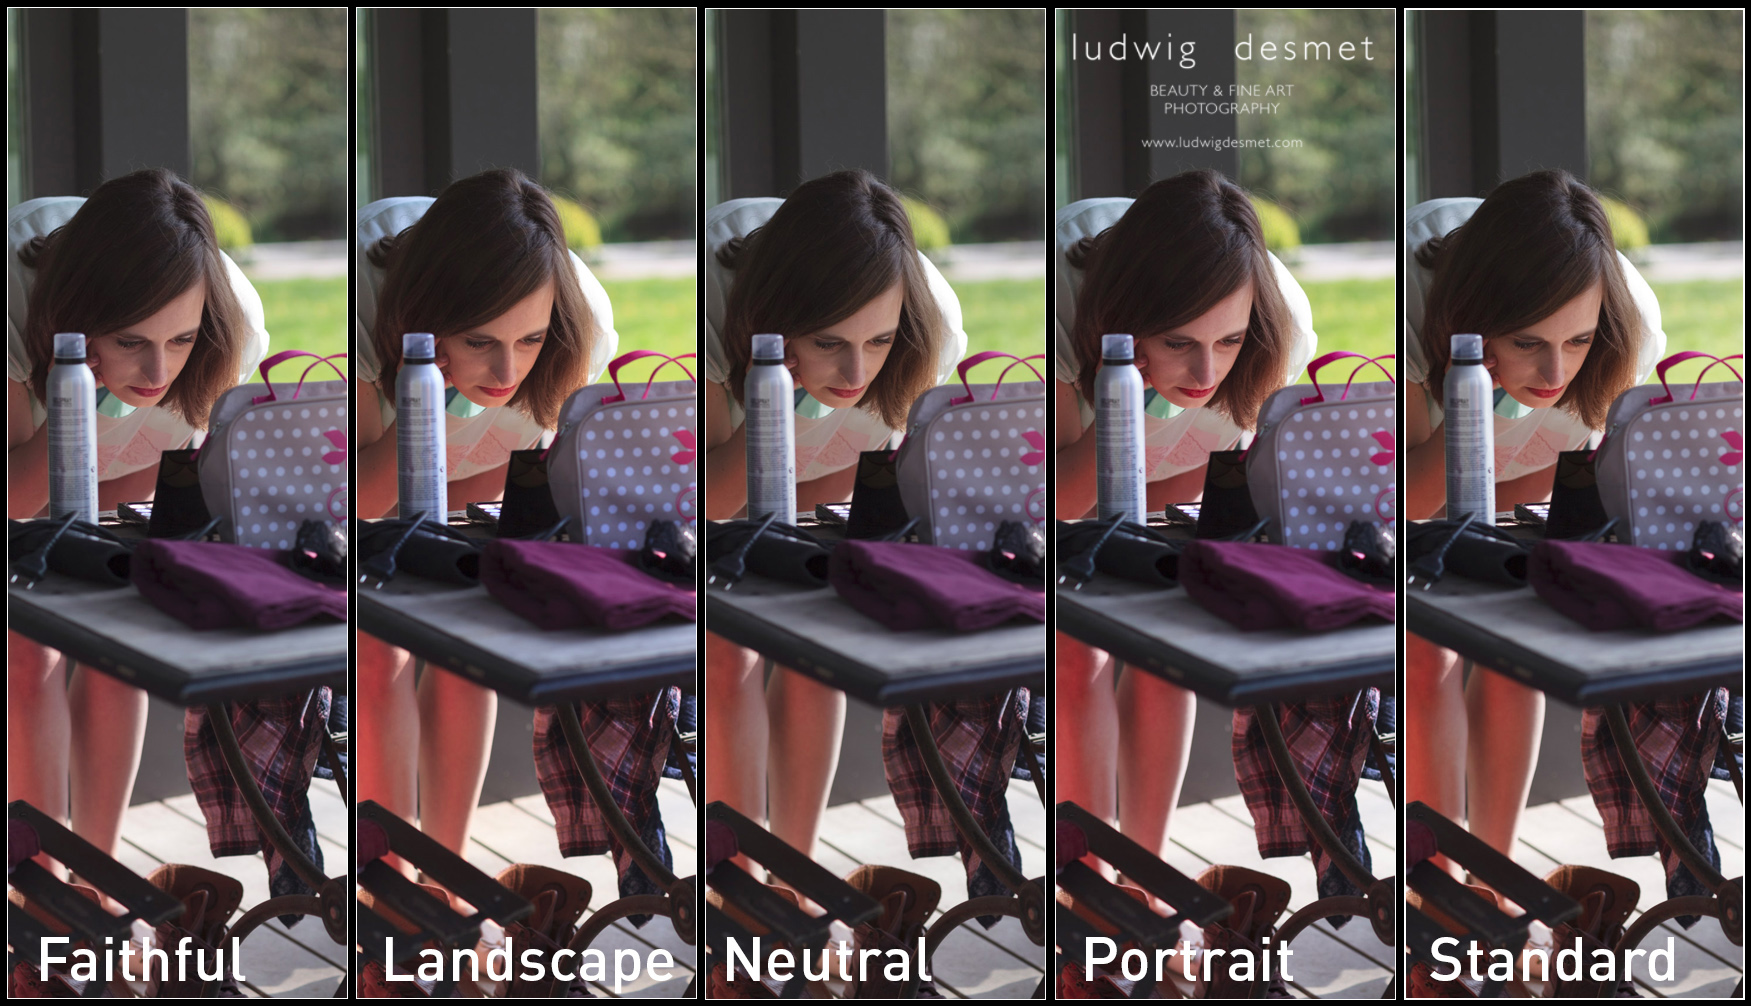
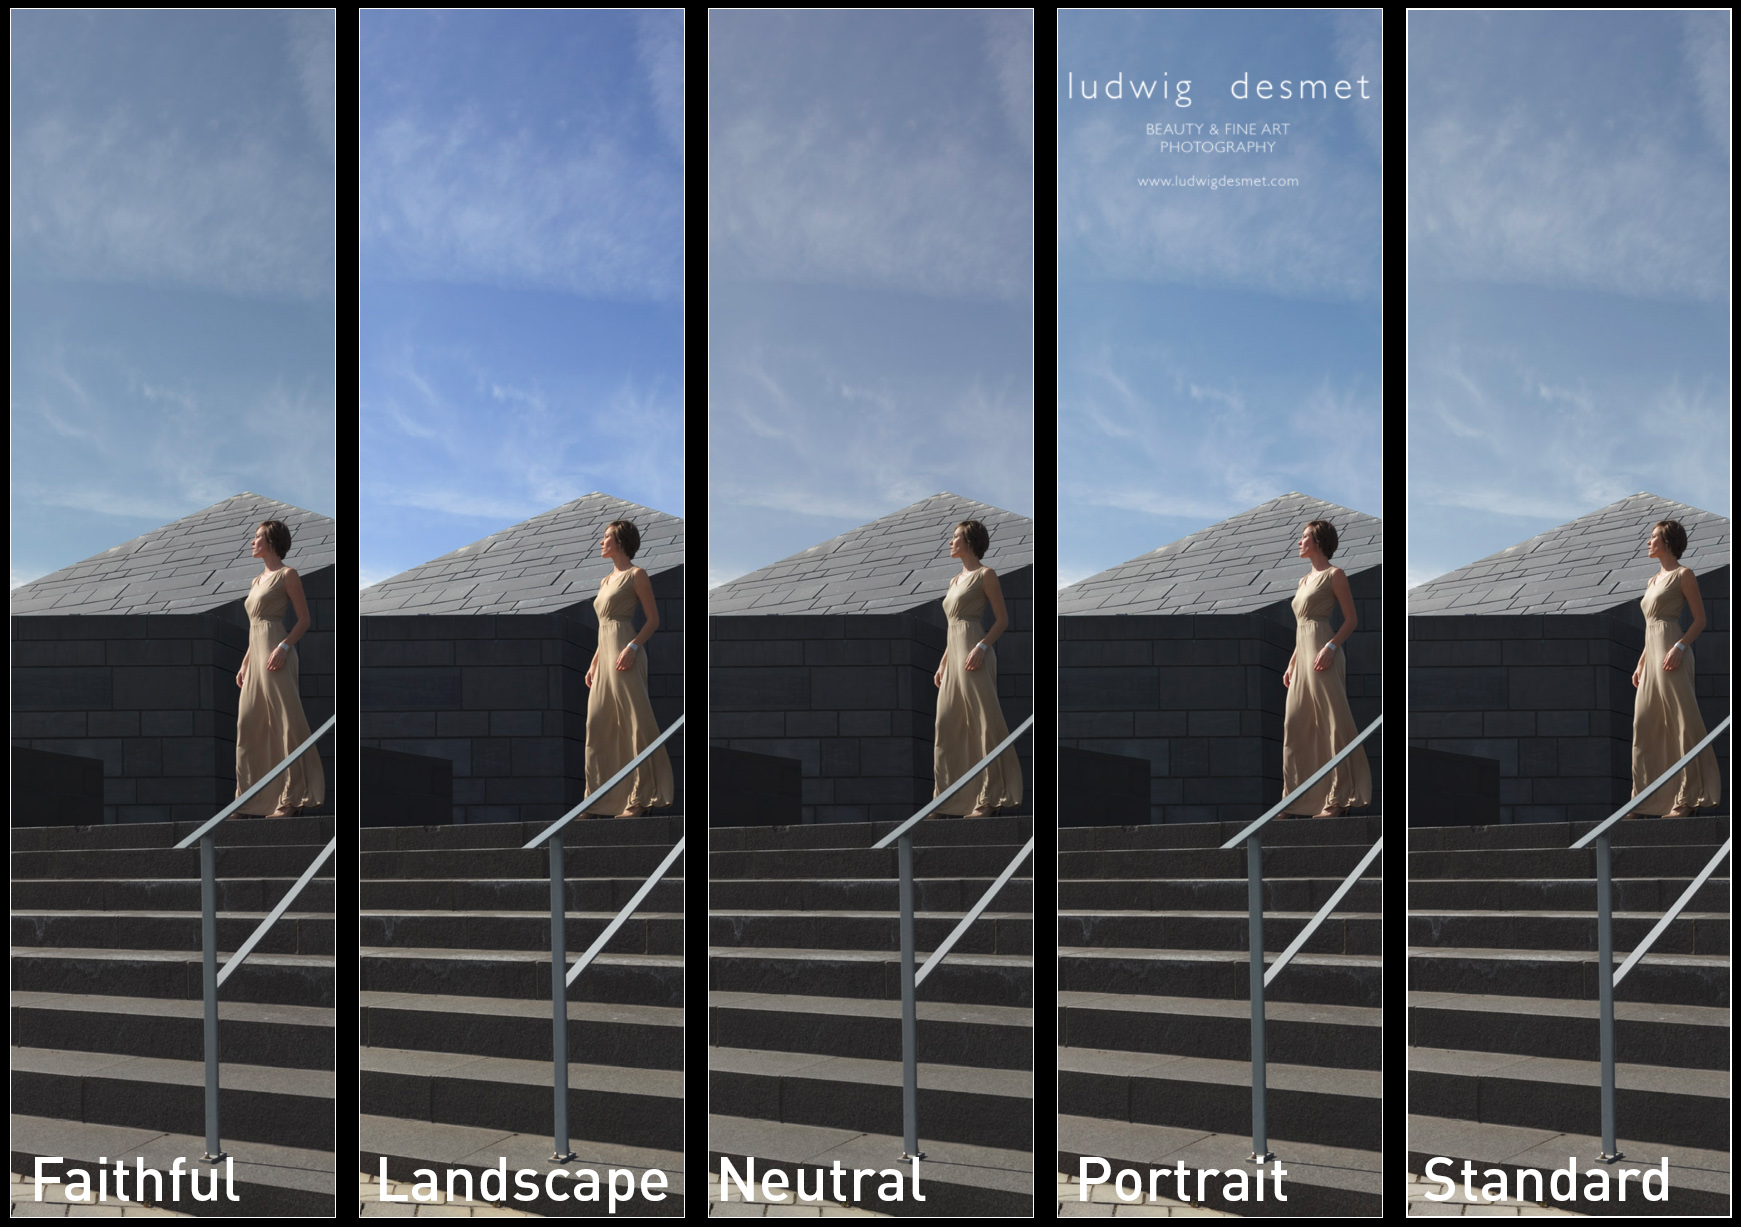
If you want to experiment with camera calibration without buying the tools needed, try using the ‘picture style calibration settings’ available in the drop down menu. They should reflect the ones you have available on your camera. The differences should be obvious.

Below two examples of different ‘picture style camera calibration’ settings. Note the changing skin tones in the first image, the changing sky colour in the second.

picture style sample I

picture styles sample II


The process version is the way LR interprets RAW files since earlier versions, you should currently use the 2012 version. (July 2016)


To give a real world example, first image with ‘Adobe Standard’ profile, second with Custom made profile:

LudwigDesmet_AL-0354  LudwigDesmet_AL-0354-3

I think that the shaded area’s are very obviously lighter in the second picture, with the correct camera calibration profile. These are unedited images. For me this lighting situation is very common, high contrast, backlit situations, where you want to make sure that the highlights are not blown out (clipped). As you know I seldom use extra light on a shoot (except for a reflector from time to time. In this way I absolutely need to be able to enhance my shadow area’s to a descent light level. This less dark starting situation is of a lot of help.

The edit looks like this (same editing on both images) Adobe Standard above, 5Ds profile below. In the first image, the colours are slightly red, but especially the corner shadows completely run black (due to my vignette, I know). Compare with the corners in the second image, where I can keep plenty of detail, with the same amount of vignetting.

LudwigDesmet_AL-0354-2 LudwigDesmet_AL-0354-4

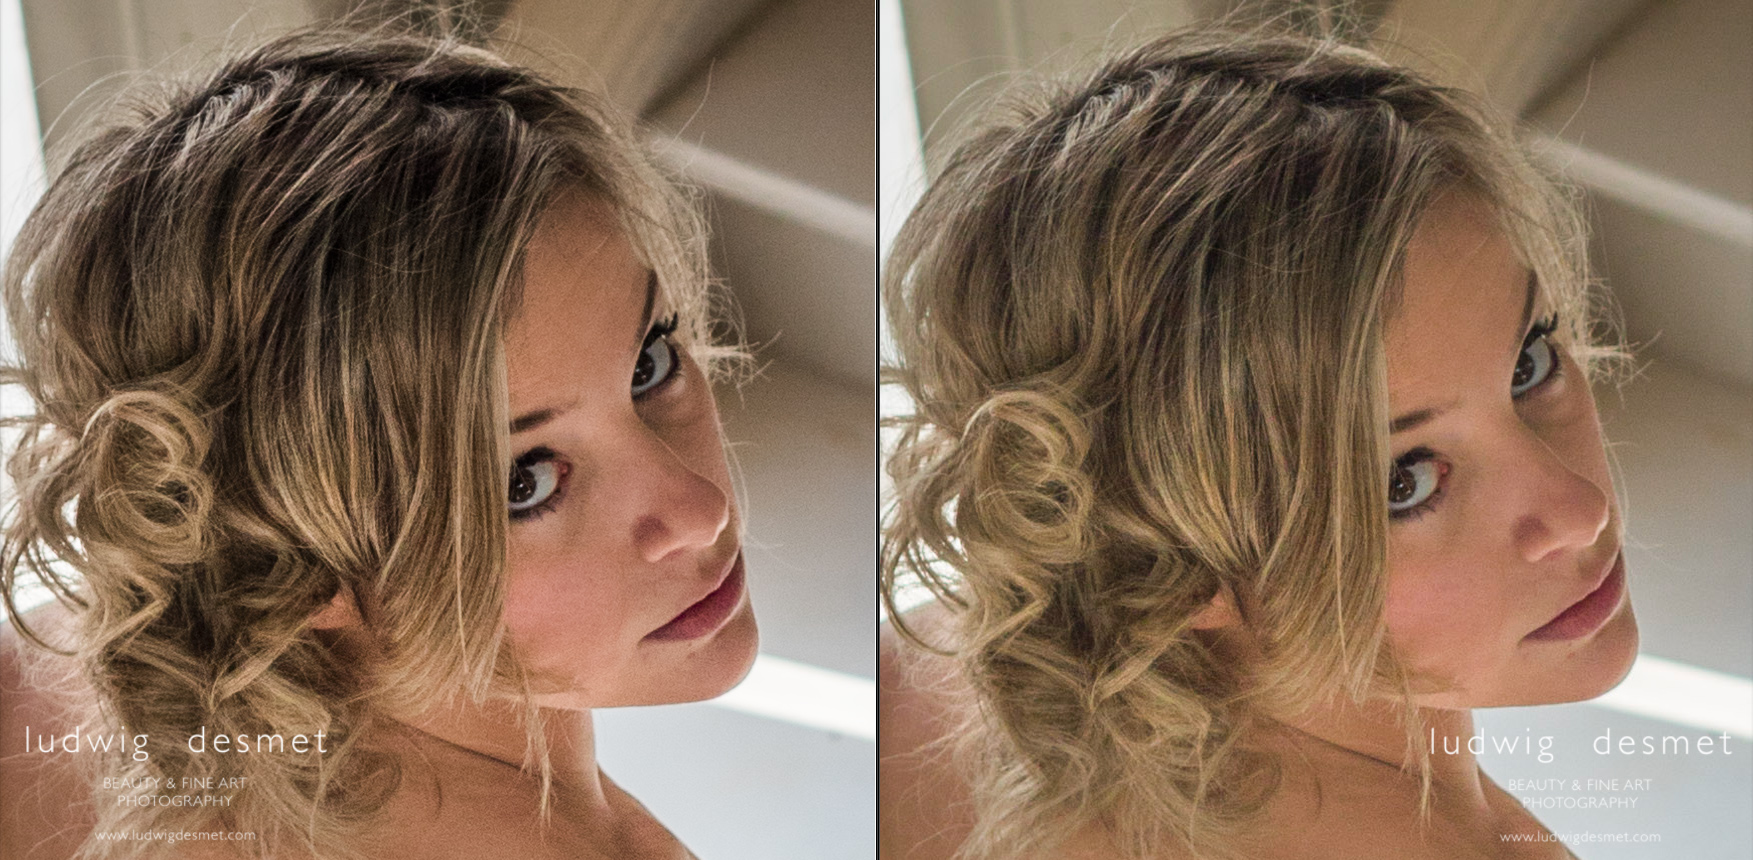
When looking in detail, you’ll see that I keep a lot more detail in the hair, and I have less noise appearing in the second image. (upping the shadows a lot also emphasises image noise)

face detail

Image: Jenn at Baudries Castle

Hair: Nathalie

Make up: Heidi

I think Jenn has a large amount of ‘Nathalie-Portman-looks’ here 😉

Canon 5Ds with Sigma 50mm f1.4 DG A   –   1/640s   f2.8   ISO 160


see you soon for part two of this explanation, and for a lot more images:

summer time, shooting time


ludwig

Post production explained

landscapes, Lightroom, Personal Pictures, personal tips & tricks

Another before and after short explanation.

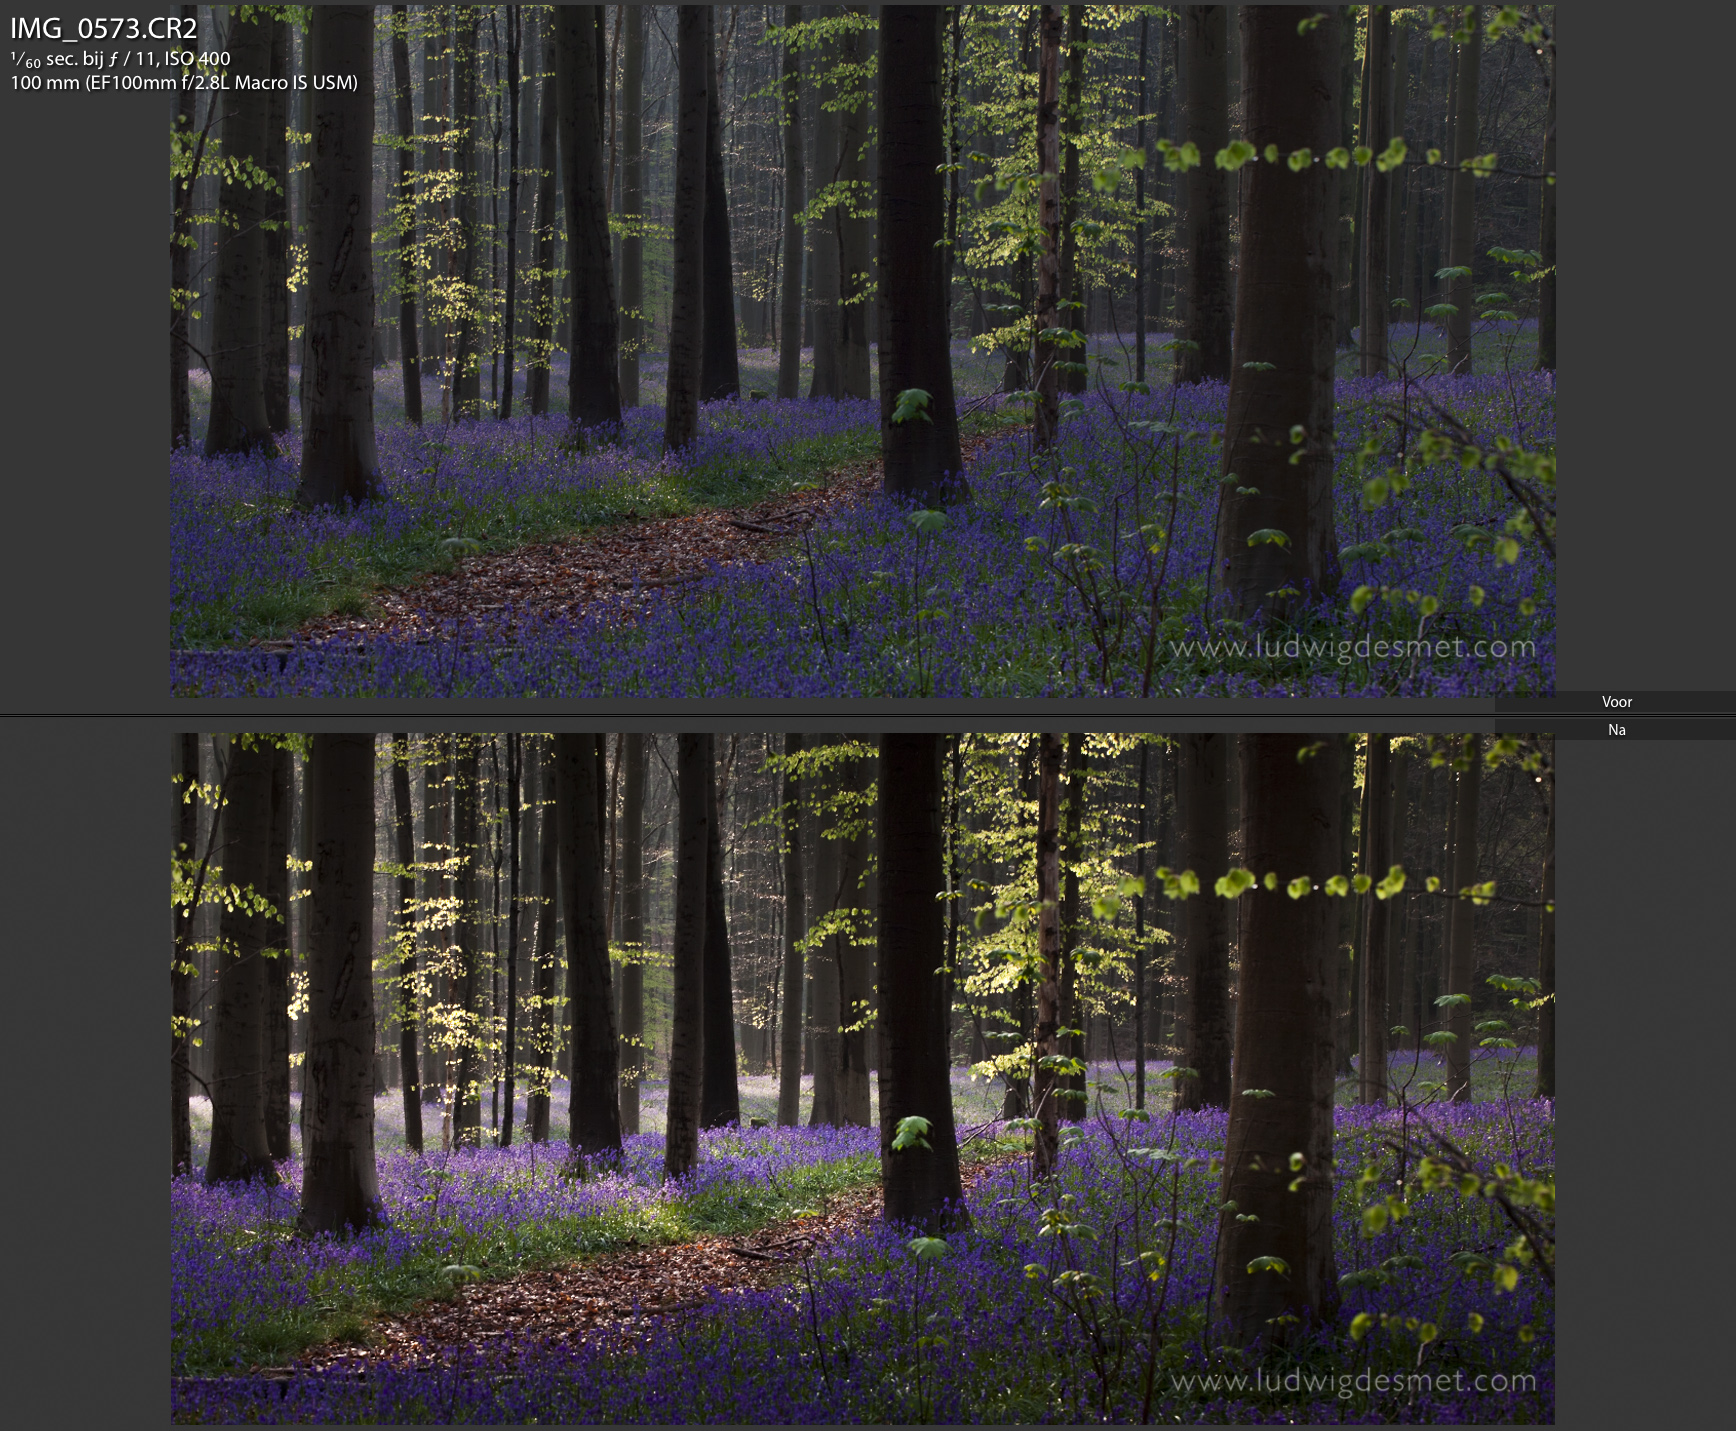
A lot of people have liked this image on facebook, and this inspired me to repeat once again the importance of good development of your images.

Hallerbos before and after

What happened in post production? For those familiar to Lightroom, here we go: (to those not familiar to Lightroom – I enhanced the image 😉 )

color temperature slightly warmer, tint unchanged

added a +0,18 stops exposure +40 contrast +97 highlights (to accentuate the sun ray’s/highlights)

HSL panel:

Added +8 in purple Hue settings

Added +35 and +23 in respectively Blue and Purple saturation

Added +25 in Blue luminance

Local adjustments:

Added 2 gradient filters:

1 to darken the tree trunks from top: exposure -0,94 – highlights +63 – shadows +24

1 to darken foreground from bottom: exposure -0,94 – highlights +62

Added 1 radial filter:

position: central, horizontally shaped, where I wanted the sun rays to be accentuated:

settings: exposure +0,99 – highlights +63 – shadows -71 – clarity +33 –  sharpness +20 (inverted mask to work on the central area, not on the outside area)

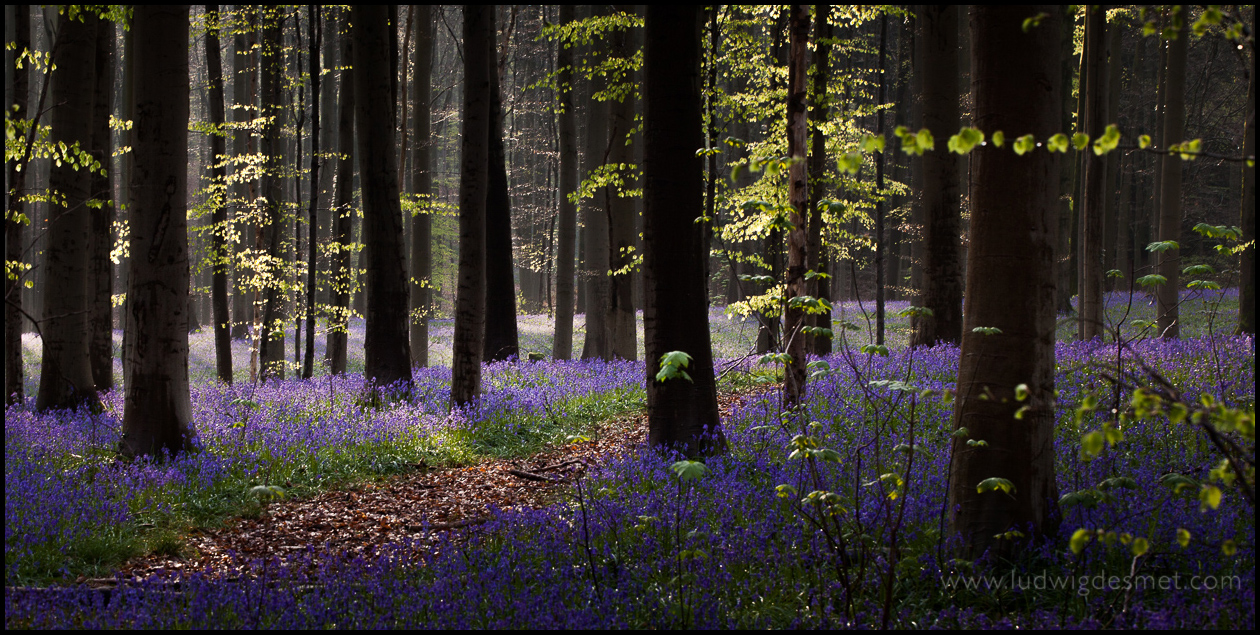
ludwigdesmet_hallerbos-0573

I sincerely hope this will inspire you to work a little on your images too. You don’t need Lightroom to enhance them, a lot of these things can be done in other RAW development applications too, some coming for free with your digital camera.

see you soon,
ludwig

Miss-Development / Developing sample LR settings

beauty, Lightroom, Personal Pictures

Hi,

Another example of a Lightroom development process.

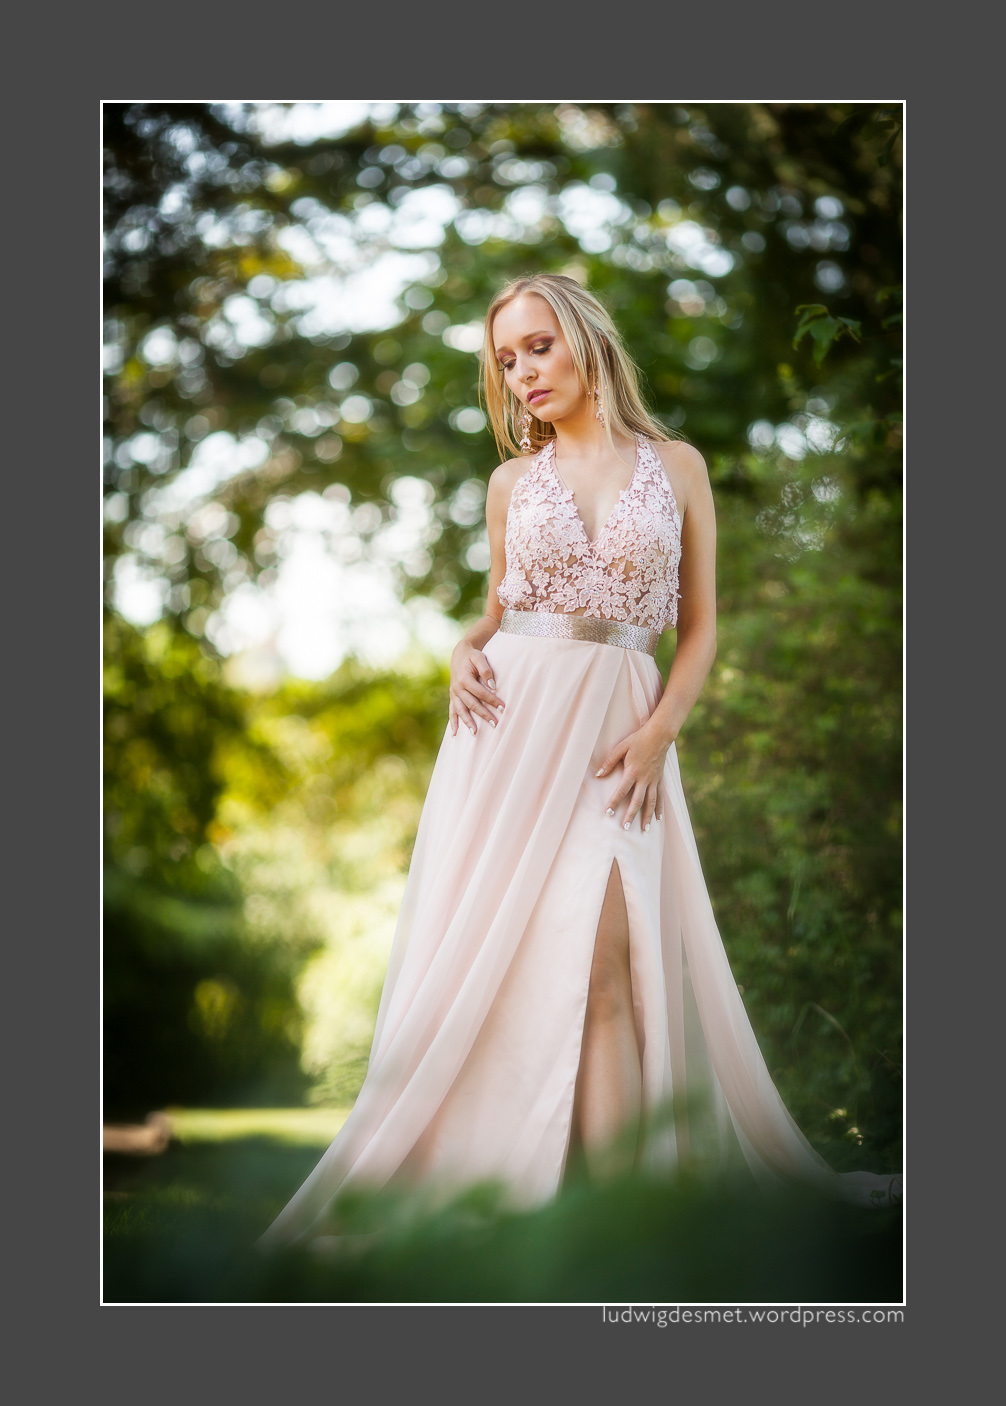
Two stages of LR development, and in this image I added a bit of photoshop sparks.

Oh my, bad exposure in the first place. Working against bright light has an imminent danger: blowing out the highlights. That’s why I will be very careful not to over-expose. I had my model standing in the tree shade, but depending on her position, the sun would shine on her blonde hair from time to time. Be careful not to cram it! Original image: 1/500s f2.2 ISO 100 with the Canon 135mm f2 L lens.

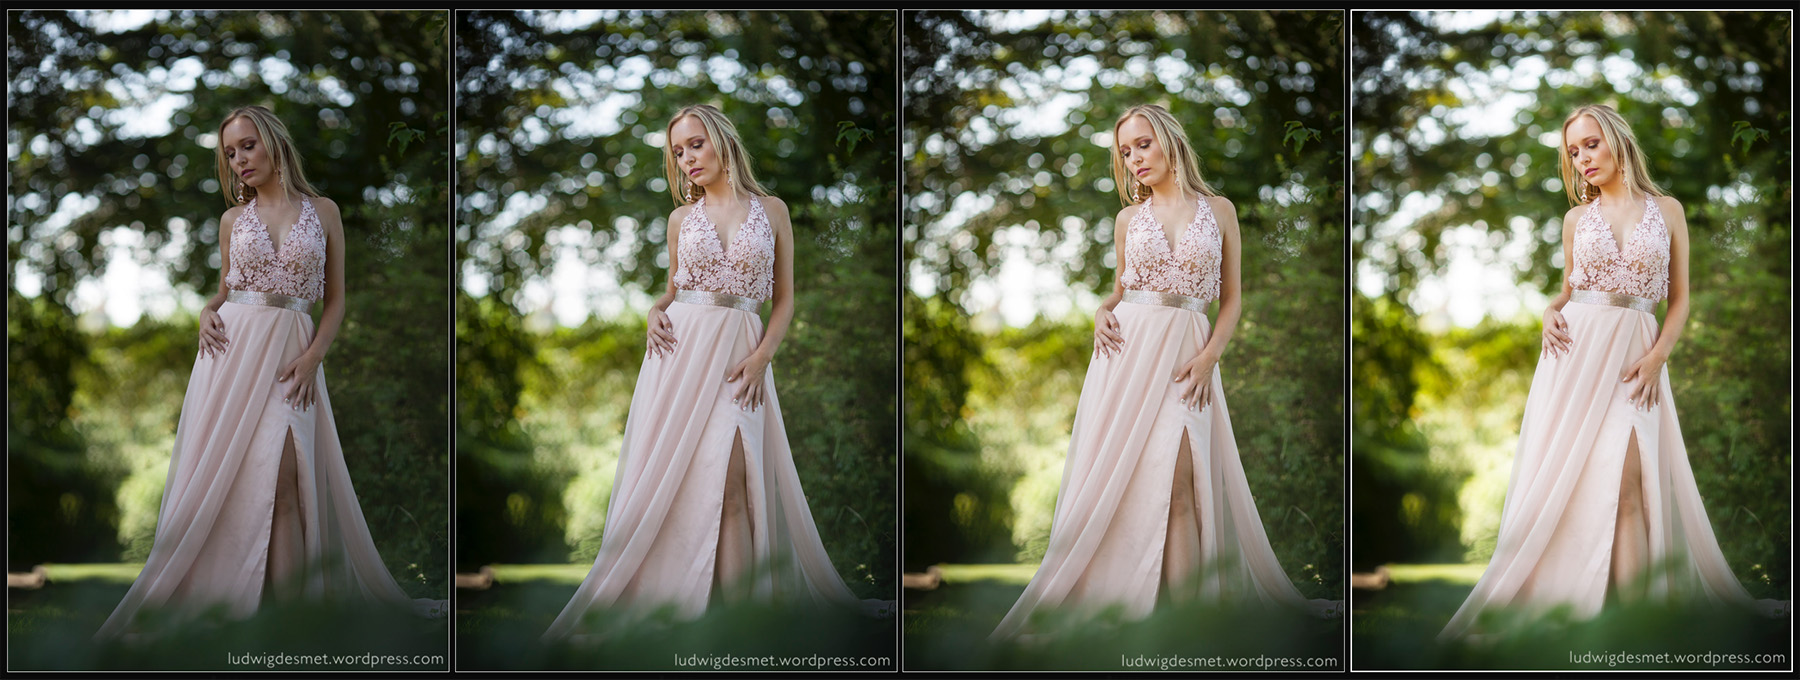
stages of miss development

I first had developed the whole series as the second image:

if you have lightroom:

exposure +0,70

contrast +19

highlights -67

shadows +55

and a vignette darkening the corners.

I also added an extra +0,28 exposure on the face and breast area. (radial gradient)

After that I decided that I wanted to get some more warmth and glow to the images, so I went a step further (still LR)

I changed the white balance from as shot 5400/-2 to a slightly warmer 5847/-3

I pushed up the exposure to +1,05 stops.

This gave me a warmer tone, and a radiating model.

In photoshop I did two further things:

I added a sort of soft-focus filter to the image (layer copy with gaussian blurr on top of the originallayer, blending mode set to screen, with reduced opacity. Prevent the soft focus layer from covering the focus areas of your image – head, breast, hands – )

Add a combined unsharp mask/high pass sharpening layer to the ‘focus areas’.

Sharon – Reina Petita Belgica – Reina Intercontinental – Costa Rica

Ludwig_desmet_SV-edit

Jenn – Lightroom developed – Step by step.

beauty, Lightroom, personal tips & tricks

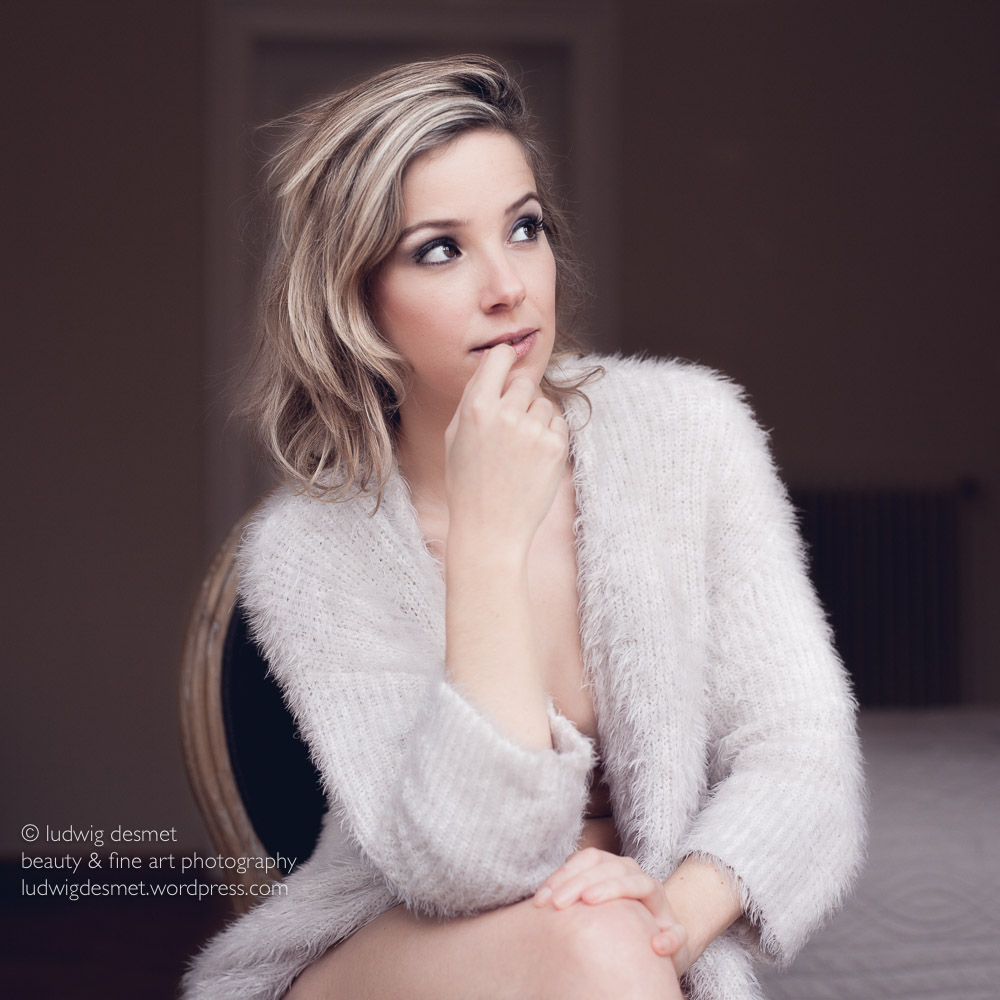
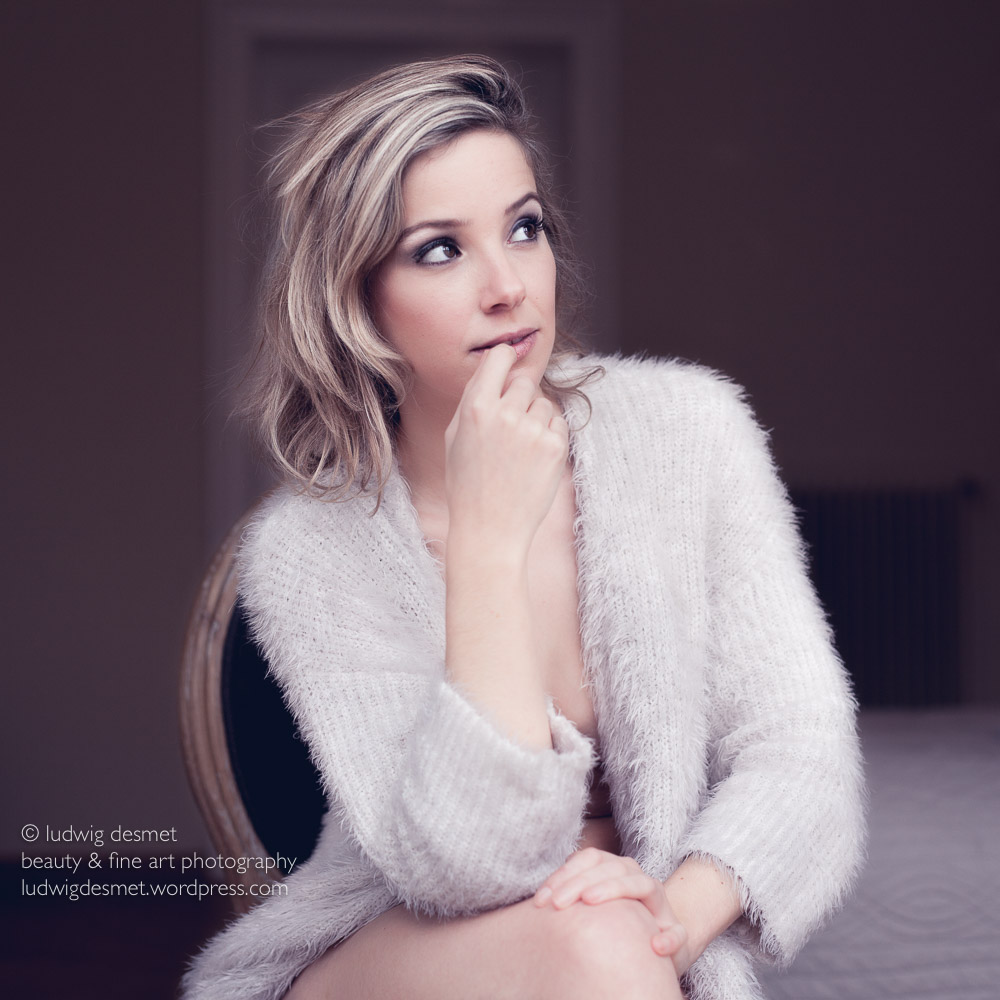
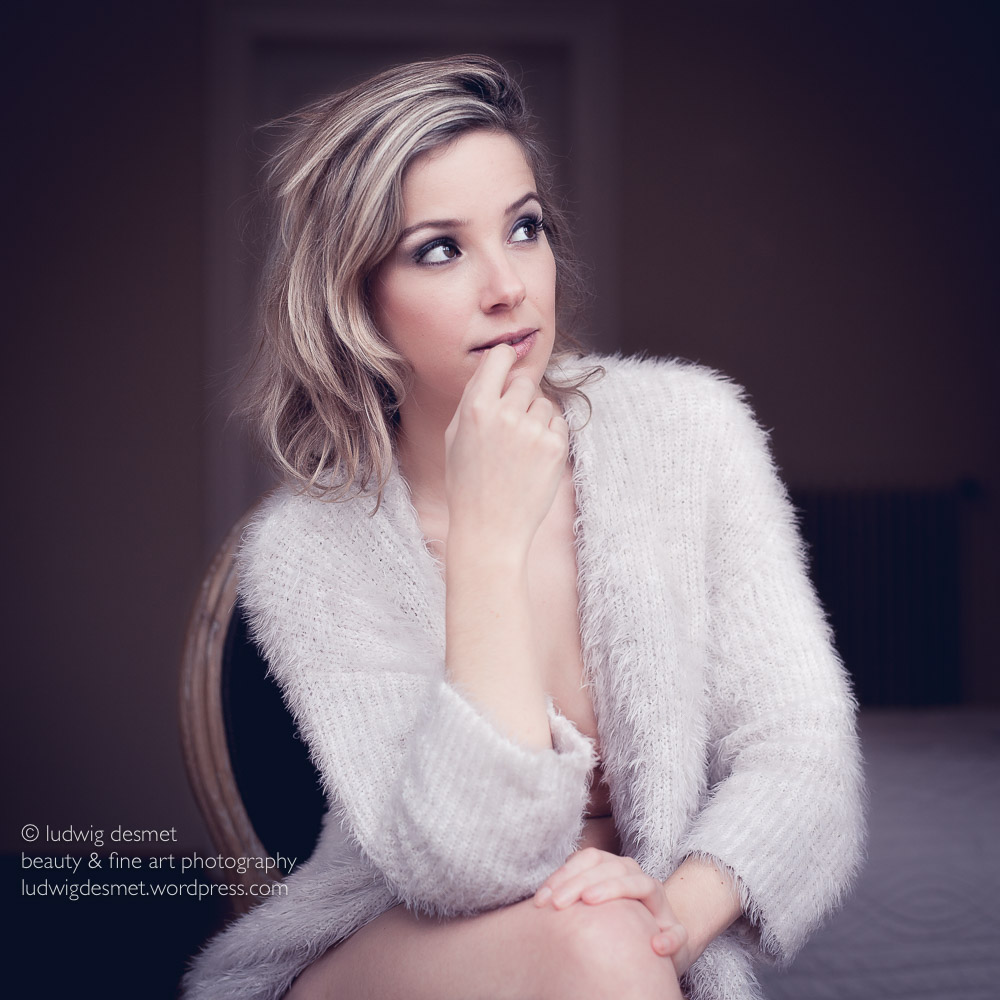
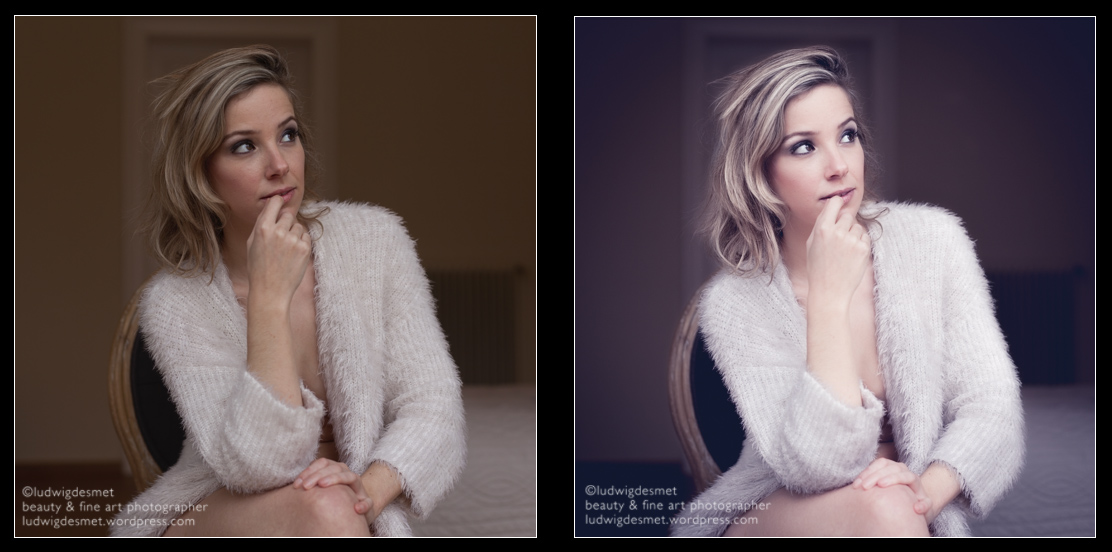
Some of my former students asked me if I could try to find out about a particular developing effect she was after, she sent me some sample images and a bit of an explanation what she needed. I tried to figure out what could be done only with the use of Adobe Lightroom ®, I’m currently using version CC 2014. I looked for an interesting image in one of my earlier shoots and found one from this shoot: A very good morning – Jenn at house Adelaïde NSFW ludwigdesmet_JK-3749 The image was rather dark exposed – blame on me. First things first: up with exposure + 1 stop. As I had seen in the sample images, the blacks were not really black anymore, and the highlights were really pale. I wanted to keep the background as dark as possible, so I changed general settings like this: Exp: +1 Highlights: +100 Shadows: -100 Blacks: -42 ludwigdesmet_JK-3749-3 A little harsh maybe :p lots of contrast, but not really appealing to me. to get a more snappy image, and to start trying to find that ‘washed out’ look, I further changed: Clarity: +25 Saturation: -14 ludwigdesmet_JK-3749-4 Then I added four local adjustment brushes, below are the respective masks 1 to 4: 1: The background: Exposure -0,8 stop, to get back to the original dark background (I could have done it the inverse way, and only have painted the model in stead of upping the exposure 1 stop overall.) 2: Skin to get it warmer and softer: Exposure +0,48, Clarity -70, Temp +7 3: Hair, and below eyebrows, to get more lively hair: Exposure 0,46, clarity 30 4: Pull over arm and leg, because I thought the arm was getting a lot of attention: Exposure -0,67 Jenn_local_brushes This is the resulting image after the local adjustments. ludwigdesmet_JK-3749-10 As all of the images had non black blacks, and a slight blue’ish color cast, I used the tone curve for further adjustment, where I changed to linear curve, I upped the left lower point for RGB, and I separately upped the left lower point for blue. (The left lower point are your blacks, by upping them, you make your blacks very dark grays, by separately upping the blue some more, you ad a blue color cast, especially in the blacks) ludwigdesmet_JK-3749-5 but I wanted some more, so I added a split toning effect in the shadow channel: Hue 244, saturation 15 ludwigdesmet_JK-3749-6 after that, some vignetting, sharpening and a little correction here and there, the final image: ludwigdesmet_JK-3749-9 and a small before and after image for your convenience: Jenn before after If you found this step by step developing instructions interesting, you might also like these posts: Kimberly before and after Developing beauty LR4 thank you for watching, I hope this has been inspiring to you.

ludwig